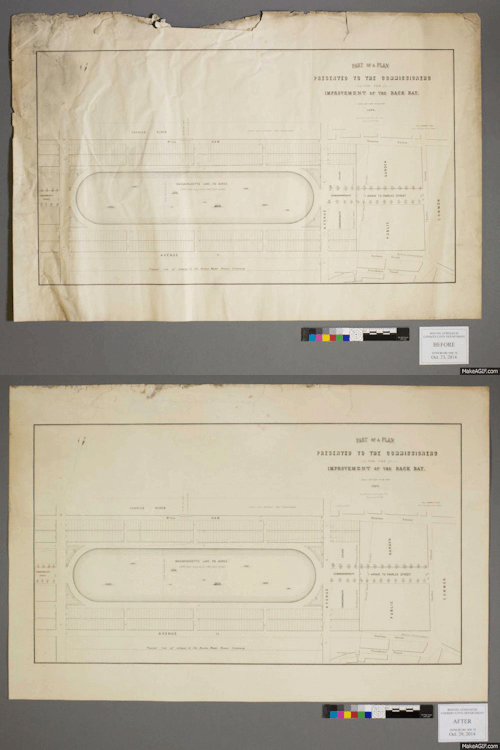
Book conservation is a field much like any other; the more we know, the more we learn just how much we don’t know. Specialization is our attempt to foil this conundrum by focusing our view, and therefore narrowing the range of potential “know-ables.” In conservation this can come in the form of “parchment specialist” or “leader in the field of 14th century wooden board bindings.” This type of focus allows one to delve more deeply into the history of the specific topic, and to explore more thoroughly the different conservation problems and treatments that may arise. But with each magnification of topic, more possibilities come into focus, not less. Ask a Palynologist, and he’ll tell you there’s an entire universe of intrigue in a single speck of dust.
So how is it done? How does one ever stop themselves from spinning down the rabbit hole of questions and answers long enough to actually produce something? Or, gasp, feel like they KNOW something?
Conservators take it one page, and one problem at a time.
So, let’s take a look at just one problem: paper. The ripped, torn, stained, creased, wadded-up-in-a-ball-and-left-for-dead kind of paper. You denizens of Forgotten Attics and Soggy Basements take heart! Conservators CAN put you back together again.
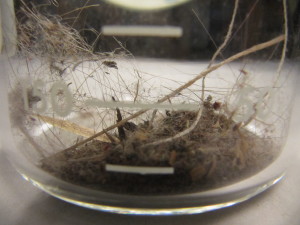
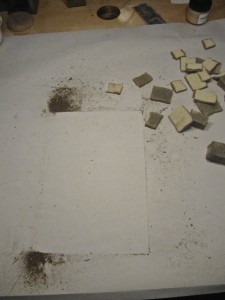
The first step in mending any sort of paper is to mechanically clean the surface with latex sponge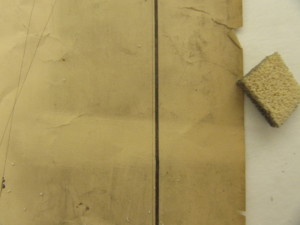 s, rubber eraser crumbs, cosmetic sponges, brushes… The list of implements goes on, but the concept remains singular. REMOVE LOOSE SURFACE DIRT. As you can see, one swipe of the sponge quickly leads to a hefty pile of spent latex, and one impressive jar of hair, dirt, dust, and many other unmentionables. [note: photographs are examples of three distinct pieces, and are adjacent for effect only.]
Once the paper is thoroughly cleaned of any loose debris, a mental Venn Diagram of all possible procedures must be conjured. If, after weighing the pros and cons of washing (Yes, paper may be washed in filtered and deionized water, pH preference of 7.5) the conservator deems it best practice for the object, its provenance, and the desires of its owner to perform this treatment,
he must carefully take note of any water-soluble marginalia, inscriptions, plates etc. I have heard lore of a conservator, who after much spot testing and deliberation, fatefully watched an ‘I’ float off a page to the surface of the water bath. It is always best to err on the side of caution, so be thorough in your spot tests.
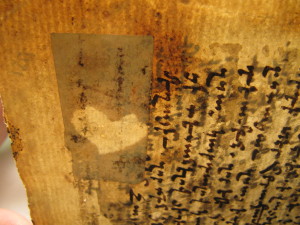
But if, as in the case of this inscribed fly-leaf, the paper really would do for a bath, a wonderful substance called cyclododecane can make an otherwise unfit washing candidate washable. The wax-like material is melted, and applied to areas one wishes to become temporarily hydrophobic. By painting over the letters written in ink as in the photo, we can choose exactly which parts of the paper we wish to remain dry, and any part of the paper not covered in cyclododecane will respond to our aquatic treatment. Within a 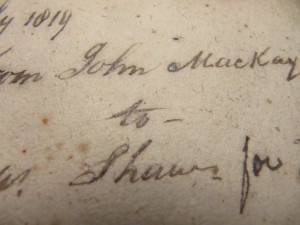 period of roughly 24 hours, the cyclododecane will sublime off the paper, leaving behind only the unaffected, unwashed ink. Then after washing, one is able to flatten and dry the paper between felts and weight. This particular fly-leaf not only lost any wrinkles or creases it previously had, but it brightened in color, added a degree of softness, and regained a sense of drape as well.
For papers we deem unfit to wash, but who could still benefit from a good ironing, a more localized approach can be taken.
Take this mountain fold. If we paint a line of thin wheat starch paste across the top of the fold with a dainty brush, the paper fibers will expand and relax, and with the small addition 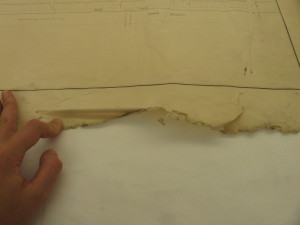 of a blotter-reemay-weight sandwich, you will find the fold to have flattened out. I find wheat starch paste to be preferable to water because there is a bit of added control in the spread of moisture, and the paste adds just a dash of strength to the weakened area. [Note: tide-lines, and other horrible and unimaginable affects could be consequence to this treatment. ALWAYS spot test before introducing moisture into paper.]
When working with paste, I have found it to be handy to keep a small glob near the first knuckle of the non-dominant pointer finger. The paste is not only near to application, but your body heat has warmed it slightly, which can be used to create a thicker, drier paste.
I have also found it handy to work on a clean surface, not merely for the sake of avoiding contamination of the object you are working on, but because it makes quick work to paste up a piece of tissue directly on the table surface. It can also be helpful to paste up on a piece of remay affixed to gray board, as Bill Minter suggests, when one is really concerned with controlling moisture levels.
Once the paper is flat, we may descend into the third level of mends: Tear Repair. I once thought that all rips, tears, and cuts were to be treated equally, and with the same large, band-aid of a tissue slapped over it. Lucky for me, this was just another beautiful point in my career when I was faced with the reminder that “I know nothing.” Paper mends should be light, delicate, invisible upon first glance, while somehow miraculously remaining strong and steadfast. The chivalrous “Mr. Knight” introduced me to a majority of these tactics, my favorite treatise being, ‘On How To Treat A Scarf Tear: Or, A Look Into The Impossibly Simple Procedure of Just Gluing It Back Together.’ Many tears occur in such a way that a “lip” is created between the two sides. With a little bit of paste painted daintily along the tear and some light pressure, the two edges of paper can happily sit one on top of the other. Tear Repaired.
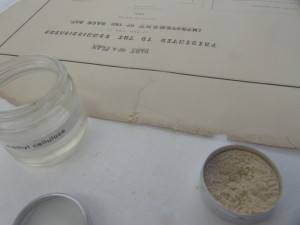
If your “lips” happen to be dirty a dark line may appear, looking much like a crack across your paper. It will be noticeable, no matter how strong your repair may be, and it will drive you crazy. I have found that it is possible (though highly aggressive) to lightly and with much care, sand the edges of the “lips”, thereby reducing dirt and repair visibility. A second, less invasive, reversible method is to tone the mend. A new favorite material of mine is Toasted Cellulose Powder. Baked in the toaster oven for a range of several minutes, 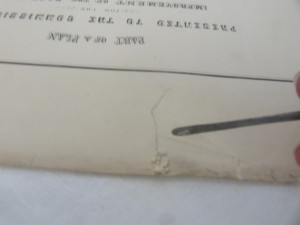 you’ll have yourself an array of creams, whites and browns. This powder, being of the same “stuff” as your paper, will blend nicely when affixed with a small amount of paste or methyl cellulose. Sometimes, simply rubbing the fine powder across the mend is enough to discourage the eye from seeing the tear immediately.
A cleaner tear, or cut, does not have the advantage of overlap, and therefore has little or nothing to affix itself to. In this case, often all that is necessary are a few fuzzys pulled from the edge of your tissue. Laying these long, muscular fibers along the cut bridges the gap in a similar manner as the “lip” in a scarf tear. Another dainty swathe of thin paste across the mend followed by a blotter-reemay-weight sandwich, and you’re good to go.
And finally, I bring you Fills. A fill is a piece of tissue replacing the original, missing paper. The most common fill I have come upon is that of the Lost Dog Ear. The vulnerable position of the page corner, met with the human desire to bend things, creates a most obvious breaking point in a piece of paper. When filling in a loss, it is best to be foppish about it. When time allows, tone your tissue with water colors, a shade or so lighter than the paper you are working on. It will be wise to select a tissue, or combination of tissues, that are equal or slightly thinner in weight to the object. A heavier tissue will create strain on the original paper and will only do more harm than good. Remember, paper mends should be ethereal, and only the smallest possible amount of tissue should be used.
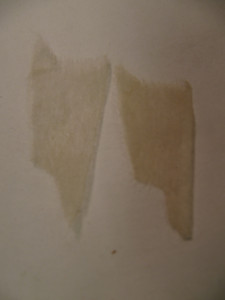 If working on a corner or an edge I like to make my fill slightly over-sized, and will cut to size later. Tear the tissue so that the fuzzys are present, and then against the backdrop of a light, snip off any extra or overzealous fibers with tiny scissors. You want enough of the fuzzys to remain so that they can be overlaid onto the edge of the mend, but not so many that they stick out in an obnoxious fashion. Here we can daintily paint on our wheat starch paste directly on the table surface. I prefer to paste out only the edge of the tissue that will be overlapping the mend, and then apply pressure quickly with a piece of reemay between the teflon folder and tissue. I have found that this mend will dry
 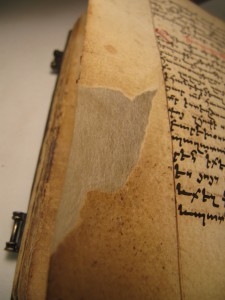 quickly, and only a little bit of weight is necessary. I like to turn the paper over, and add a second layer of the same tissue, overlapping the first mend every so slightly from the verso side. Here, it is good to paste up the entire piece, so that it sticks both to the paper being mended, and the first layer of tissue. A mixture of types of tissues and weights can and should be used to match the mend, the kind of paper being mended, taking into account the condition the original paper is in. Each repair is unique, and requires an arsenal of paste thicknesses (thin paste is more flexible than thick paste, but thick paste can be tackier) and different tissue types.
To find any hidden tears, run the edges of the paper lightly through your pointer and middle fingers, using only the slightest pressure to reveal any tears you may have missed.
Document your work in written and photographed documentation. I’ve been taught to photograph in both normal and raking light for flat work (raking light really shows off creases and folds). A light table can be useful for highlighting rips and tears (I’ve read on other conservation blogs that there are apps for phones and tablets that work as cheap, portable light tables).
And last but not least, don’t forget to make your GIF!
