RSS Feed

Posts Tagged ‘marianna brotherton’

  1. North Bennet Street School // Student & Alumni Exhibit 2016 – Alumni Work

    May 22, 2016 by Erin Fletcher

    The Annual Student and Alumni Show at North Bennet Street School displays work from both current students and alumni. In this post, I will be focusing on some of the outstanding work exhibited by those who have graduated from the full-time program. If you missed my previous post reviewing the Class of 2016’s design bindings of 1984, you can check that out here.

    McKey Berkman, BB ’11

    BooksWillSpeakPlain-McKeyBerkman

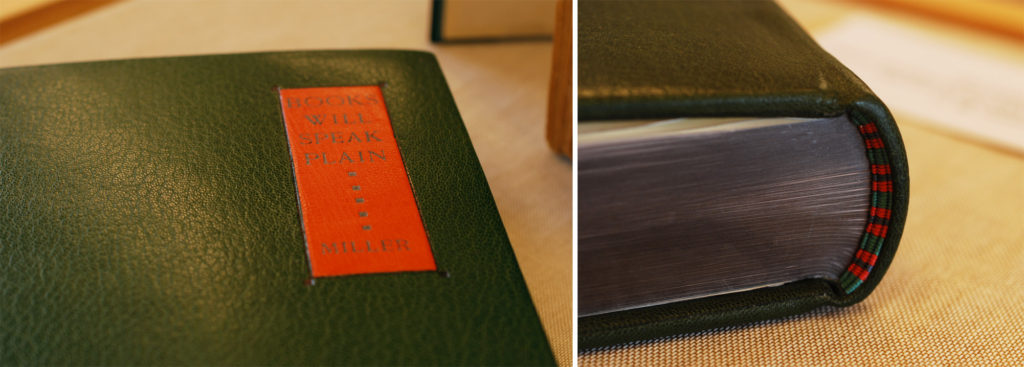
    When I looked at the headband and endcap on McKey’s binding of Books Will Speak Plain by Julia Miller I was in awe. Each thread is wrapped with perfect tension and her endcaps are formed so evenly creating a beautiful crescent shape. The binding is covered in full green goatskin. The tooled orange onlay is stamped in a matte grey and outlined with a single brown tooled line with small squares at each corner. The head edge is colored with graphite. The details on this binding are subtle, but done with such a high level of craftsmanship.

    Marianna Brotherton, BB ’14

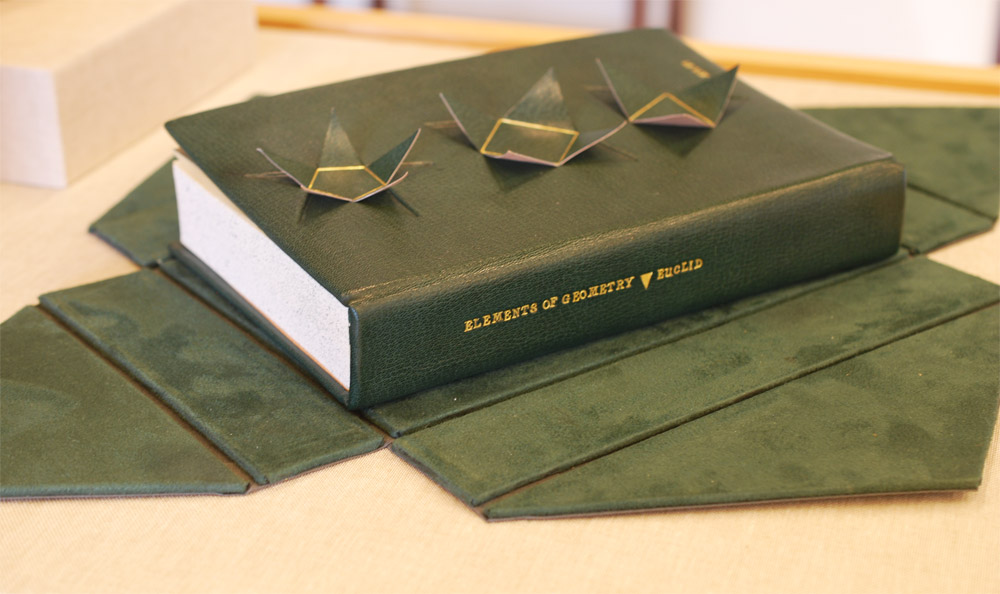
    ElementsOFGeometry-MarianneBrotherton

    This binding from Marianna is spectacular. I love the how the leather onlays pop away from the cover. Marianna’s binding of Euclid’s Elements of Geometry is bound in full green goatskin with suede doublures. The onlays are gilt in the center to highlight a specific shape. The title is tooled in gold down the spine. The edges are sprinkled with green pigment. The headbands are hand sewn with white and green silk. The book is housed in a beautiful 4-flap lined in suede. Each pointed flap wraps around the book to meet at the center. Check out more of Marianna’s work at her website.

    Lauren Calcote, BB ’15

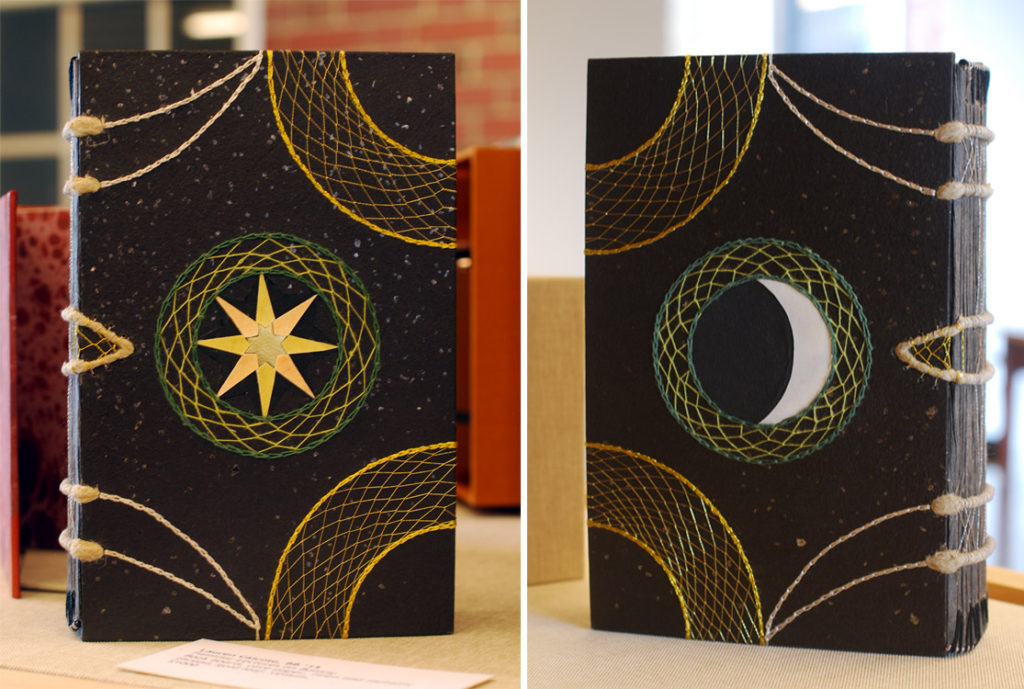
    FamiliarLecturesOnBotany-LaurenCalcote

    Regulars to the blog, know my admiration for embroidered bindings. Lauren’s work has always impressed me and balances between contemporary and traditional. This embroidered binding of Familiar Lectures on Botany is bound on raised cords that are laced through the covers, which are covered in Galaxy Cave Paper. This richly dark handmade paper is filled with flecks of mica offering a subtle dazzle of shimmer. The embroidery is achieved with linen and metallic threads. The center motifs are designed with gold leaf for the sun and a piece of vellum for the moon.

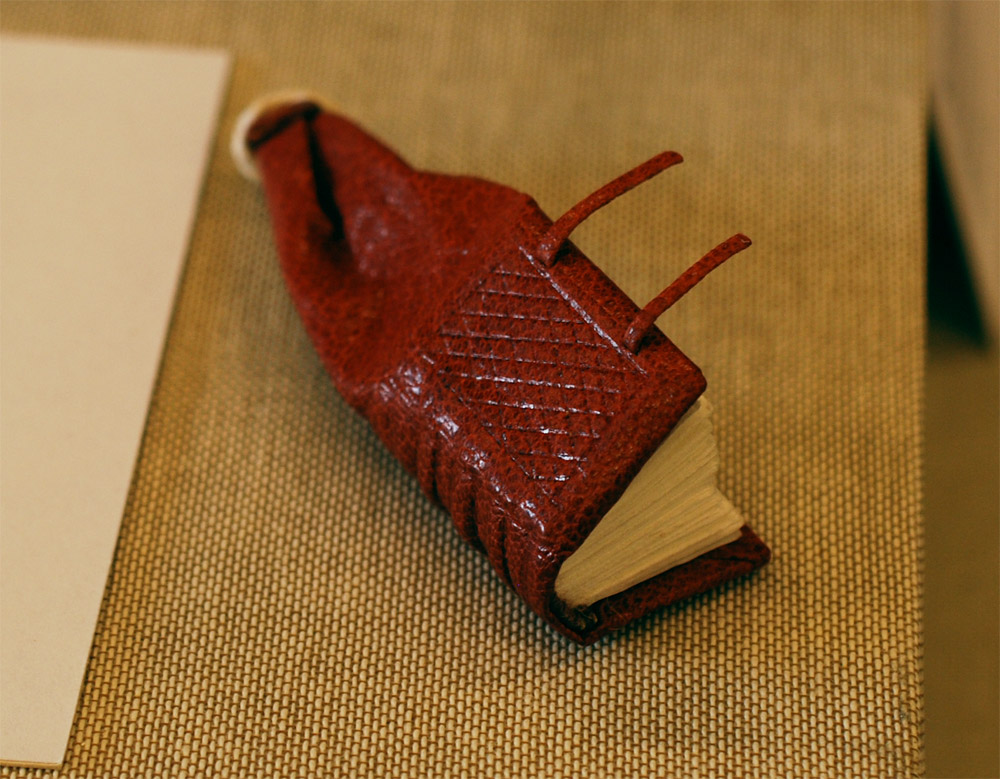
    MiniGirdleBook-LaurenCalcote

    Lauren is also highly skilled with creating miniature bindings of historic models. This mini Girdle Book is sewn over raised cords and laced into cedar boards, which are covered in a crimson goatskin. The covers are blind tooled in a traditional lozenge pattern. There are even miniature brass clasps and a small linen knot to secure the book underneath your teeny, tiny belt.

    Samuel Feinstein, BB ‘12

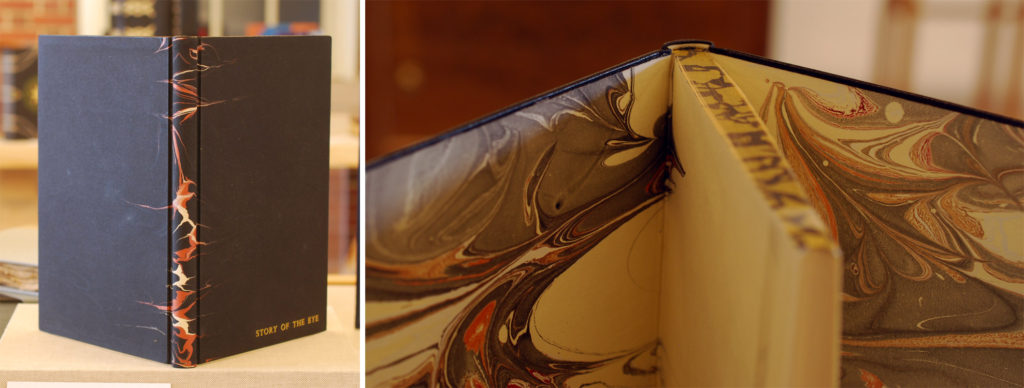
    StoryOfTheEye-SamuelFeinstein

    It is so great to see work from a former classmate of mine. Samuel is one of the most talented binders of my generation. Story of the Eye by George Bataille is bound as a Millimeter binding in the Rubow-style. A strip of black goatskin runs across the entire head and tail edge of the book. An exquisite marbled paper (made by Samuel) covers the remainder of the binding. The marbled area is isolated to the spine with threads of color sprawling onto the covers. The head edge of the text block is decorated with gold leaf over graphite. The endpapers are also marbled, but on white paper instead of black. Check out more of Samuel’s work at his website.

    Fionnuala Gerrity, BB ’11 and Maryanne Grebenstein

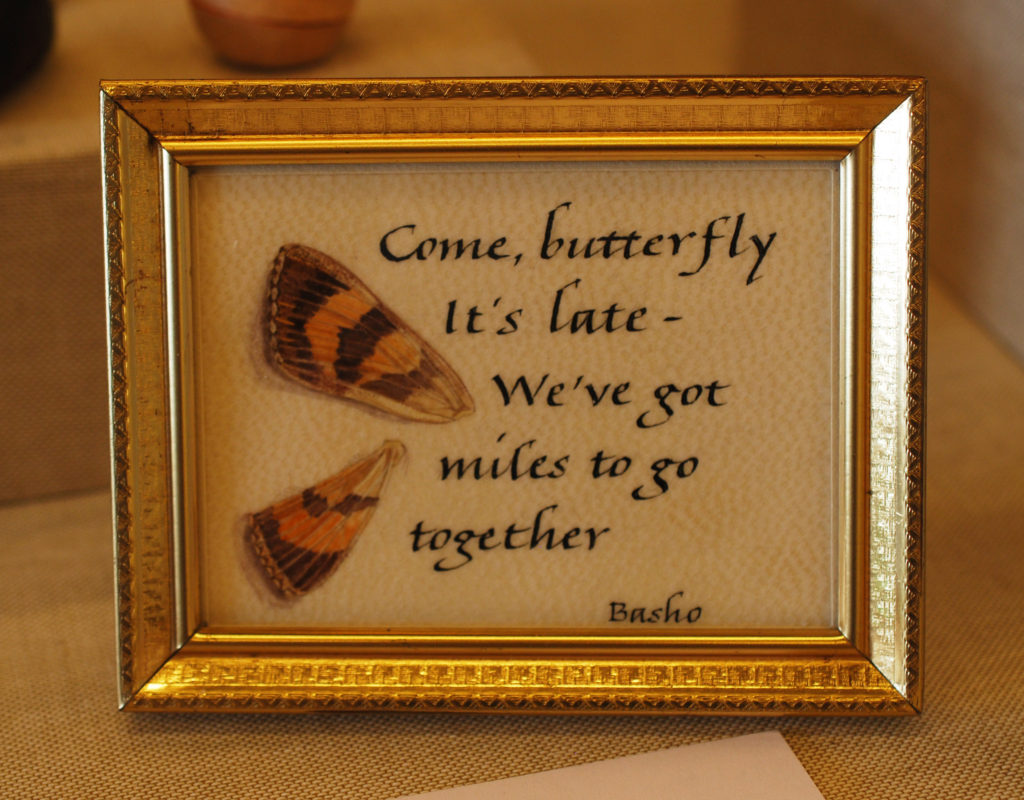
    Butterfly-FionnualaGerrityandMaryanneGrebenstein

    During our time at NBSS, Fionnuala gave a presentation on back-painted vellum; a decorative technique seen on Cosway and stiff-board vellum bindings. It was clear to me that she was hooked by this niche area of bookbinding. Maryanne Grebenstein is a very talented calligrapher and teaches workshops at NBSS. Together they created this lovely rendition of a haiku by Matsuo Basho, a famous poet of the Edo period in Japan.

    Barbara Halporn, BB ‘06

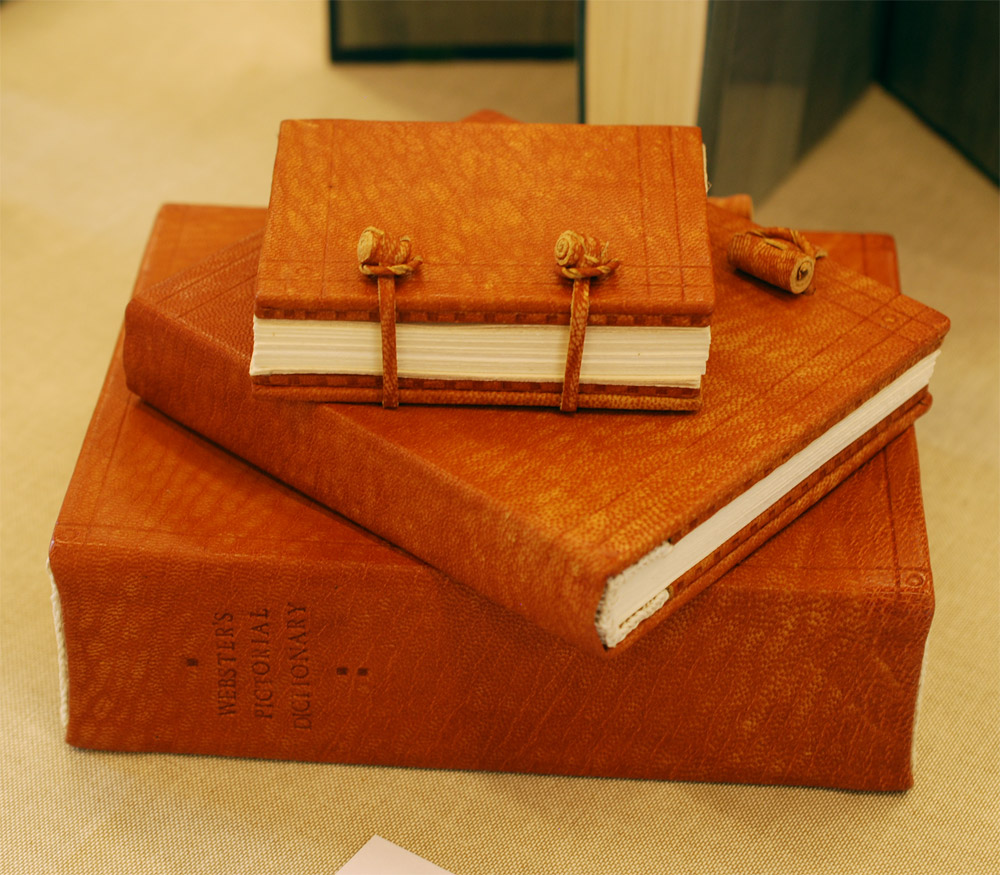
    PictorialWebster-BarbaraHalporn

    There are so many things I love about Barbara’s binding of Webster’s Pictorial Dictionary by John M. Carrera. The leather from Pergamena has been distressed and is absolutely alluring. In these three bindings, Barbara references a historical Coptic binding. She even includes details such as headbands that wrap from cover to cover across the spine and leather toggles to keep the book securely closed. The title is blind tooled across the spine of the largest book. Check out more of Barbara’s work at her website.

    Becky Koch, BB ’12

    RimeAncientMariner-BeckyKoch

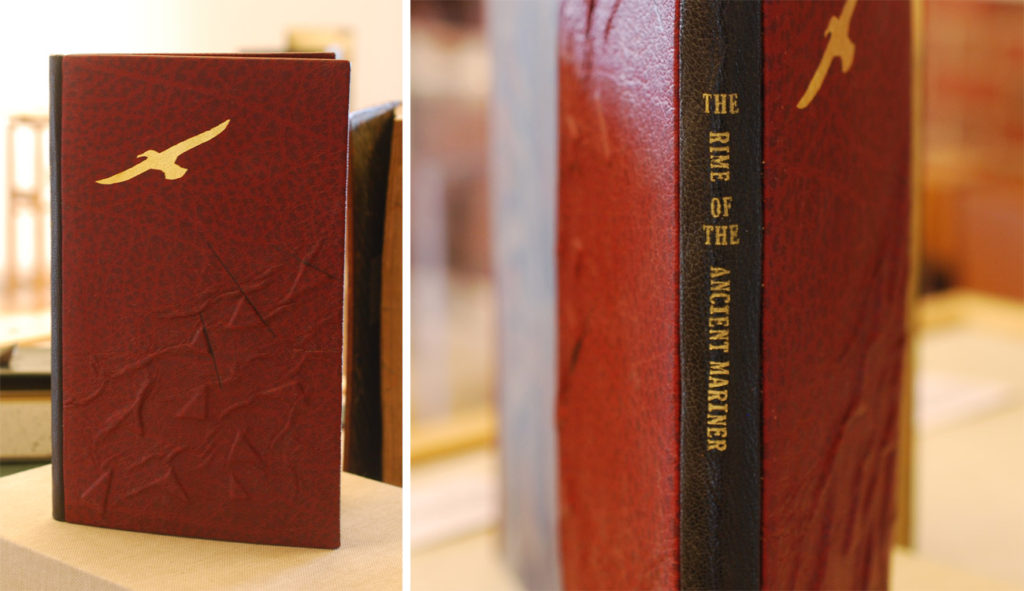
    Becky was also classmate of mine and I was so thrilled to see her work in the show. The Rime of the Ancient Mariner by Samuel Taylor Coleridge is bound as a simplified binding with black goatskin for the spine and a deep red buffalo skin for the covers. A surface gilt seagull adorns the front cover. The red buffalo skin is puckered over raised triangles on both covers. The title is tooled in gold down the spine. The buffalo skin offers such a distinct texture, but Becky managed to amplify the skin through her manipulation of the leather. Check out Becky’s website: Dog Eared Bindery.

    Lauren Moon-Schott, BB ’13

    BooksWillSpeakPlain-LaurenMoonSchott

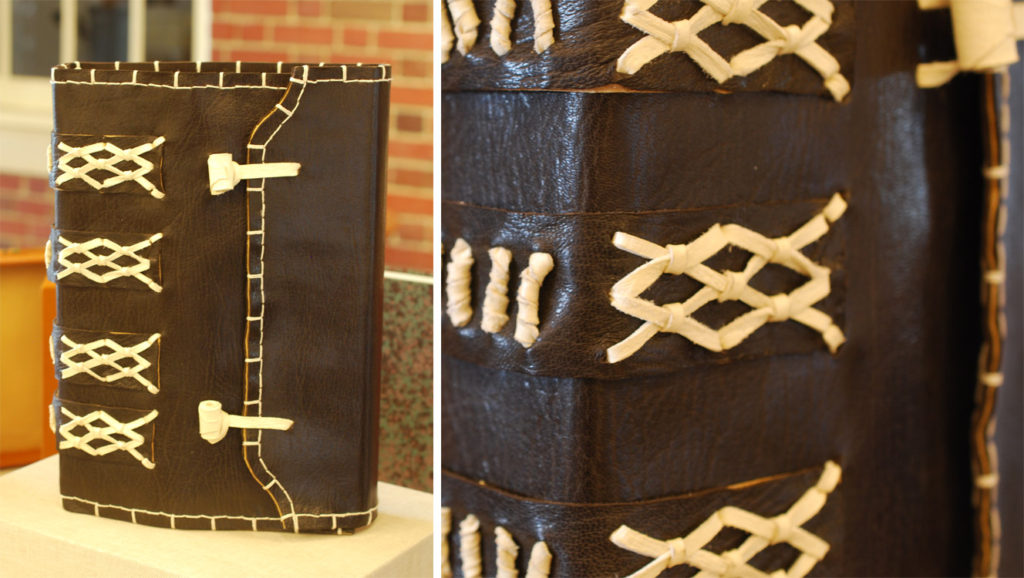
    Lauren is an incredibly talented binder and conservator. She currently holds a position at the Rare Book Room in the Boston Public Library and she is also one of my studio mates. She bound this amazing model of a Stationer’s Binding over Julia Miller’s Books Will Speak Plain. The covers are goatskin with toggles and ties in alum-tawed pigskin. The complexity of the binding is not to be under-rated. Each cross-tie has to be meticulously laced through the covers.

    Wendy Withrow, BB ‘08

    NineMonthsToBearFruit-WendyWithrow

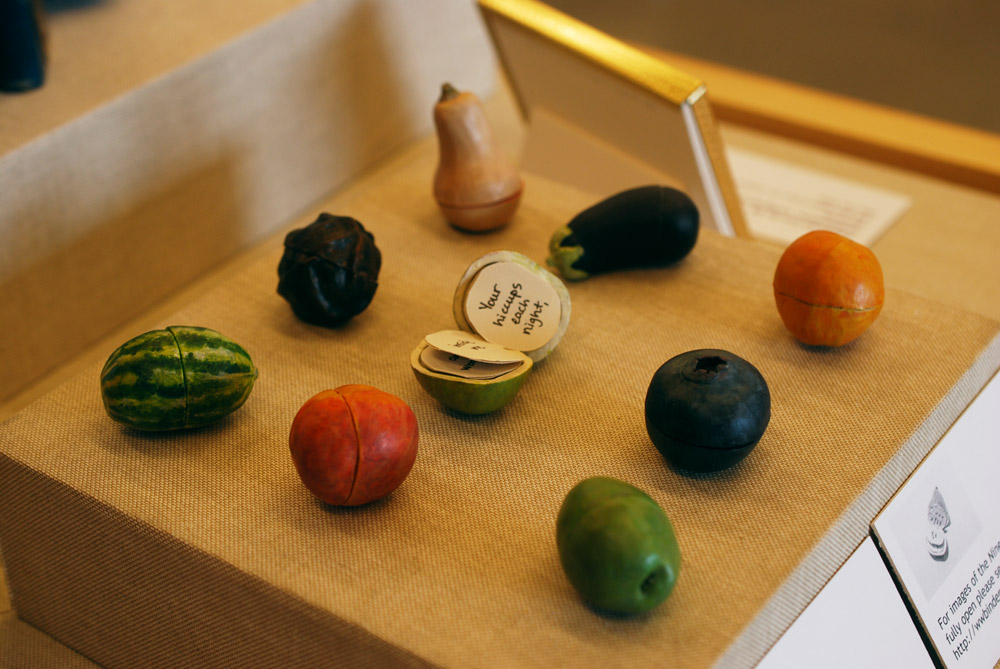
    I met Wendy for the first time at the Standards of Excellence Conference last year in Cleveland, Ohio. I was so excited to meet her, not only is her work well executed and her craftsmanship clean, she was one of the few alumni that I reached out to when applying to NBSS. Her words were so encouraging and her work inspiring. As the only artist book in the show, Nine Months to Bear Fruit, is quite attractive. Each object is sculpted from clay and held shut with magnets. The exterior is painted with acrylic. Hidden inside each piece is a miniature accordion, which you can read by clicking here.
  2. Conservation Conversations // My Modelin’ Career

    February 26, 2015 by Marianna Brotherton

    Recently, an album of letters came into the lab. Each letter, envelope and card had been adhered into a notebook, and had become brittle, creased, and difficult to handle. The notebook’s covers were both off, and its binding was in disrepair. Designing a thoughtful and safe treatment proposal for this piece will be complicated- the different aspects; historical, structural, economical, and intent of use will have to be weighed and balanced. To remove each piece of memorabilia will be difficult and time consuming, but would create the opportunity to mend and rehouse the pieces. However, a lighter touch is always better, and focusing on stability alone would preserve more of the original structure and composition. To treat this album well, it will be necessary to have an understanding of the current structure and adhesion, and the possible detriments these may cause; a consciousness of different potential structural solutions; and clear expectations for the future needs and use of the album and its contents.

    Although I won’t be working on this treatment, the different concerns and possibilities associated with it piqued my curiosity. In researching different ways similar albums had been treated, I came across “A Photo Album Structure from Philadelphia, 1865” by Betsy Palmer Eldridge [Book and Paper Group Annual 21 (2002)]. It is an excellent description of a structure which, as Eldridge describes it, “can be used in the restoration of Victorian photo albums or in the construction of new stiff-leafed albums.” However, what I appreciated most about her article was the investigation and research her curiosity fueled. Although there were plenty of advertisements and descriptions about the albums, there were no detailed directions. Eldridge has constructed a method on how it is put together, and describes each step in her article. The best piece of advice I have yet been given is to pursue this curiosity- especially in the form of creating models. Working backwards, recreation, and developing ideas through writing are perhaps the best ways to fully know anything. This is especially true of books, who’s working action and composition is difficult to discern if fully intact. An historical model presents us with three-dimensional access to its structure and intended function, while also serving as an invaluable form of documentation.

    While interning at the Wunsch Lab at MIT, Jana Dambrogio showed me a few models she had made of books she had studied. Not only did she replicate the binding structure, but all of the individual flaws and characteristics of the books as well. Each dog ear, tear, and hole was now documented in a book she could later handle and contemplate. This kind of work is an important lesson in patience, detail, and critical thinking. It slows the hand and creates time to ask questions. What am I trying to repair? What is the causation of the damages I am looking to reverse or minimize? Is every dog eared page an accident, or do they represent an historical figure’s notation? [Read about the Huntington Library’s famous fold here]

    NewtonMede-4

    Not all dog ears are important notations, but every now and then there comes a crease I wouldn’t flatten

    As a conservator, it is not my responsibility to lend gravity to an individual book; I must treat, and conserve each book with equal propriety, reverence, and respect. But it is my responsibility to stabilize a book for future use and understanding. By documenting what a book looked like before treatment I not only hold myself accountable for what I proceed to do with it, but I am also acknowledging its history and experience of time.

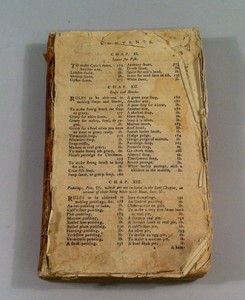
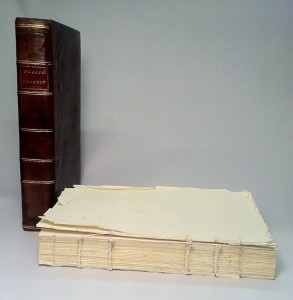
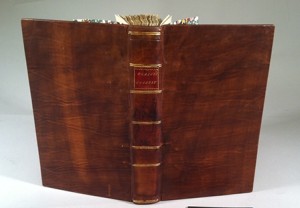
    Documentation is our way of preserving  as much of a book as possible, and creating a model of a working, physical manifestation of its history and experience not only aids researc8de6cc3a99ae9a7b7fdb193c364c6ccdhers and historians, but future conservators and bookbinders alike. I found this tactic to be especially useful when I was rebinding “The Art of Cookery Made Plain and Easy.” The front and back boards were missing, and the paper was torn and discolored. Imitating both the book and its defects forced me to mentally disbind and rebind the book before acting. I had to lend importance to each flaw in order to ascertain what the damage was, how it occurred, and what it could teach me about the structure and its experience.

    950c11662a8d75c778c503b5ab4cb928


    First, I tried sewing the model all along, following the lines of an educated guess; but when I tried to mimic the tears and loose sections it became apparent that a different method had been employed. With trial and error, I was able to recreate the original sewing, finding explanations for most of its defects. 63ccc9a06a929a62b6b10d50ccd94c64Once the book was rebound between new covers, its original functionality was restored, but it no longer told the story of its physical experience. Its history, however, is preserved in the form of photos, its treatment report, and of course, its model.

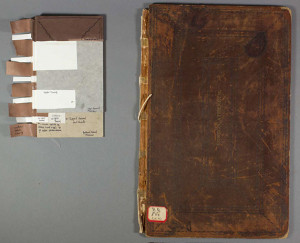
    During the repair of a large book of tracts, disbinding was not a prudent option. I was faced once again, with a structure that was unfamiliar to me, and I found this made it difficult to decide upon a sympathetic treatment plan. The front board had come off, the paste down was lifting, and the spine piece was missing. The parchment slips were split at the point of hinging; half remained sewn along the spine, while the other half stuck out from between the board edge.682c0e41048c34ae90a4e7bd90304b2b

    I was curious about the end papers and the board attachment. Remembering the advice Jana had given me, I made a replica of the cover, end sheets, and the first sewn section.

    56821f0686b411f66ebd53ac53bc4710


    I spent all day trying to make sense of its many layers, and to discern where the attachment’s strengths and weaknesses were. By the end of the repair, I had not only reattached the board and reinforced its weak points, but I had learned a new type of binding as well.

    In an interview posted by the American Museum of Natural History, Ichthyologist Scott Schaefer addresses the need to preserve the physicality of specimens:

    Q: With a growing jurisdiction, since collections increase every year. Why is it still important to bring back physical specimens?

    A:  “Because they often represent the only tangible snapshot we have of life on Earth. You might say, “You can sample the genome of a specimen. You can take a photograph of a specimen, won’t that be sufficient?”

    Well, the answer is no. It might be adequate. Those might be excellent photographs. That might be one kind of representation, if you talk about a genome sequence, for example. But it isn’t necessarily sufficient to answer all the types of questions that could potentially be asked about that biodiversity at that place and at that time…”

    [Read the entire interview here]

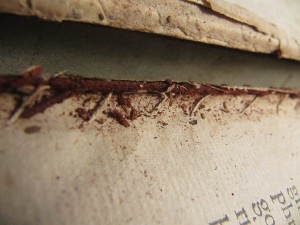
    Having information on a specimen will never be the same as having the specimen on hand. In order to get to all the nuances that Schaefer describes, to fully represent the snapshot of our bibliographic experience, it is necessary to have books, and to have original bindings. BUT as we conservators know, sometimes a book crumbles just by looking at it, and so we must compromise some originality for the sake of prosperity. When a book has aged beyond use, it is, I believe, best to gather as much information about it as possible, providing the greatest insight with the least amount of damage. And while I would prefer to be able to casually flip through everything in Special Collections, I won’t be the one to turn the stacks into a pile of red rot.

    Original is best, (but I think Schafaer might agree) that when pressed, a clone comes in at a close second.


  3. Conservation Conversations // On Assuming and Assumptions

    February 5, 2015 by Marianna Brotherton

    I have been thinking about a recent treatment I did on An Historical Collection of the Most Memorable Accidents, and Tragical Massacres of France quite a bit lately. More than the mere drama of the process, I was really taken by the experience of nixing some old assumptions of mine. Conservation is a relatively new science, and while we work on preserving artifacts that are hundreds of years old, we really only have a few decades worth of treatments and methods to study and improve. There are ways of simulating the aging process in a lab, but nothing is as affirming as standing the true test of time. But until enough time passes, and those ahead of us can OK our treatments (or kick them to the curb, liquid leather I’m looking at you!) we have little more to go on than our assumptions, scientific or otherwise. It is therefore important to revisit these assumptions often, and to feel confident and comfortable in them.

    First Assumption: There is little to be done to a sad, sewn, dirty text block.

    Conserving a book not only means stabilizing it structurally, but preserving its history as well. To cut sewing is to severe a tie with a bookbinder of the past, and to alter the character of the book and its future. Even when the sewing is replicated exactly, we loose a piece of the history that we are striving to hold onto.  Also, this particular book was rather large, and cutting the sewing just to wash and resew it was not an ideal way to spend the week.

    Second Assumption: If the text block seems solid, and there are no apparent breaks, the sewing must be perfectly intact.

    70f022d92e1b8e7b61396496820720fb

    Three generations of book conservators looked at this text block and confidently assumed, based on their collective experiences and knowledge, that this book was over sewn and intact. One of the most beautiful aspects of working with Special Collections is the craftsmanship that goes into every piece – you can survey hundreds of books bound in the same tradition, but every one of them will reflect quirks of their individual binder(s). You can never be certain that a mistake wasn’t made somewhere in the process, that a new technique wasn’t being developed, or that a specific structure was ever intended to fully mimic another. We can make generalizations and assumptions about collections, but we really must treat each object as its own.

    This particular book I was working on was printed in 1598, and the paper is just stunning. However, after 400 years anyone would have a few cobwebs to clean out, and it was discussed that a good wash would have really done it some good.

    Third Assumption: You cannot wash a whole book.

    9be25fd3ed2d62dc8c12c26361792b68

    Photo Credit: Suzy Morgan

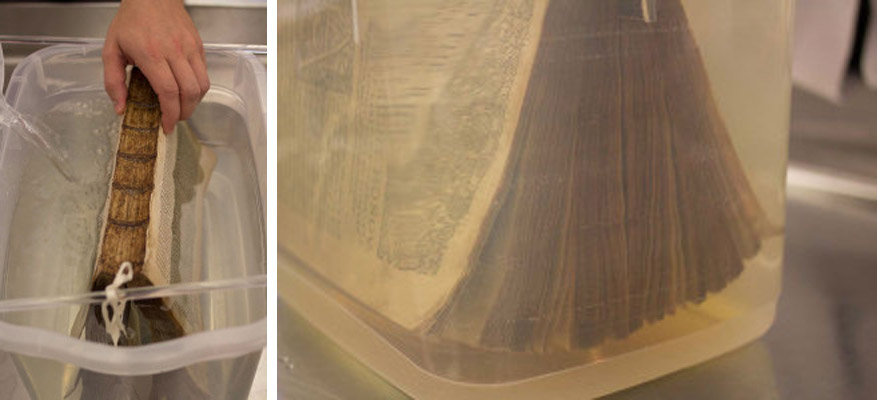
    For the most part, paper and water are actually good friends, especially when introduced in a controlled manner. And while Cellulose and H20 may go way back, the thought of a soggy book remains horrifying. I have always assumed, as perhaps the above poster brainwashed me into thinking, that it should be avoided at all costs. However, this assumption of mine was quickly dismissed when washing the text block in its entirety was suggested. With a quick search of the CoOl archives, Bill Minter‘s description of this very idea popped up. As he mentions, this treatment is rarely prudent, but just because the right opportunity doesn’t present itself often doesn’t mean it isn’t a possibility to consider.

    In any science, especially when one is new to the field, it is easy to assume that the methods you were taught are the only methods that should be employed. But stopping once in a while to question and consider your techniques, especially the most simple, is important. Why is paste sticky? What amount of abrasion does a latex sponge cause? What parts am I actually trying to put back together? For me, washing an entire book was so out of the ordinary, and such a foreign treatment that I was forced to stop and think about every step along the way. Ideas I had held as truths started to feel less certain – if I put paper in water might it dissolve and turn to pulp?! Will the pages stick together if they’re washed or dried on top of one another? Is there dirt IN the pages? I had never had cause to consider such things when I washed a book in leaves; I was taught this was an appropriate method, and that I could expect certain outcomes in certain situations. Of course I knew that every book was different, and that spot testing was important, but I didn’t ask why A always equaled B, or pondered the possibility of irrational results. When we assume something is tried and true, we don’t feel the pressing need to think about it actively. I took it on blind faith.

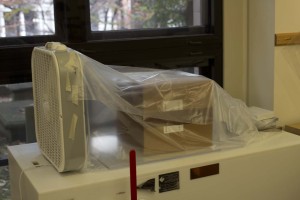
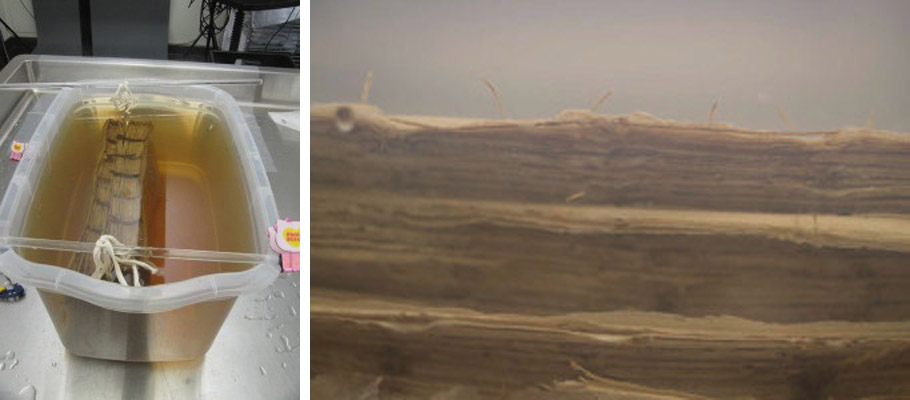
    But we went ahead with Bill’s directions anyway- we set up a “fish tank”, had our interleaving ready, and our wind tunnel built.

    Washingentirebook44sm

    I took a deep breath, and lowered the oldest book I have ever worked on into what I assumed could easily be its watery grave. But, science held out and the paper reacted just as it would have in sheets. I was not left with a 5 gallon bucket of paper slush.

    conservation_marianna

    However, we did discover that the sewing wasn’t actually intact. The first few sections had been over sewn, but the rest were held together only by the remnants of sewing and adhesive. Sections started sloughing off as the water developed that satisfying ocher.

    conservation_marianna2

    Fourth Assumption: Assume the book is intact, and continue with the experiment anyway.

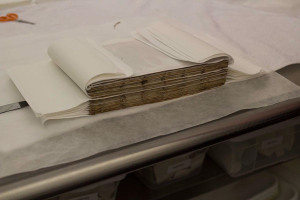
    We carried out the rest of Bill’s methods with the sections stacked together as a single textblock. 5d34051ee3e249947b696df455a3cf7aWe were all curious to see how the book would dry, and how the paper would respond to a week long stint in the Motel 8 of wind tunnels. Continuing in this manner gave me time to consider and investigate the methods of washing, drying, and flattening that I had learned. And although it turns out that washing and drying intact is not actually faster, it is still just one more possibility.
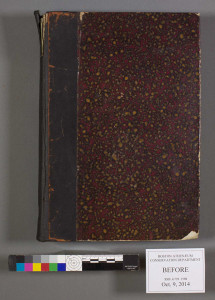
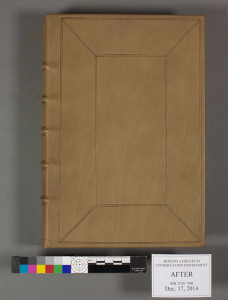
    All in all, this book was just rife with learning opportunities…

    Fifth Assumption: If you find you’ve sewn a section in upside down, you must take the book apart and start again (even if you’ve already laced your boards on).

    After deciding that this assumption was NOT the direction I wanted to go in, I took a step back from the project and considered it from every angle I could muster. We decided that if I cut the sewing (gasp!) around the incorrect section, I could then turn it about and resew it through the newly lined spine. This was not an ideal situation, but it was an opportunity to think about the book structure, and all the implications of altering it.

    Sixth Assumption: Once you’ve covered a book in full leather, and it has dried overnight, you do not get any more redo’s.

    Yet another learning opportunity! I had covered this book the first time in a skin that made everyone in the lab raise an eyebrow. It was a very strange shape, and looked a bit wonky. However, we assumed it would come out just fine in the wash. Never had I been so disappointed to come into work the next morning. The leather was puckered and wrinkled in all the wrong ways, and simply did not seem salvageable. Perhaps there were design opportunities in this glaring mistake as a bookbinder, but as a conservator, there was nothing to be done.

    However, paste is reversible. Duh. And there were plenty of new skins to choose from. So after much debate and inner conflict, I decided to test just how reversible it was. Again, not an ideal situation, but I was able to remoisten the leather and lift it off its new boards. It was certainly a set back, but not nearly as detrimental as I had first thought it to be. With a little bit of sanding, and a new paper lining, the boards were fit to be covered.

    Again.

    e3929a5f6bf5b62f854d43415c26dad5   540dcc1e4b9644bd51b203fba906336d

    But, after much preparation, research, collaboration, and thinking outside of the box, I was somehow able to take this book from drab to fab, and to reassess my ways of thinking in the process.


  4. Conservation Conversations // A Bit on Paper Mends

    January 18, 2015 by Marianna Brotherton

    Book conservation is a field much like any other; the more we know, the more we learn just how much we don’t know. Specialization is our attempt to foil this conundrum by focusing our view, and therefore narrowing the range of potential “know-ables.” In conservation this can come in the form of “parchment specialist” or “leader in the field of 14th century wooden board bindings.” This type of focus allows one to delve more deeply into the history of the specific topic, and to explore more thoroughly the different conservation problems and treatments that may arise. But with each magnification of topic, more possibilities come into focus, not less.  Ask a Palynologist, and he’ll tell you there’s an entire universe of intrigue in a single speck of dust.

    So how is it done? How does one ever stop themselves from spinning down the rabbit hole of questions and answers long enough to actually produce something? Or, gasp, feel like they KNOW something?

    Conservators take it one page, and one problem at a time.

    So, let’s take a look at just one problem: paper. The ripped, torn, stained, creased, wadded-up-in-a-ball-and-left-for-dead kind of paper. You denizens of Forgotten Attics and Soggy Basements take heart! Conservators CAN put you back together again.

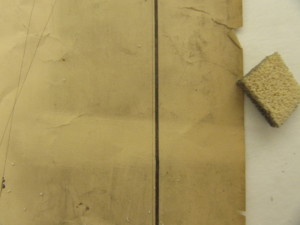
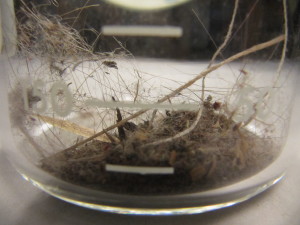
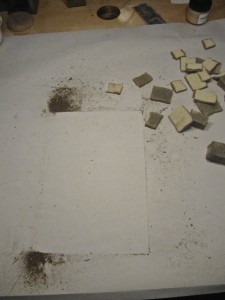
    The first step in mending any sort of paper is to mechanically clean the surface with latex spongeIMG_2785s, rubber eraser crumbs, cosmetic sponges, brushes… The list of implements goes on, but the concept remains singular. REMOVE LOOSE SURFACE DIRT. As you can see, one swipe of the sponge quickly leads to a hefty pile of spent latex, and one impressive jar of hair, dirt, dust, and many other unmentionables. [note: photographs are examples of three distinct pieces, and are adjacent for effect only.]
    IMG_2716IMG_2713

    Once the paper is thoroughly cleaned of any loose debris, a mental Venn Diagram of all possible procedures must be conjured. If, after weighing the pros and cons of washing (Yes, paper may be washed in filtered and deionized water, pH preference of 7.5)  the conservator deems it best practice for the object, its provenance, and the desires of its owner to perform this treatment,

    he must carefully take note of any water-soluble marginalia, inscriptions, plates etc. I have heard lore of a conservator, who after much spot testing and deliberation, fatefully watched an ‘I’ float off a page to the surface of the water bath. It is always best to err on the side of caution, so be thorough in your spot tests.

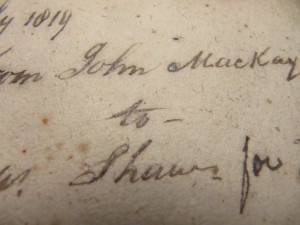
    But if, as in the case of this inscribed fly-leaf, the paper really would do for a bath, a wonderful substance called cyclododecane can make an otherwise unfit washing candidate washable. The wax-like material is melted, and applied to areas one wishes to become temporarily hydrophobic. By painting over the letters written in ink as in the photo, we can choose exactly which parts of the paper we wish to remain dry, and any part of the paper not covered in cyclododecane will respond to our aquatic treatment. Within a IMG_2744period of roughly 24 hours, the cyclododecane will sublime off the paper, leaving behind only the unaffected, unwashed ink. Then after washing, one is able to flatten and dry the paper between felts and weight. This particular fly-leaf not only lost any wrinkles or creases it previously had, but it brightened in color, added a degree of softness, and regained a sense of drape as well.
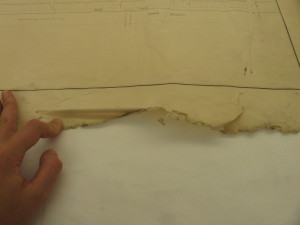
    For papers we deem unfit to wash, but who could still benefit from a good ironing, a more localized approach can be taken.

    Take this mountain fold. If we paint a line of thin wheat starch paste across the top of the fold with a dainty brush, the paper fibers will expand and relax, and with the small addition IMG_2790of a blotter-reemay-weight sandwich, you will find the fold to have flattened out. I find wheat starch paste to be preferable to water because there is a bit of added control in the spread of moisture, and the paste adds just a dash of strength to the weakened area. [Note: tide-lines, and other horrible and unimaginable affects could be consequence to this treatment. ALWAYS spot test before introducing moisture into paper.]
    When working with paste, I have found it to be handy to keep a small glob near the first knuckle of the non-dominant pointer finger. The paste is not only near to application, but your body heat has warmed it slightly, which can be used to create a thicker, drier paste.

    I have also found it handy to work on a clean surface, not merely for the sake of avoiding contamination of the object you are working on, but because it makes quick work to paste up a piece of tissue directly on the table surface. It can also be helpful to paste up on a piece of remay affixed to gray board, as Bill Minter suggests, when one is really concerned with controlling moisture levels.

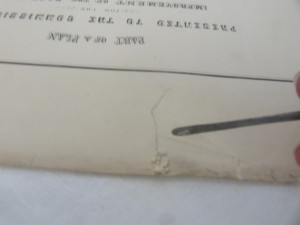
    Once the paper is flat, we may descend into the third level of mends: Tear Repair. I once thought that all rips, tears, and cuts were to be treated equally, and with the same large, band-aid of a tissue slapped over it. Lucky for me, this was just another beautiful point in my career when I was faced with the reminder that “I know nothing.” Paper mends should be light, delicate, invisible upon first glance, while somehow miraculously remaining strong and steadfast. The chivalrous “Mr. Knight” introduced me to a majority of these tactics, my favorite treatise being, ‘On How To Treat A Scarf Tear: Or, A Look Into The Impossibly Simple Procedure of Just Gluing It Back Together.’ Many tears occur in such a way that a “lip” is created between the two sides. With a little bit of paste painted daintily along the tear and some light pressure, the two edges of paper can happily sit one on top of the other. Tear Repaired.

    IMG_2795

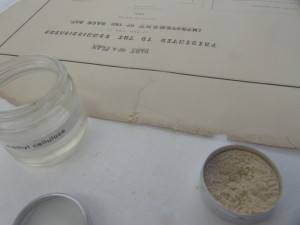
    If your “lips” happen to be dirty a dark line may appear, looking much like a crack across your paper. It will be noticeable, no matter how strong your repair may be, and it will drive you crazy. I have found that it is possible (though highly aggressive) to lightly and with much care, sand the edges of the “lips”, thereby reducing dirt and repair visibility. A second, less invasive, reversible method is to tone the mend. A new favorite material of mine is Toasted Cellulose Powder. Baked in the toaster oven for a range of several minutes, IMG_2794 you’ll have yourself an array of creams, whites and browns. This powder, being of the same “stuff” as your paper, will blend nicely when affixed with a small amount of paste or methyl cellulose. Sometimes, simply rubbing the fine powder across the mend is enough to discourage the eye from seeing the tear immediately.
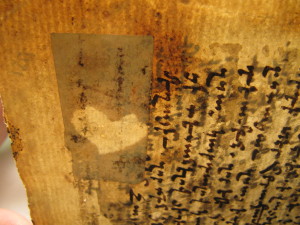
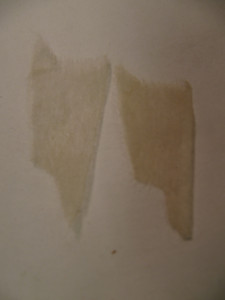
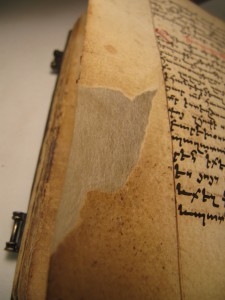
    A cleaner tear, or cut, does not have the advantage of overlap, and therefore has little or nothing to affix itself to. In this case, often all that is necessary are a few fuzzys pulled from the edge of your tissue. Laying these long, muscular fibers along the cut bridges the gap in a similar manner as the “lip” in a scarf tear. Another dainty swathe of thin paste across the mend followed by a blotter-reemay-weight sandwich, and you’re good to go.

    IMG_1475

    BAD FILL. But historical, so cool.

    And finally, I bring you Fills. A fill is a piece of tissue replacing the original, missing paper. The most common fill I have come upon is that of the Lost Dog Ear. The vulnerable position of the page corner, met with the human desire to bend things, creates a most obvious breaking point in a piece of paper. When filling in a loss, it is best to be foppish about it. When time allows, tone your tissue with water colors, a shade or so lighter than the paper you are working on. It will be wise to select a tissue, or combination of tissues, that are equal or slightly thinner in weight to the object. A heavier tissue will create strain on the original paper and will only do more harm than good. Remember, paper mends should be ethereal, and only the smallest possible amount of tissue should be used.

    IMG_1439 If working on a corner or an edge I like to make my fill slightly over-sized, and will cut to size later. Tear the tissue so that the fuzzys are present, and then against the backdrop of a light, snip off any extra or overzealous fibers with tiny scissors. You want enough of the fuzzys to remain so that they can be overlaid onto the edge of the mend, but not so many that they stick out in an obnoxious fashion. Here we can daintily paint on our wheat starch paste directly on the table surface. I prefer to paste out only the edge of the tissue that will be overlapping the mend, and then apply pressure quickly with a piece of reemay between the teflon folder and tissue. I have found that this mend will dry IMG_1457quickly, and only a little bit of weight is necessary. I like to turn the paper over, and add a second layer of the same tissue, overlapping the first mend every so slightly from the verso side. Here, it is good to paste up the entire piece, so that it sticks both to the paper being mended, and the first layer of tissue. A mixture of types of tissues and weights can and should be used to match the mend, the kind of paper being mended, taking into account the condition the original paper is in. Each repair is unique, and requires an arsenal of paste thicknesses (thin paste is more flexible than thick paste, but thick paste can be tackier) and different tissue types.
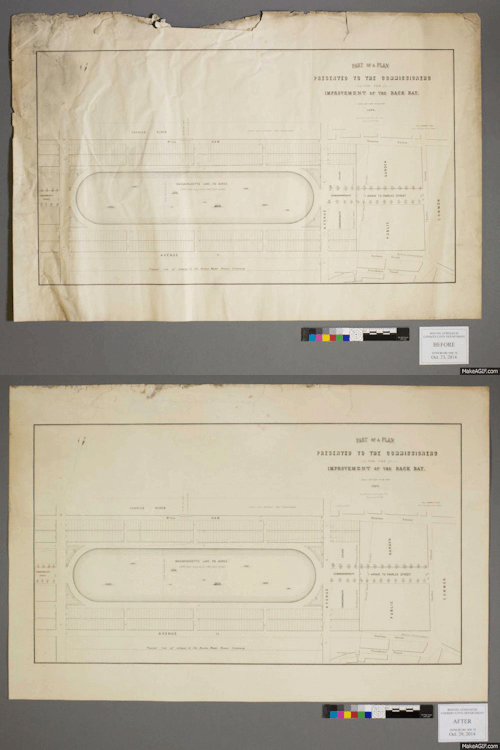
    To find any hidden tears, run the edges of the paper lightly through your pointer and middle fingers, using only the slightest pressure to reveal any tears you may have missed.

    Document your work in written and photographed documentation. I’ve been taught to photograph in both normal and raking light for flat work (raking light really shows off creases and folds). A light table can be useful for highlighting rips and tears (I’ve read on other conservation blogs that there are apps for phones and tablets that work as cheap, portable light tables).

    And last but not least, don’t forget to make your GIF!


  5. North Bennet Street School // Student & Alumni Exhibit 2014

    May 13, 2014 by Erin Fletcher

    Every year the North Bennet Street School hosts an exhibit to celebrate the work of current students and alumni across several of its departments, which include Bookbinding, Violin Making, Jewelry, Cabinet and Furniture Making, and Preservation Carpentry. The exhibit opened on May 10th and runs through the end of the month. The opening reception will take place on the evening of Tuesday, May 13th for the Annual Evening of Craft when supporters of the school and exhibitors come together to discuss and explore the handcrafted items.

    As an exhibitor this year, I had the opportunity to help set up the show, which allowed me to document and chat with each of the graduating students about their fine bindings. The photographs in this post were taken during the set-up, so please excuse the occasional body in the background or roll of blue tape.

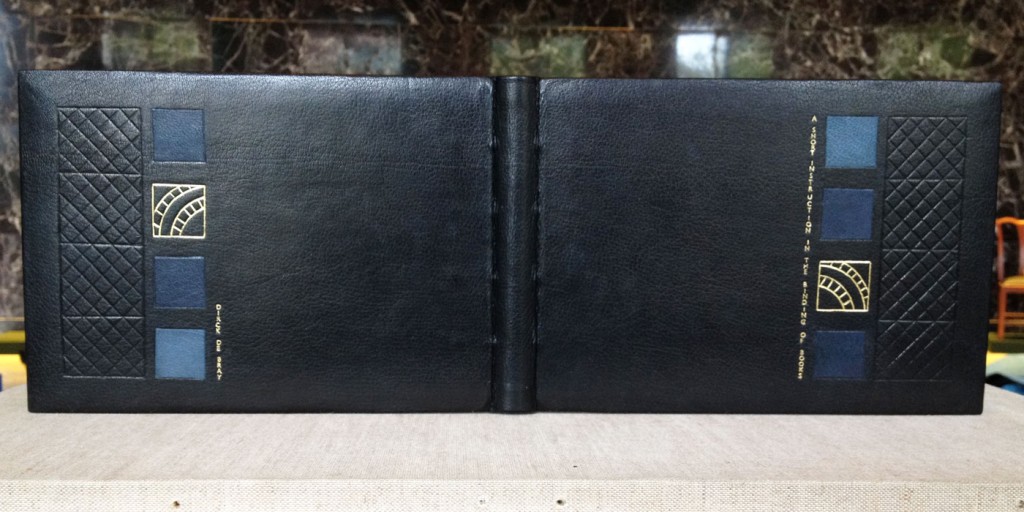
    Dirck de Bray: A Short Instruction in the Binding of Books was chosen as this year’s set book for the graduating bookbinding class. The earliest known Dutch bookbinding manual is a tiny illustrated manuscript from 1658, in which, Dirck de Bray described the making of a full leather binding and a parchment laced-case binding as the most common techniques of the 17th century. The manuscript is illustrated with 16 instructive drawings in pen and watercolor. This 17th century bookbinding manual originally appeared for the public in a 1977 edition, which has been re-edited in the 2012 edition that the students bound. This second edition includes each original page from the 1658 manuscript along with an in-depth look at the life of Dirck de Bray and the time period he lived in, as well as, the way books would normally look, the master’s test for bookbinders and other early manuals.

    The 2012 edition was printed in an unusual oblong format to include the historical Dutch paired with a contemporary Dutch and English translation next to the original page from the 17th century manuscript. I asked each of the graduating students to share with me their concept for their design.

    DirckDeBray5-AlcamyHenriksen

    Alcamy Henriksen
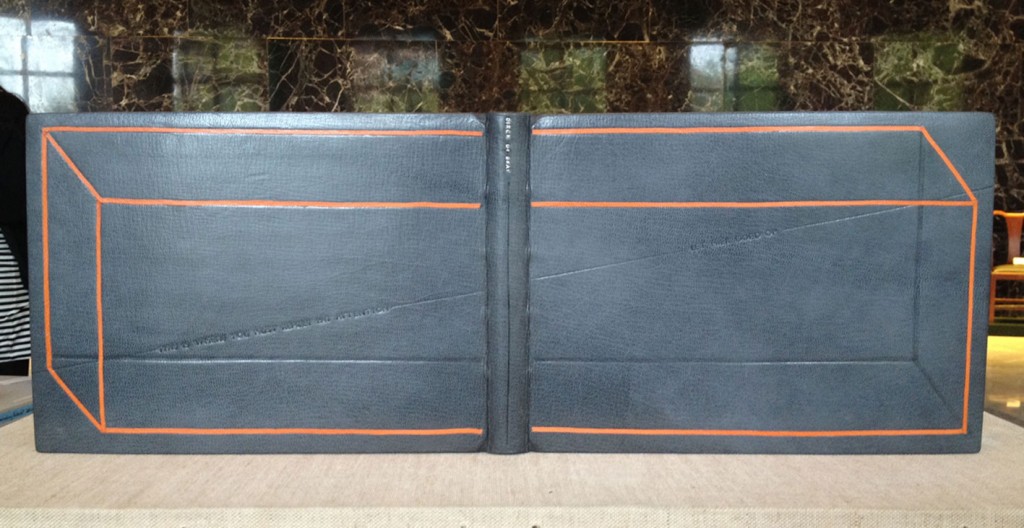
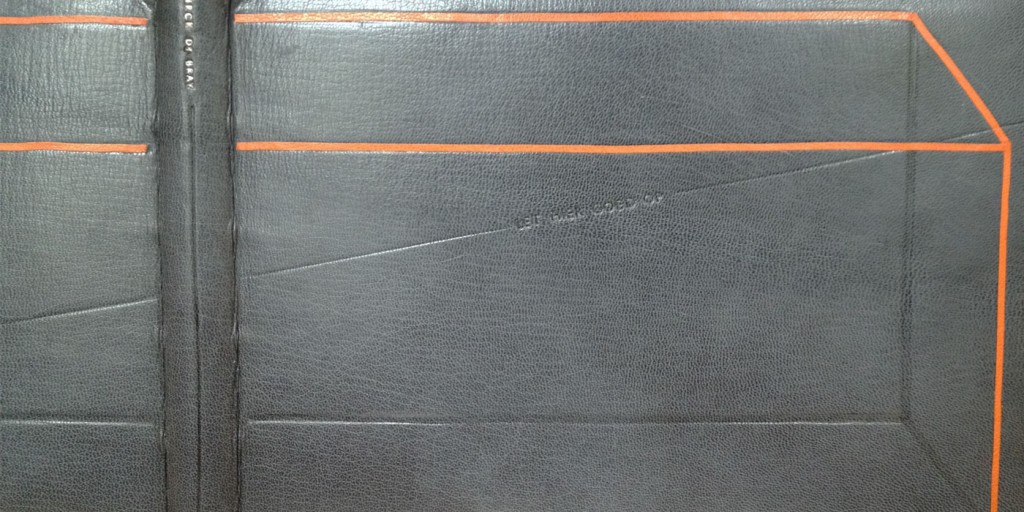
    As I mentioned above, the set book was written in both Dutch and English. Alcamy ran with this theme by including a phrase from the text: “This is where you must really pay attention” is blind tooled on the back cover, while “Let hier goed op” is the Dutch translation blind tooled on the front cover. These two phrases are enclosed within a box created through the use of orange onlays.

    Dirck de Bray was a talented artist across several mediums, but principally known for his paintings and worked on the murals of “Orange Hall” (Oranjezaal) in Huis ten Bosch, a royal palace in The Hague. The orange cube spanning across the covers represents the space of the artist’s creavity and its challenging limitations.

    DirckDeBray4-AlcamyHenriksenDirckDeBray2-AlcamyHenriksen

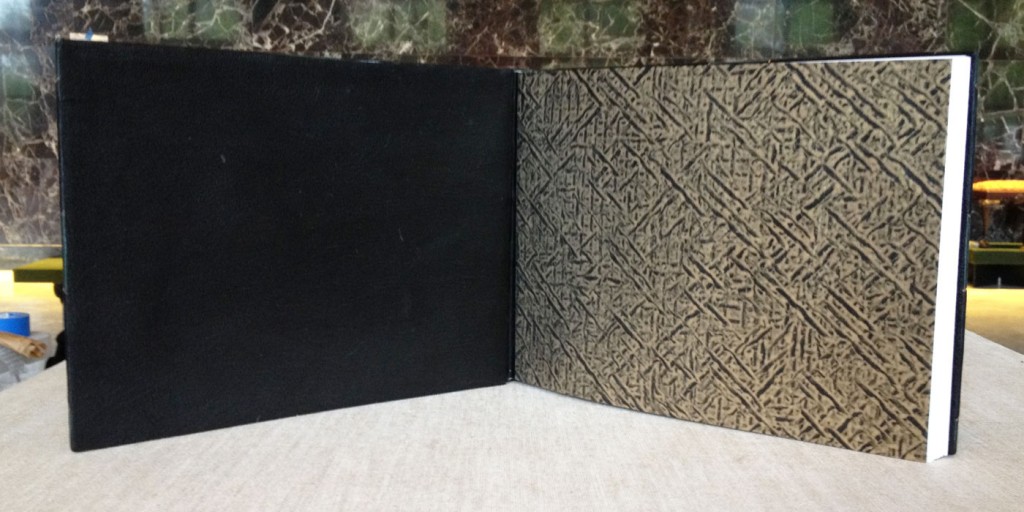
    Alcamy’s binding is bound in gray Harmatan goatskin with matching leather doublures. She used handmade papers from Hook Pottery Paper as the made flyleaf. The head edge is decorated with graphite with a single line of orange running the length of the edge. Alcamy’s design is really striking and made great use of long horizontal shape of the binding.

    – – – – – – – – – – –

    DirckDeBray1-ChristineAmeduri

    Christine Ameduri
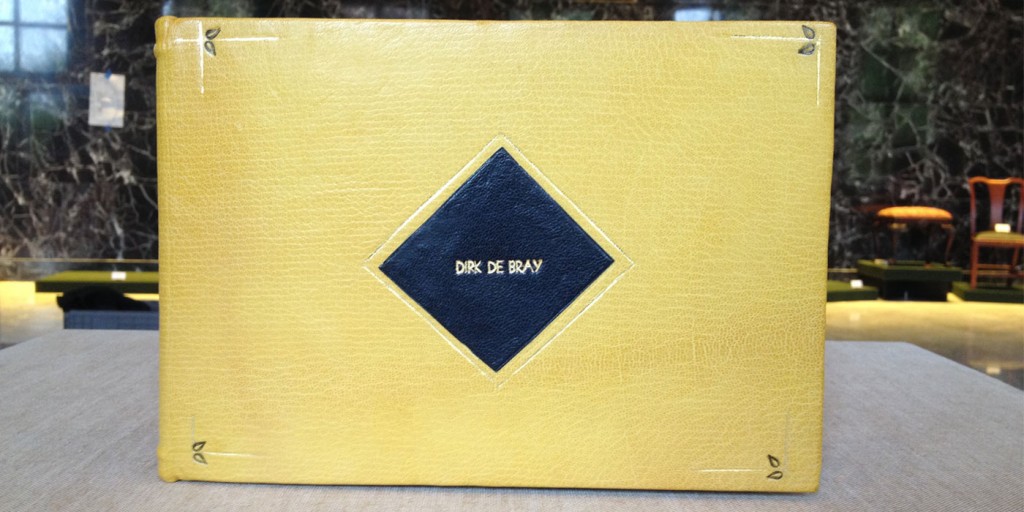
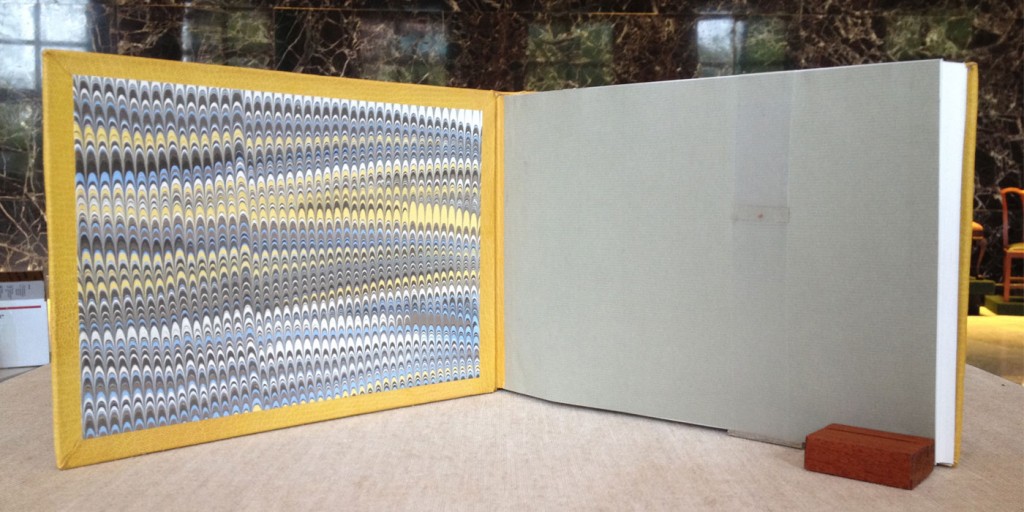
    Inspired by 17th century Dutch tile designs, Christine reinterprets the design as a broken frame of simple corner ornaments. The intersecting gilt lines at each corner are paired with two small smoke-tooled droplets. The center tile is a black onlay tooled with de Bray’s name and framed within gilt lines. Bound in yellow Harmatan goatskin with matching leather hinges. Inset on the inside of the boards is a panel of handmade marbled paper made by Christine herself.

    DirckDeBray2-ChristineAmeduri

    – – – – – – – – – – –

    DirckDeBray1-GabrielleCooksey

    Gabrielle Cooksey
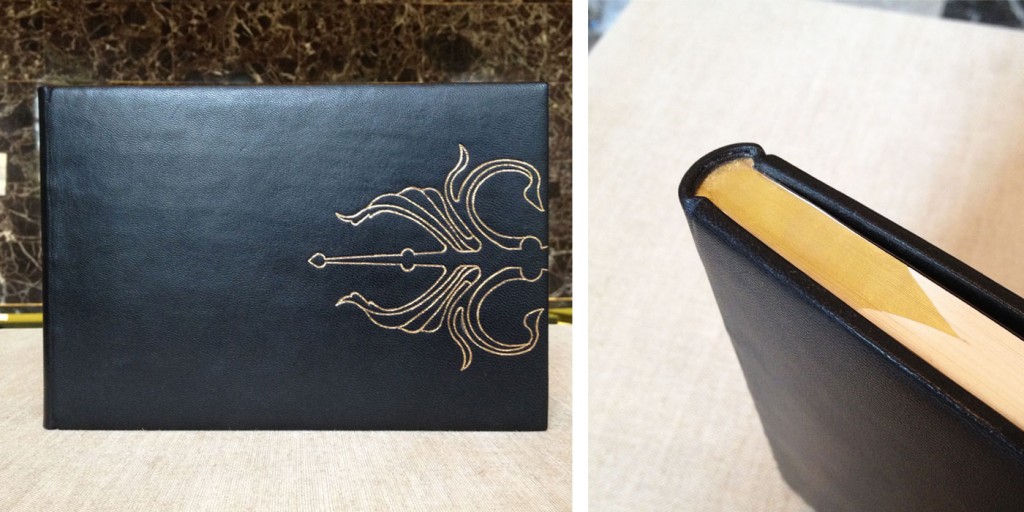
    In the classic drawing style that I’ve seen emerge on Gabrielle’s work during her two years at NBSS, she has created an elegant and simple design binding. The motif on the front cover is reflected on the back cover and was created from a series of line palettes and gouges through gold foil. The motif was inspired by Gothic door frames. The edge decoration mimics the shape of the design on the covers.

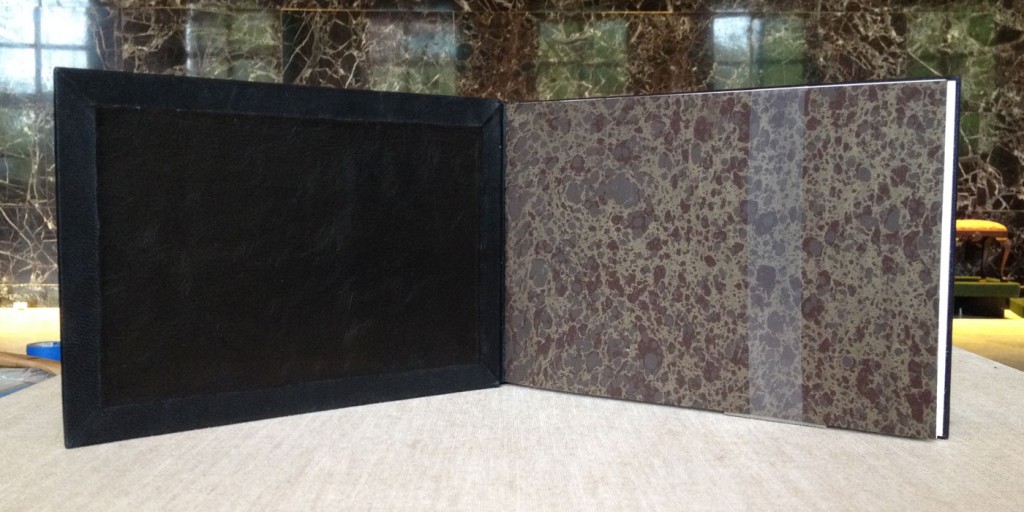
    Bound in dark blue Pergamena goatskin with matching leather hinges. A panel of black leather fills the inside of the boards. The made flyleaf is a handmade marbled paper.

    DirckDeBray2-GabrielleCooksey

    – – – – – – – – – – –

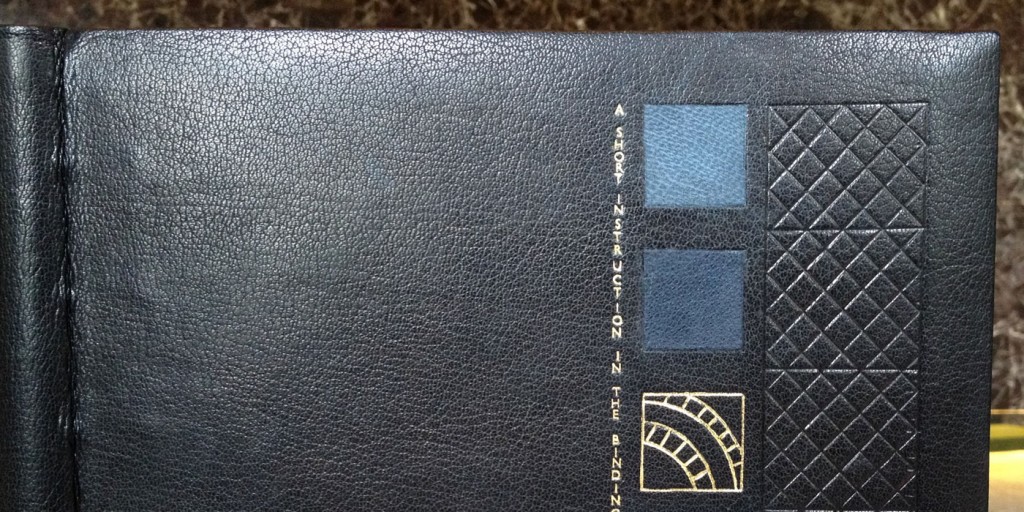
    DirckDeBray1-LeslieTo

    Leslie To
    The diaper-style design and onlays of various blue leathers are extracted from the illustrations in the manuscript. de Bray mentions that in art you must look past the surfaces of your surroundings to find the details. Leslie captures the background details of the archways, windows and blue tile flooring through both gilt and blind tooling. The head edge is decorated with green pigment, which is also pulled from the manuscript illustrations. 

    DirckDeBray3-LeslieTo DirckDeBray2-LeslieTo

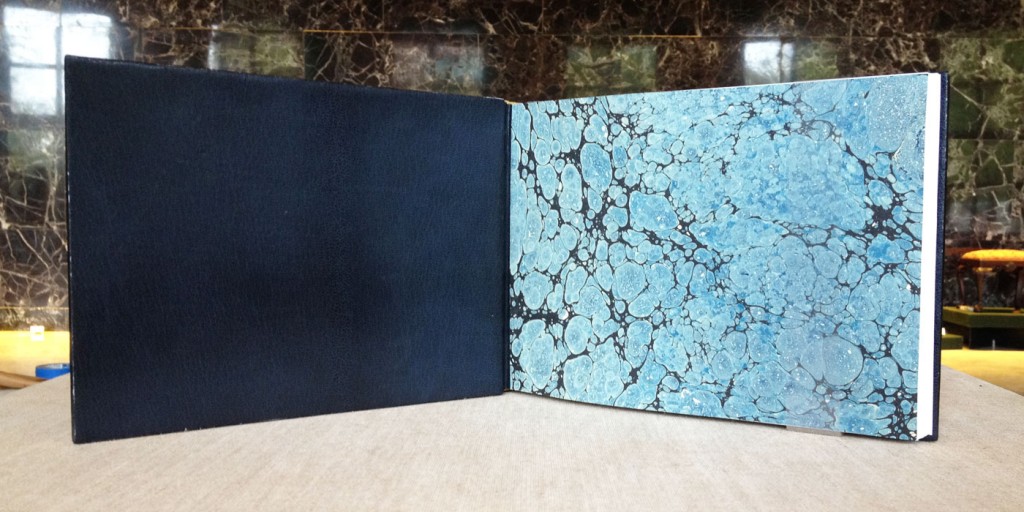
    Bound in black goatskin with navy blue doublures. Leslie hand marbled the paper used on the made flyleaf. Pulling from the architectural elements within the illustrations, Leslie has created a complimentary structural design on her binding.

    – – – – – – – – – – –

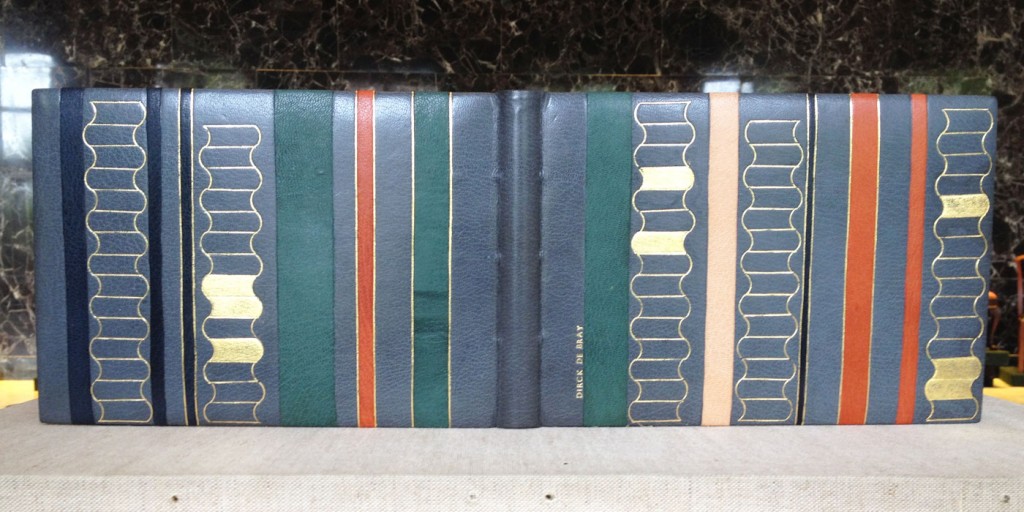
    DirckDeBray1-ElizabethCurran

    Elizabeth Curran
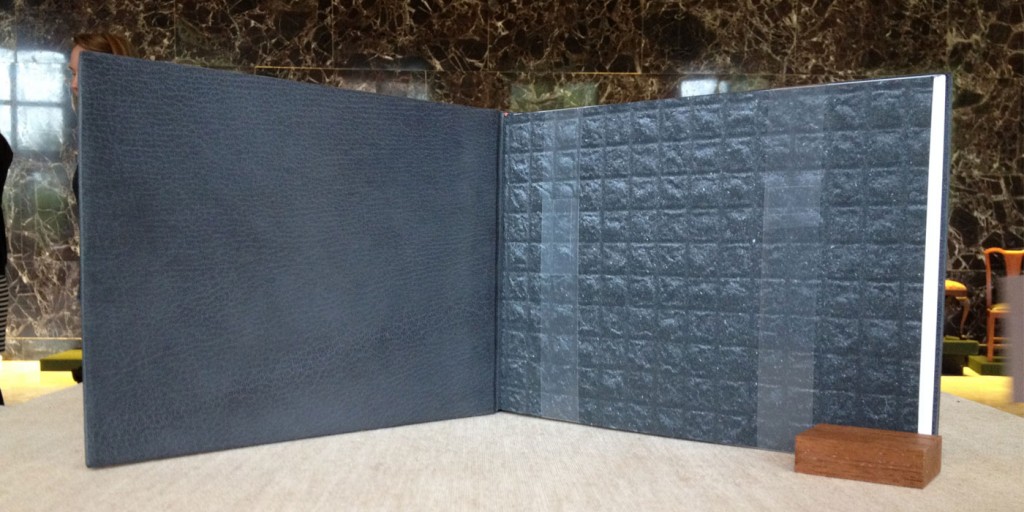
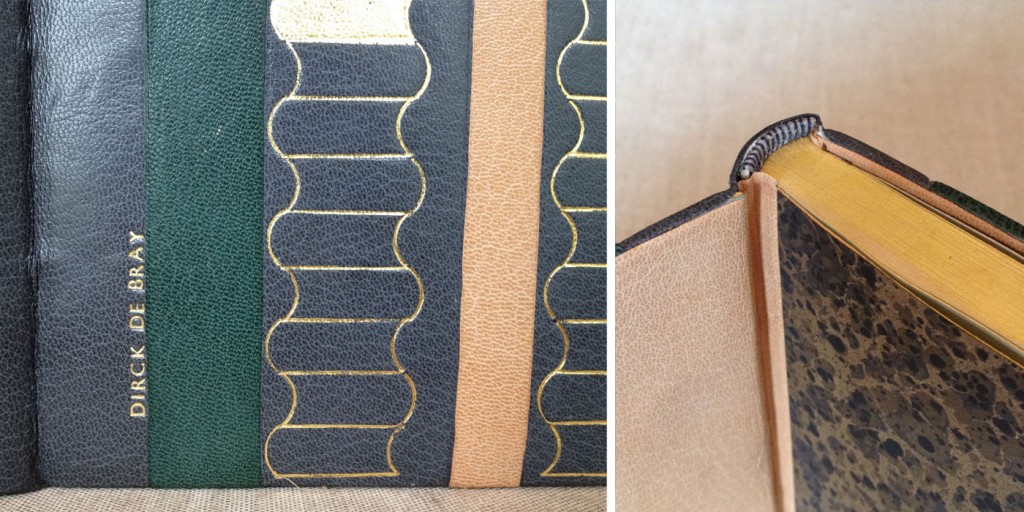
    Elizabeth also found inspiration in the original manuscript illustrations, but put her focus on the illustrations of stacked books to create a design of an abstracted library. The stacked books on her binding are created through a series of gilt line palettes and gouges, with a few being surface gilt. Separating the stacked books are a series of vertical stripes of colored onlays, some being tooled onlays. A nice detail that Elizabeth included, was wrapping the colored onlays onto the board edges.

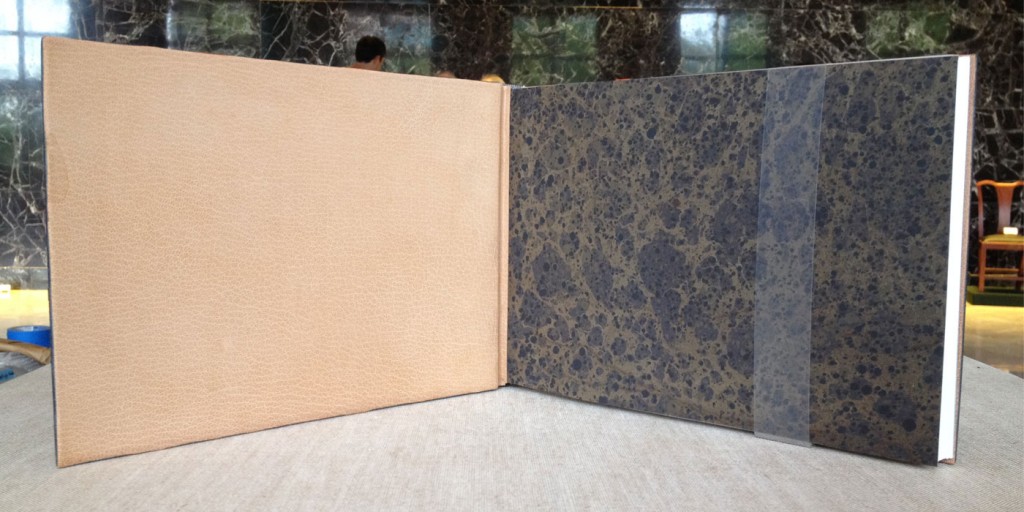
    The design is quite striking and each cover can stand alone or be displayed fully open as the image above displays.

    DirckDeBray3-ElizabethCurran DirckDeBray2-ElizabethCurran

    Bound in grey Harmatan goatskin with biscuit-colored goatskin doublures paired with a handmade marbled made flyleaf. The headbands are hand sewn around a flat rectangular core made from laminated goatskin and vellum.

    – – – – – – – – – – –

    DirckDeBray1-MariannaBrotherton

    Marianna Brotherton
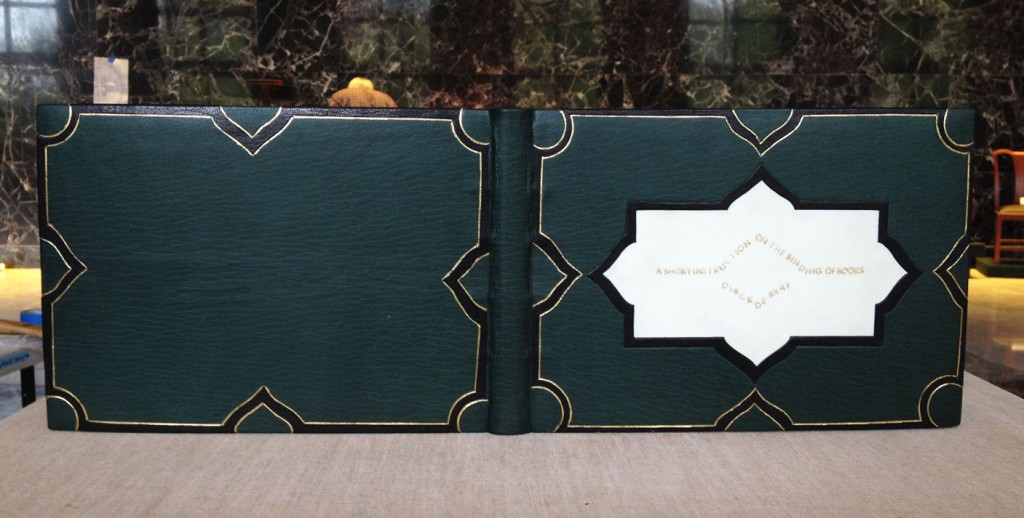
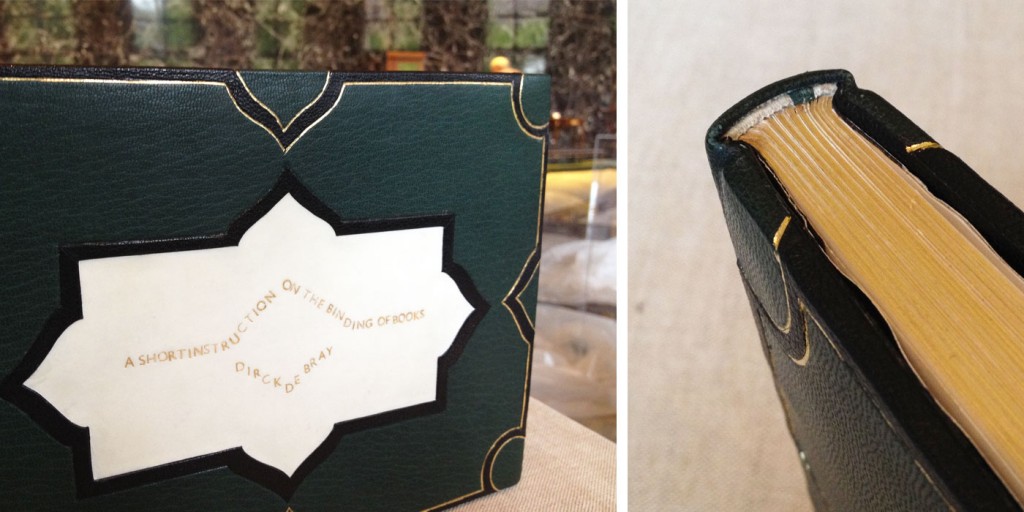
    Marianna took her inspiration from designs on mid-17th century bindings, a period that is contemporary to the original manuscript. The frame is created with a black onlay and tooled using an ascona tool over gold foil. The center inlay panel of vellum is framed with a black onlay mimicking the style of the outer border. Marianna wanted to incorporate vellum in her design as a homage to the original vellum binding of the manuscript. The title, along with de Bray’s name, has been hand-tooled with gold foil onto the vellum.

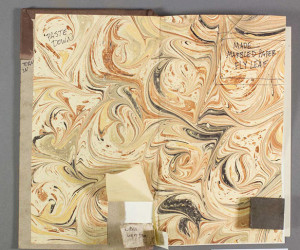
    Bound in green Pergamena goatskin and vellum with black goatskin doublures paired next to a stunning Claire Maziarcyk paste paper made flyleaf.

    DirckDeBray3-MariannaBrotherton DirckDeBray2-MariannaBrotherton

    – – – – – – – – – – –

    DirckDeBray1-JeffAltepeter

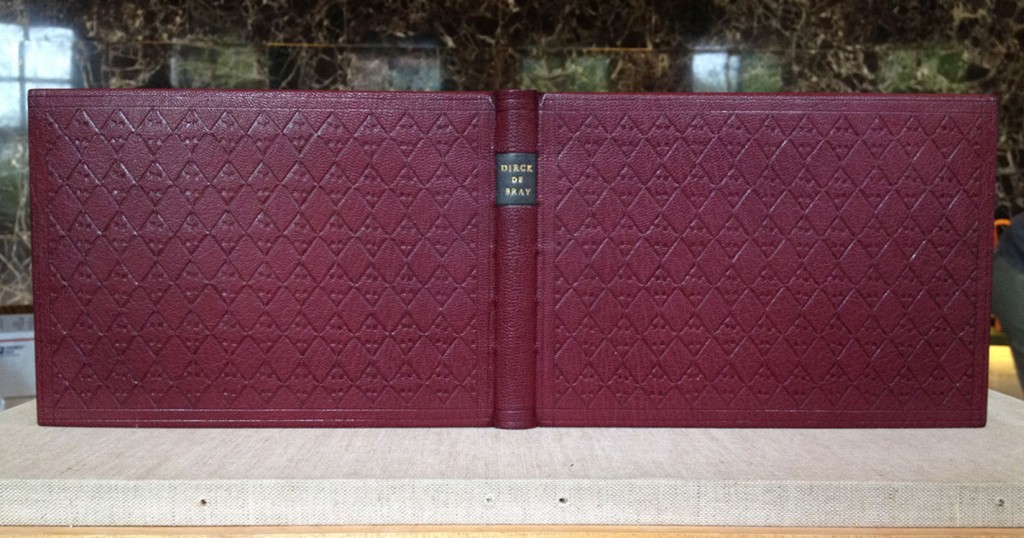
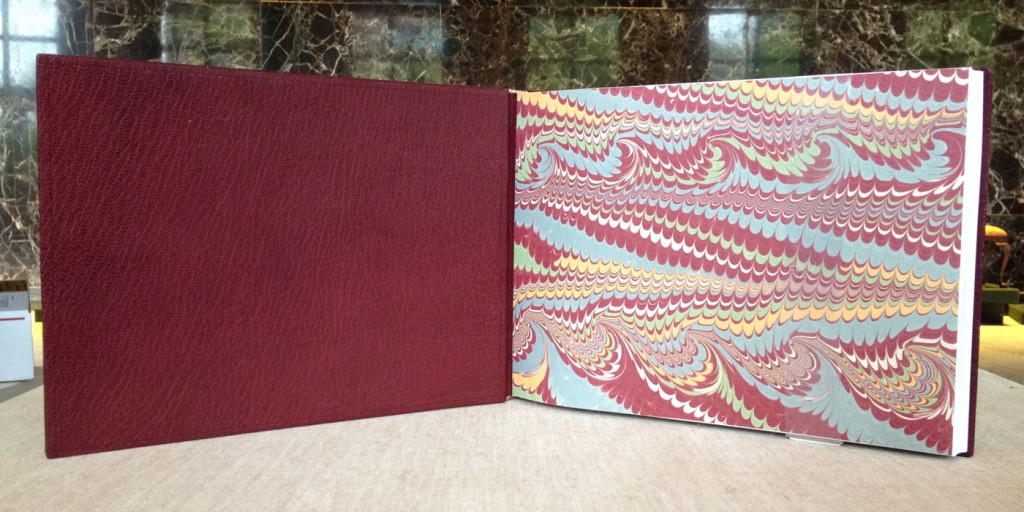
    And last, but certainly not least is the binding created by NBSS instructor and alum, Jeff Altepeter. Bound in crimson goatskin with matching doublures. The boards are blind tooled in a lozenge pattern using a single hand-carved finishing tool which mimics the classic ‘cusped edge stamp’. de Bray’s name is hand tooled on a leather label pasted on the spine. Marbled ‘Dutch curl’ endpapers in the typical 18th century palette are used for the made flyleaf.

    DirckDeBray2-JeffAltepeter


  • My name is Erin Fletcher, owner and bookbinder of Herringbone Bindery in Boston. Flash of the Hand is a space where I share my process and inspirations.
    The StudioNewsletterInstagramEmail me
  • Archives