RSS Feed

Posts Tagged ‘athena moore’

  1. Exquisite Corpse Collaboration

    July 10, 2016 by Erin Fletcher

    ExquisiteCorpse
    As Program Chair for the New England Chapter of the Guild of Book Workers, I had the pleasure of organizing a project brought to me by one of our members. Jonathan Romain, a recent graduate of the North Bennet Street School Bookbinding Program, brought forth the idea of a collaborative project between the students at NBSS and the NEGBW. I loved this idea and so with the help of instructor Jeffrey Altepeter, we put this plan in motion.

    An Exquisite Corpse is a method of illustration invented by Surrealists in the early 1910s, where each collaborator adds to a composition in sequence usually without seeing the prior portion. Upon reveal this rule to hide the previous sequences offers up an abstract and amusing portrait. Each student created a plaquette covered in neutral leather (we used Harmatan Terracotta and Brown goatskin) and also completed the “head” portion of the figure. The plaquette’s were about 18in x 6in; allowing each participant to cover a 6in square portion of the board.

    The project spanned over 3 months as each participant received and worked on their portion over the course of a month. At the end of May, the finished pieces were on display as part of NBSS’s Student & Alumni Show, an annual exhibit that showcases work from current students and alumni from the various programs.

    I had the pleasure of receiving the finished pieces and bringing them back to the students. We gathered around one another as each student revealed the unique and strange characters that developed over the course of the project. Each piece is displayed below with a brief description from each collaborator remarking on their concept and use of materials.
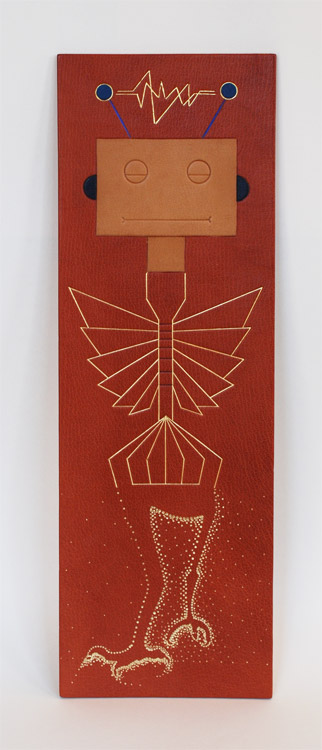
    Jeffrey Altepeter – Samuel Feinstein – Lang Ingalls

    JeffSamuelLang-Corpse
    Jeffrey Altepeter
    The robot head was inspired by my son’s fascination with mechanical and technological design and construction. It is made up of traditional leather decoration techniques—leather onlays, tooled with gold leaf, foil and carbon.


    Samuel Feinstein
    Chicago, IL

    Gold and blind tooling.


    Lang Ingalls
    Crested Butte, CO

    I opted for humor in my approach to the Exquisite Corpse. The design concept was to depict bird legs: the initial tests were for tooling in the positive; it became clear that the negative space would be more interesting. I used four sizes of “dots” in gold foil to produce the background behind the legs. Repetition and rhythm became the focal point.

    Emily Patchin – Barbara Adams Hebard – Athena Moore
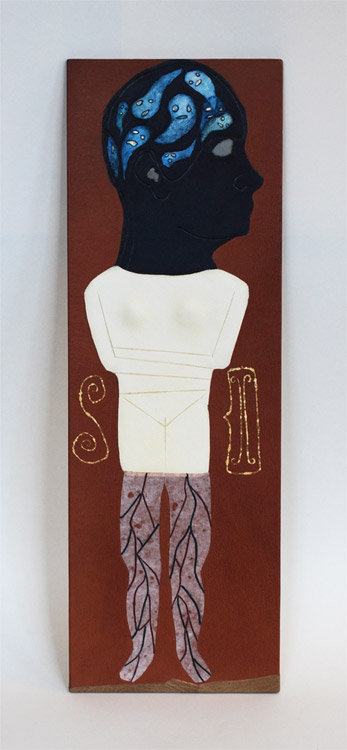
    EmilyBarbaraAthena-Corpse Emily Patchin
    This head was created as an onlay piece. The main portion was cut out of navy blue goat skin, pared thin. The sections for the eye, ear, and ghosts were all cut out, and their edges beveled on the flesh-side. Light blue leather for the eye and ear were glued to the back before pasting to the base leather. The ghosts were cut out from parchment; their faces backed with thinly pared gold leather, and painted with watercolor before being glued in place. The outline of the original drawing was then blind tooled over the leather. The intention behind the design was to look at intense personal struggles (depression, intrusive thoughts, insomnia) through a lens of whimsy and humor.

    Barbara Adams Hebard
    Melrose, MA

    Melrose, MAWhite alum-tawed goatskin onlay with blind tooled details, inspired by the shape of an Early Cycladic marble female torso (2800-2300 BC, Keros-Syros Culture). Flanking the torso are shapes commonly found incised on Early Cycladic pottery, a spiral and a two-headed ax, executed in surface gilding.


    Athena Moore
    Somerville, MA

    My materials were leather and hand-cast paper (made by the artist). The concept was a bit literal, since I had the last portion and was finishing the body with the legs, but I was inspired by a particular set of medical prints from Yale’s collection.

    Jonathan Romain – Erin Fletcher – James Reid-Cunningham
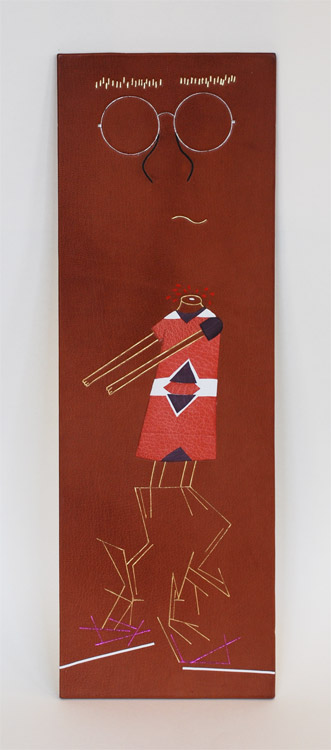
    JonathanErinJamesJonathan Romain
    a shapeless face, 18 karat gold, palladium, and ascona onlay


    Erin Fletcher
    Boston, MA

    I wanted to created something really playful with my portion of the plaquette. When I saw no indication of where to begin, I chose to create a headless girl with comically long arms. The girl’s dress is a series of blind tooled onlays in pink and purple goatskin and white buffalo. Her skin is gold tooled. And the blood spurting from her headless stump is painted with red acrylic.


    James Reid-Cunningham
    Cambridge, MA

    The design is largely non-representational, with a vague suggestion of legs. Otherwise, there is no concept. Tooled in gold and metallic foil, with inset lines of white box calf.

    Mary Grace Whalen – Eric Alstrom – Penelope Hall
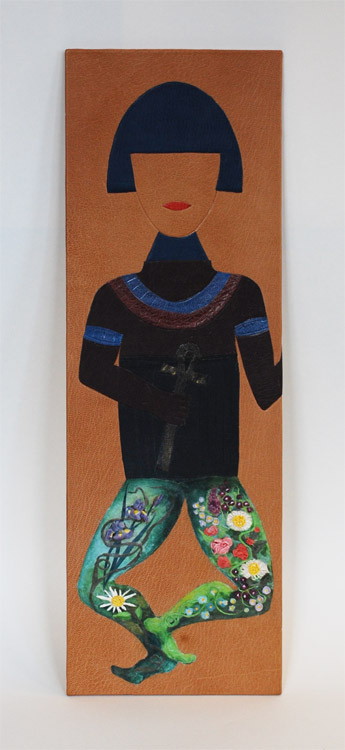
    MaryGraceEricPenelope-CorpseMary Grace Whalen
    Blue Pageboy, a leather tool-edged onlay made of goatskin is inspired by the Russian pioneer of geometric abstraction, Kazimir Malevich’s costume design and his Yellow Man painting. Blue Pageboy gives off a theatrical and mysterious vibe. Who is s/he? Only the body will tell!


    Eric Alstrom
    Okemos, MI

    After many ideas, I kept coming back to the idea of ancient Egypt and their exquisite corpses.  My design is based on various historic paintings, but did not copy any single on in particular. The design is made from various colors of goat painted with acrylics and blind tooled


    Penelope Hall
    Kingfield, ME

    Inlay consisting of glazed earthenware, scraps of Thai papers, and wheat paste. Colored with watercolor. Additional adhesives used are E-6000, and Jade 403 PVA. Finish coat on the inlay is SC 6000 acrylic polymer and wax emulsion.

    Nicole Campana – Jan Baker – Colin Urbina

    NicoleJanColin-Corpse

    Nicole Campana
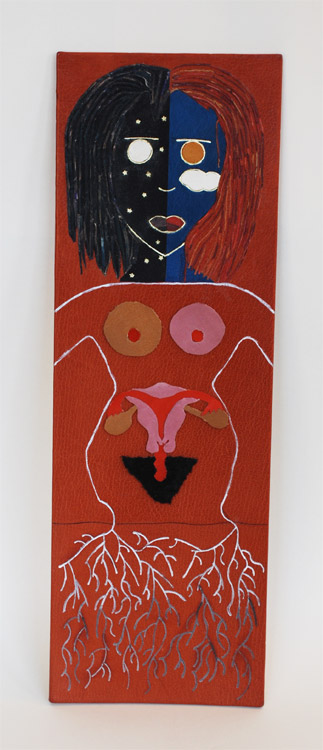
    This design was inspired by nothing more than a common theme in much of my art: day and night. I’m drawn to the color palette each time presents and the way in which our perceptions of those colors change as the light does. The techniques utilized are predominantly onlays and gold tooling, however a variation of the lacunose technique and an Ascona tool were used for the hair.


    Jan Baker
    Providence, RI

    what i lost this year:
    – my ovaries
    – my fallopian tubes
    – my uterus
    – all of my hair
    – and my brother


    Colin Urbina
    Boston, MA

    When I’m sketching, I often come back to the roots of a plant. For this project I decided to attempt the same type of free flowing, loose, many-from-one nature of these sketches with traditional gouges. Using five or six tools I built up the legs of this plaquette, and then added acrylic paint into them that gets darker as the roots go lower. The dirt is represented by grain manipulation with sandpaper, changing the surface of the leather and giving it a different look and feel.

    Peggy Boston – John Nove – Shannon Kerner

    PeggyJohnShannon-Corpse

    Peggy Boston
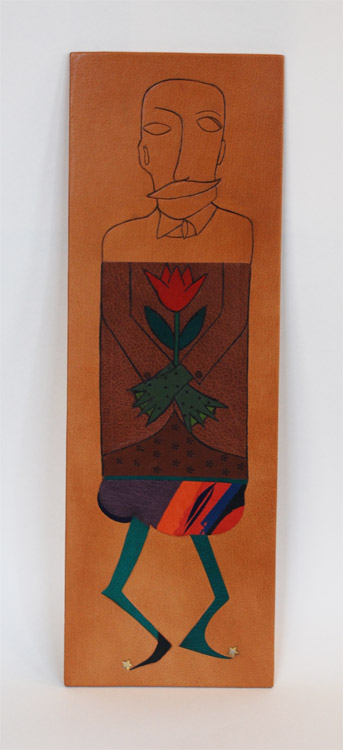
    My inspiration for this project came from a group of mustachioed, high-collared, quirky members of the Viennese Secessionist art movement. This movement was part of the golden age of illustration and graphic design in Vienna and Germany from 1897 to 1918. Their main influences were derived from William Morris and the English Arts and Crafts movement which sought to bridge the applied and fine arts. The Secessionists favored hand-made object opposing machine techniques. Hand tooling and acrylic paint.


    John Nove
    South Deerfield, MA

    The initial description of the project attributed the Exquisite Corpse to the Surrealists. My concept was of a Magritte-ian gentleman – fine suit, hands crossed in the standard coffin pose holding the usual flower  — but then with an amphibian’s green gnarly ‘hands’. Carbon tooling and goatskin onlays.


    Shannon Kerner
    Easthampton MA

    The vivid colors on the chubby tum were used to inspire whimsy, as well as the funny shape of the legs, which took inspiration from the cartoon Invader Zim, a silly plot animation focusing on an alien sent to Earth and meant to blend in. Stars: gold and palladium mixed together is a challenging medium to tool as they are different weights, but the outcome is very rewarding and attractive. Leather onlays, gold and palladium tooling.

    Todd Davis – Jason Patrician – Jacqueline Scott

    ToddJasonJackie

    Todd Davis
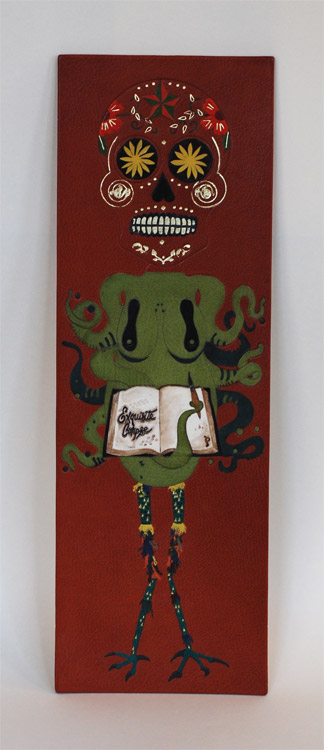
    The design of this head is inspired by the sugar skulls used as part of the Mexican celebration of Dia de los Muertos (day of the dead). On that day, these skulls, made of sugar, are part of an altar made to honor and celebrate dead ancestors, particularly children. Blind tooled outline filled with raised, ascona, and back-pared onlays. It is finished with blind and lemon gold tooling, and surface gilded teeth.


    Jason Patrician
    New London, CT

    I wanted to stay true to the surrealist exercise of the exquisite corpse by combining the distorted human figure and nature. For my design I chose the octopus, the master of disguise, which doubles as the female torso. Leather onlays (Harmatan and Pergamena), vellum inlay (Pergamena) with walnut ink wash and Prismacolor marker detail, blind tooling throughout.


    Jacqueline Scott
    Somerville, MA
    Materials: goatskin leather, gold leaf
    Concept: I wanted my plaquette section to be whimsical and colorful and wanted to utilize the feathered onlay technique. Something about chicken legs appealed to me, so I ran with that, though I think they ended up looking more like reptile legs with funny leg warmers.

  2. Conservation Conversations // Adhesive Pre-Coated Repair Materials

    April 22, 2015 by Athena Moore

    Mending tears is a treatment that book and paper conservators utilize nearly every day.  For this reason, wheat starch paste is one of our best friends at the bench – a dependable go-to, especially when paired with an appropriate eastern paper. Unfortunately, this reliable standard is is not always an option – the media may be soluble, the paper difficult, the work space less than ideal.

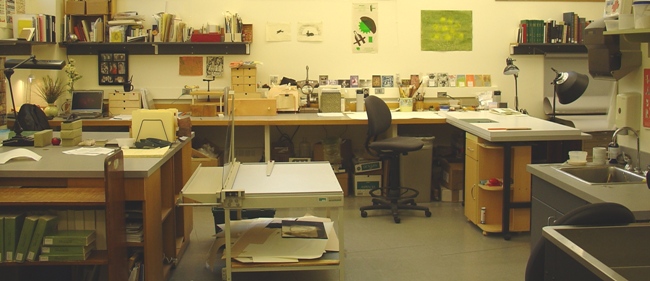
    Luckily, there are other routes to take! A possible solution to one or all of these issues may be adhesive pre-coated repair materials. Recently, I had the pleasure of taking a two-day workshop at Dartmouth College taught by Sarah Reidell, Associate Conservator for Rare Books and Paper at the New York Public Library on exactly this topic.
    dartmouth lab

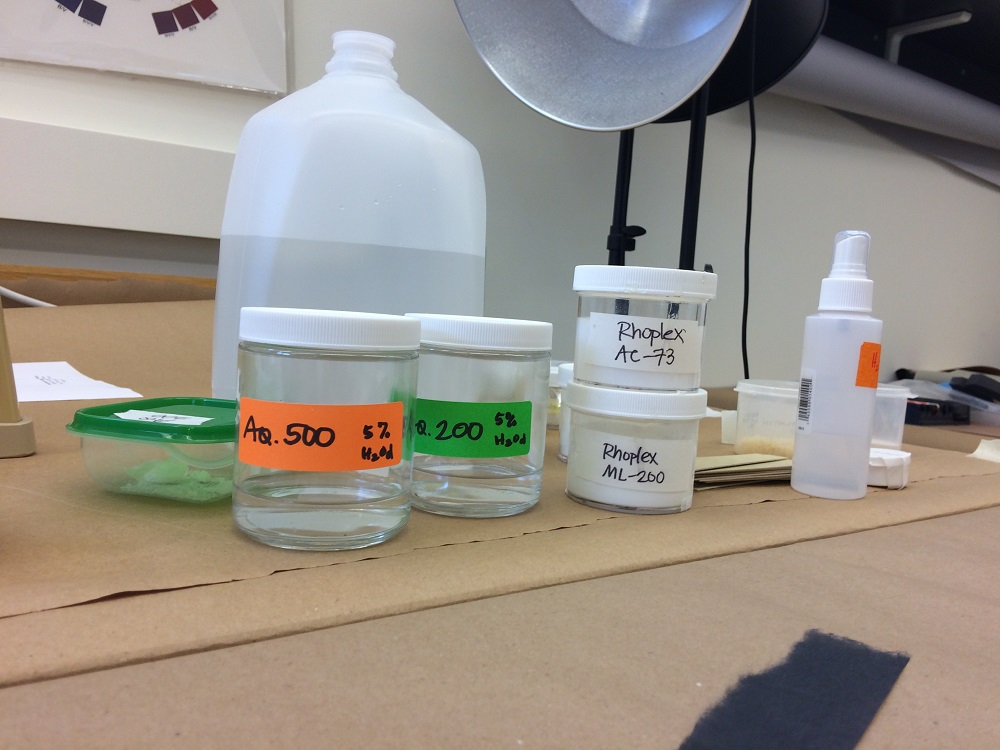
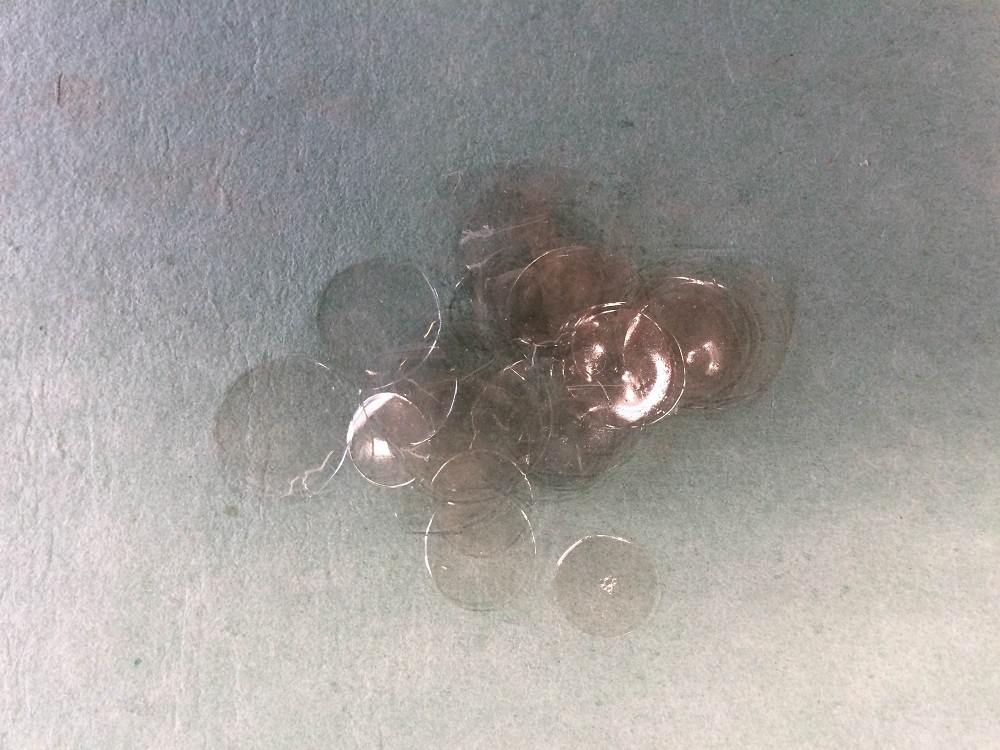
    Pre-coated repair materials can be prepared with a huge number of adhesives – starches (wheat starch paste), cellulose ethers (methyl cellulose, sodium carboxymethyl cellulose, hydroxy propyl cellulose), proteins (gelatin, isinglass), synthetics (Aquazol, Lascaux 303HV and 498HV, Rhoplex, Avanse, Plextol, Texicryl) and in some cases, a combination of more than one. These adhesives can be applied to any number of repair papers with a variety of application methods. This makes the possibilities fairly endless, which is almost equally helpful and daunting.

    IMG_8631

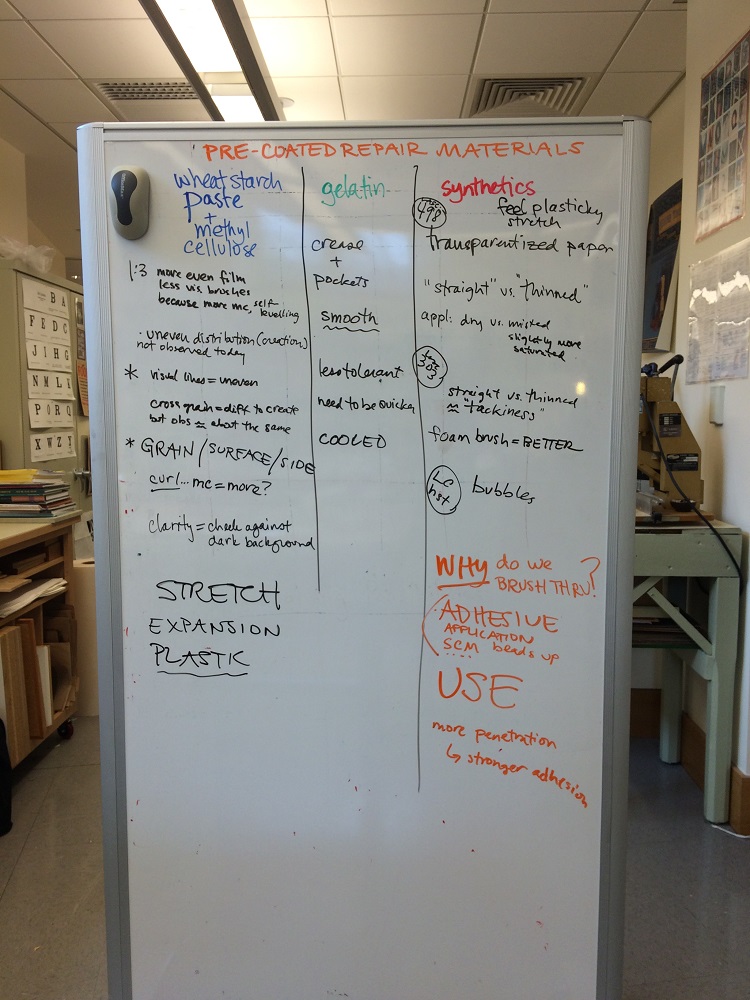
    Sarah walked us through the overall benefits of having these repair materials on-hand – portability, speed, control – and the specific advantages of each adhesive. One of the greatest benefits is understanding the method of reactivation for each adhesive (this is also potentially one of the more challenging elements to remember, but luckily we walked away with an extremely handy chart). If media solubility is an issue, reactivating with water is likely not an option – in this case, one would opt to use a repair material that can be reactivated with either heat or a solvent. If the scope of a project is large but solubility is not an issue, it may be helpful to have a stash of water-activated repair material and a water brush on hand. If the object to be treated is parchment, gelatin- or isinglass-coated paper is likely a good option and for plastics or clear supports, synthetics may be the best bet.

    IMG_8809

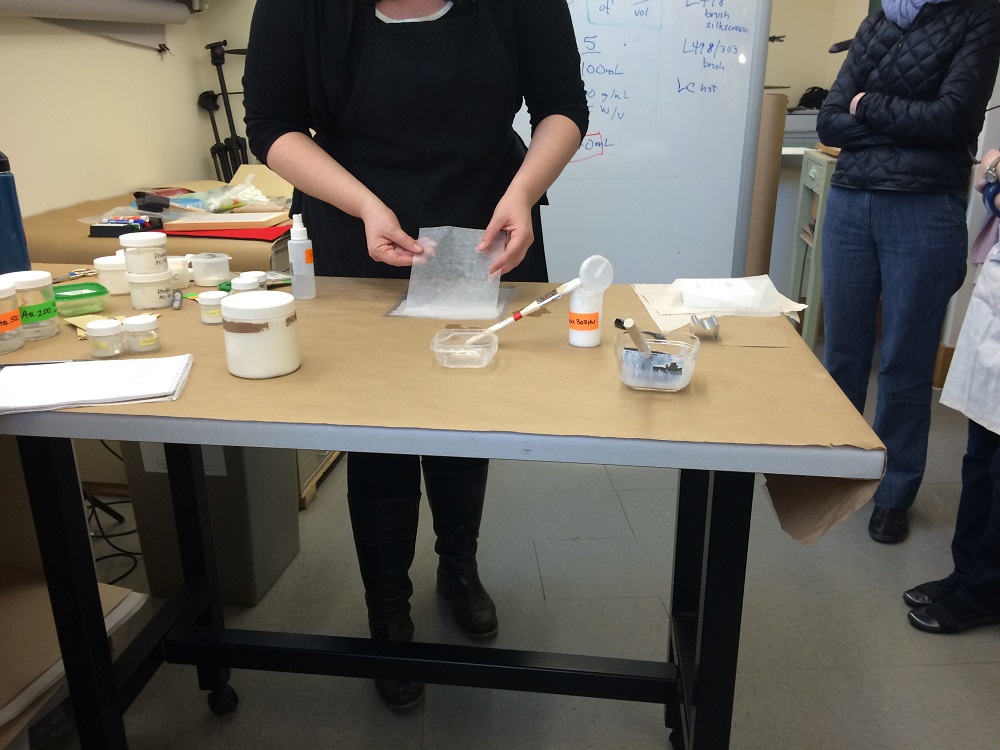
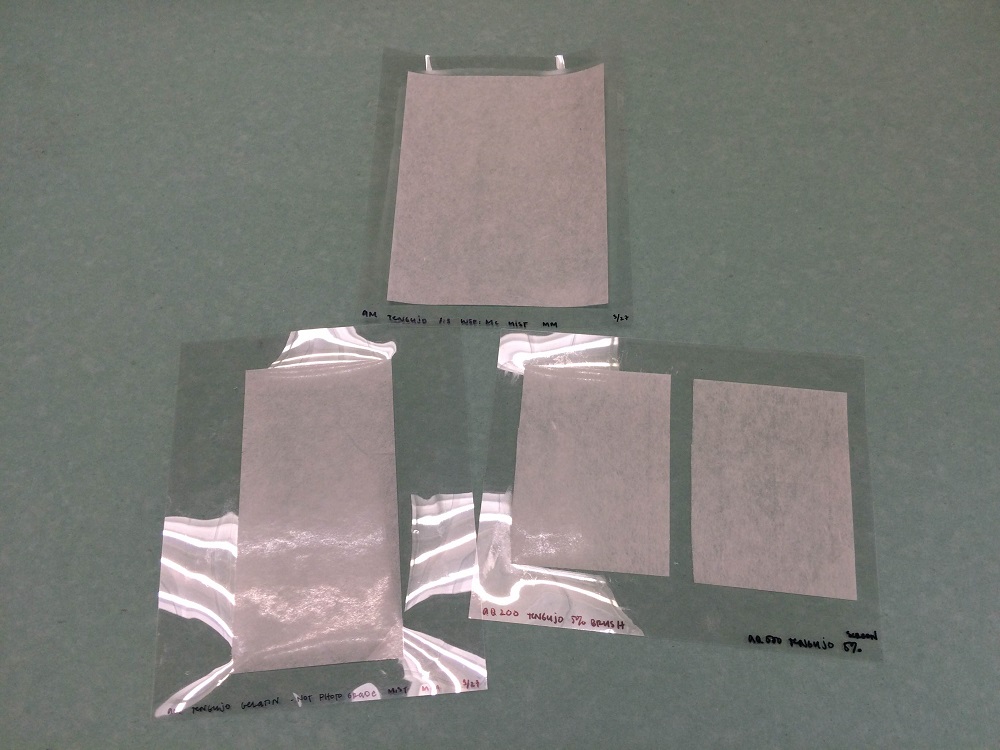
    Pre-coated repair materials can be prepared with nearly any adhesive and paper that one has in their lab and can be done with several different approaches, depending on skill and comfort level. Many can be done with a quick hand and a piece of Mylar, while others utilize tools not always seen in a conservation lab – a bbq/oven mat, dough scraper, and/or a silkscreen.

    IMG_8623

    As with all conservation treatments, this is one that takes some time and experimentation to gain comfort with. That said, the risk and cost are very low. These materials can be toned to match an object and stored indefinitely. As they are controllable and customizable, they also offer a great advantage over commercially available products, whose formulations can often be unknown and can change without notice.

    IMG_8630

    Sarah has taught this workshop several times now, both solo and partnered with Priscilla Anderson, Senior Preservation Library for Harvard Library, and it shows – she’s as organized as she is enthusiastic, which is saying something. Along with being extremely knowledgeable, she has a ton of great tips and sources for additional information, clever tools and other treatment ideas.

    IMG_8806

    There’s a helpful bibliography of pre-coated repair information on Sarah’s website to get you started. Henry Hébert made brief mention of Sarah’s presentation of this technique in an earlier Flash of the Hand post and Mindell Dubansky, Preservation Librarian at the Metropolitan Museum of Art has a nice write-up on the workshop here. If you have the opportunity to take this workshop in the future, I highly recommend it – take-away soundbites like “gel and swell” and “first pancake syndrome” should be enough to entice you.


  3. Conservation Conversations // Tools of the Trade

    March 19, 2015 by Athena Moore

    As anyone who works with their hands can attest, tools are the key to good work. They also happen to be one of the most satisfying to seek out, collect, and choose favorites from.

    Nearly all tools used by conservators will be easily recognized by bookbinders and are particularly suited to their respective tasks.

    IMG_8583

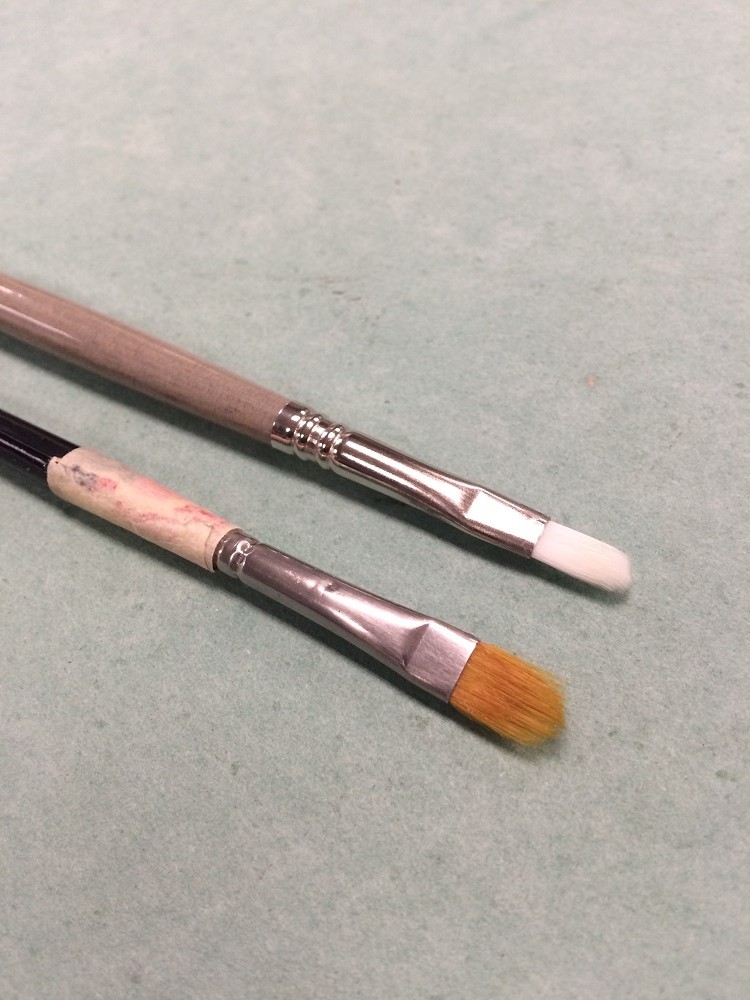
    First, there are brushes:

    IMG_8571

    IMG_8573

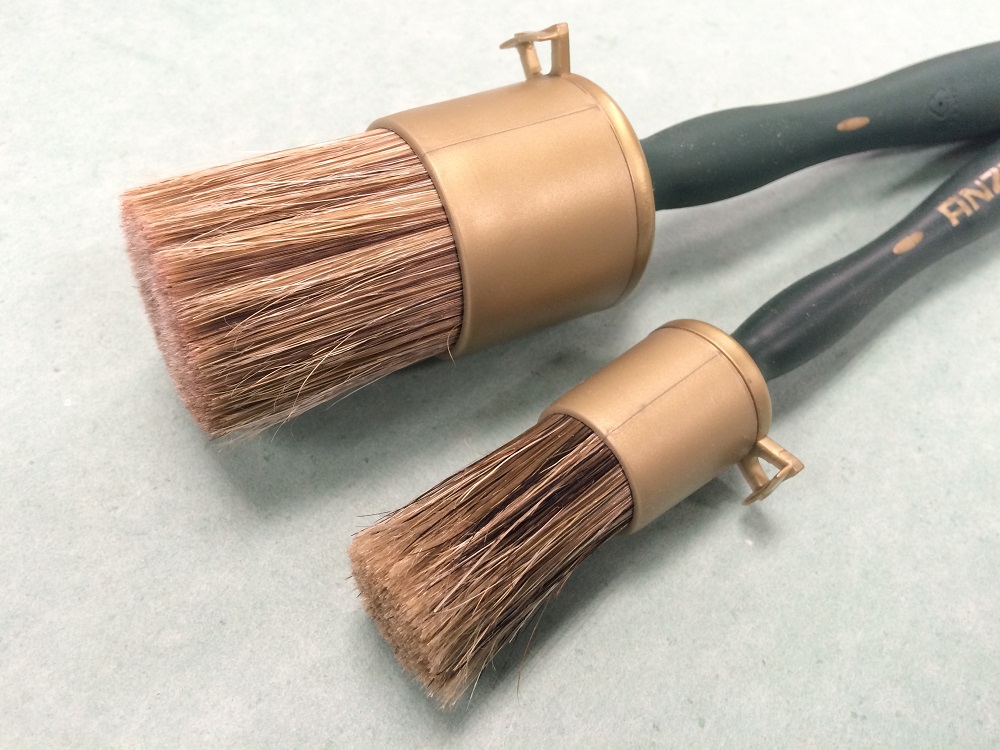
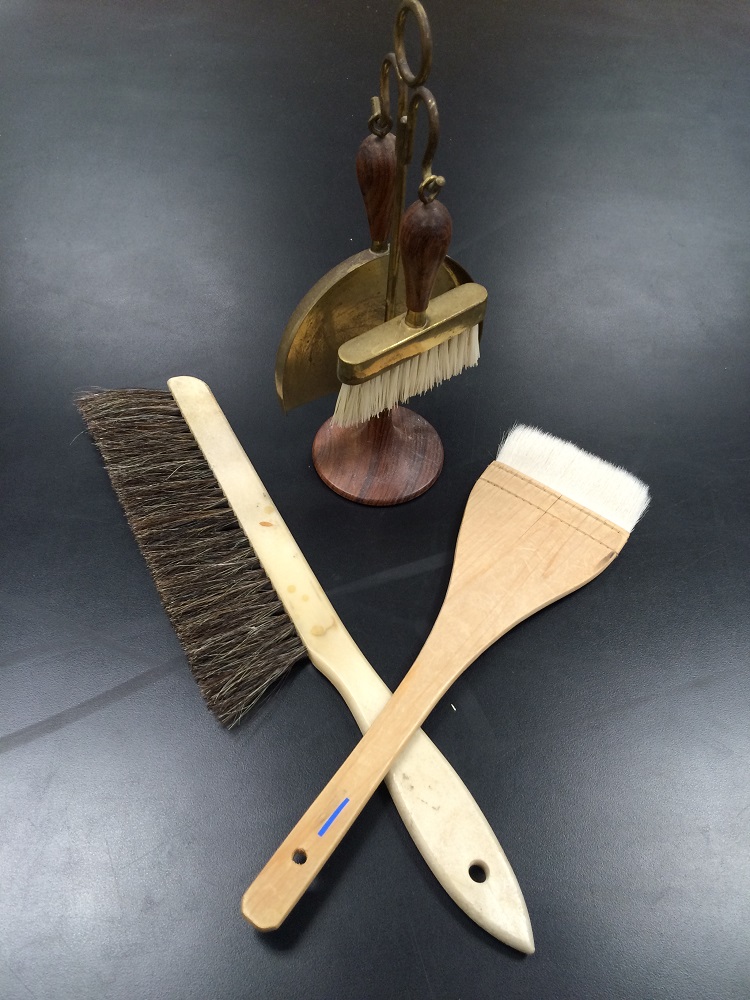
    We use them every day: to adhere materials, to tone cloth and Japanese paper, to apply water strategically or smooth out fibers on a bit of tissue. For PVA and mix I really love using round Anza brushes (second image) and for paste, especially detailed mending, I go for any kind of flat filbert. Toning brushes are one-purpose too, since the risk of them being a tad dirty is always there. We use über beautiful Japanese brushes to apply size and tamp down linings (they’re fairly expensive so we share one large, very nice set). Static-dissipating brushes are used to clean dust from surfaces, hake brushes to remove loose material from bindings, and this clever little guy in the stand is used to pick up all the debris that gets caught in my bench corners (turns out, his true purpose is to clear away baguette crumbs!).

    IMG_8584

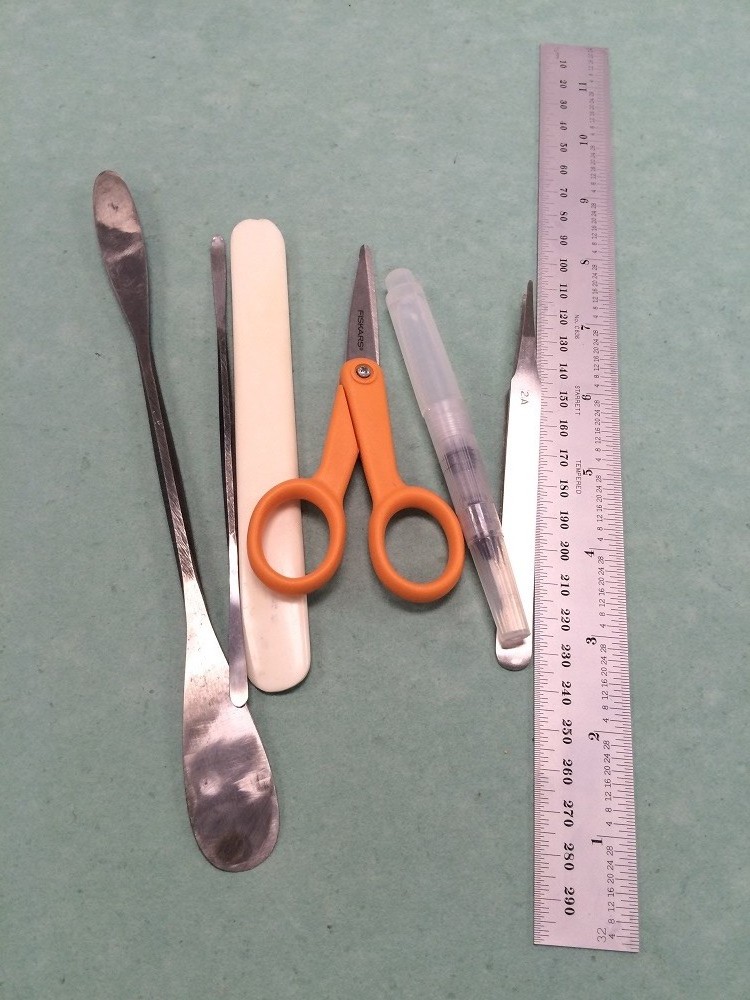
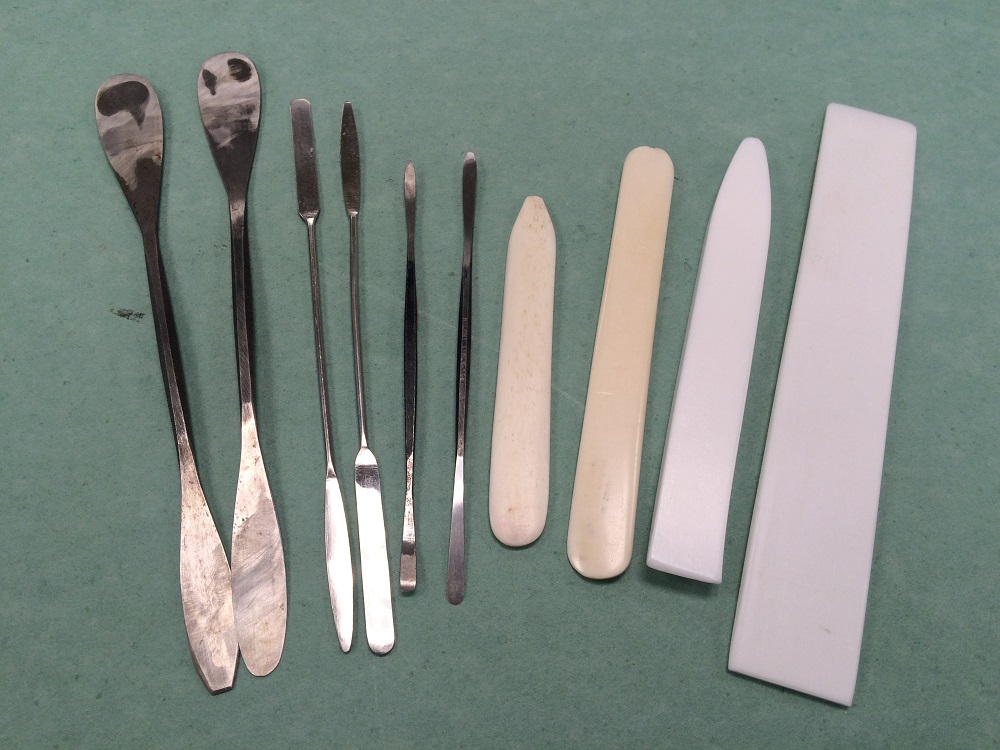
    Two other forms of tool that I find myself having quite a few of and utilizing pretty much every day are folders and spatulas.

    IMG_8577

    In my personal studio I have probably more bone folders than any other single tool, but at work I show more restraint. A bone folder with a point is useful for scoring lines and forming endcaps, while a nice flat bone folder is great for creasing sections or consolidating a spine. Teflon folders come in handy when smoothness is key or there’s concern over too much burnishing. A flat, super thin Teflon folder is especially good for floating material apart in a bath or removing adhesive with local humidification (be super careful if you choose to shape your own Teflon folders – breathing in the dust is dangerous!).

    Spatulas are a must. Stainless steel ones are great for working with wet materials, since there’s no risk of rusting and the edges are duller and therefore less likely to tear through potentially fragile paper. Casselli spatulas can be used to remove dry adhesive or accretions, to separate uncut pages when necessary, or to carefully unfold corners and edges. The large ones can easily be shaped (and re-sharpened!) to your preference on a sharpening stone and come in handy for muscling tough spine glue off.

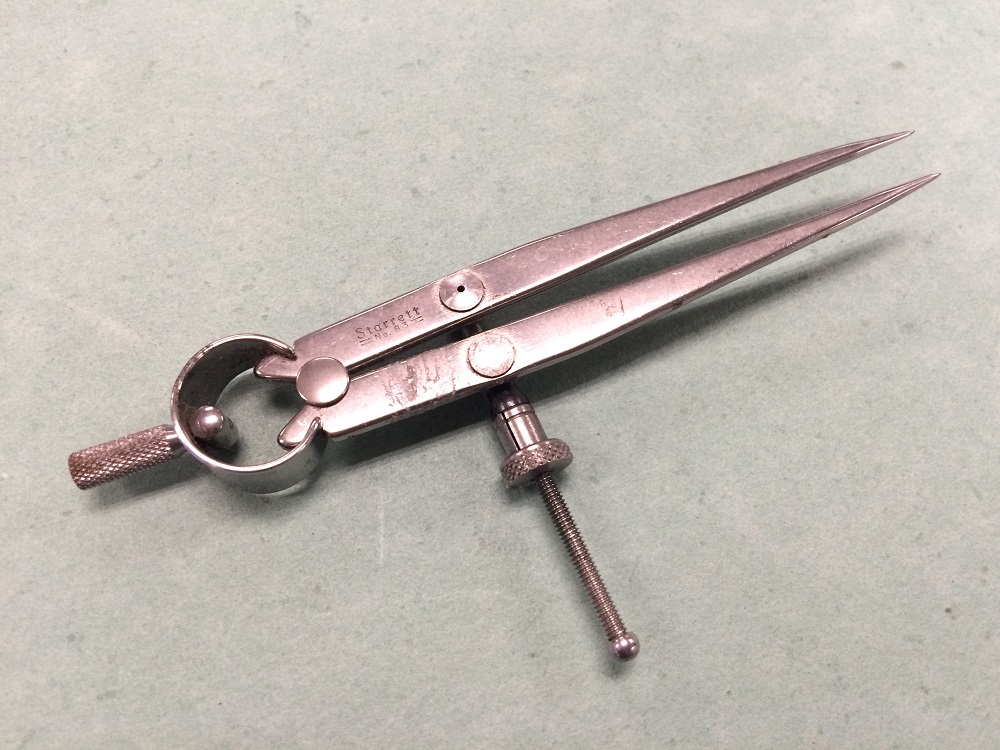
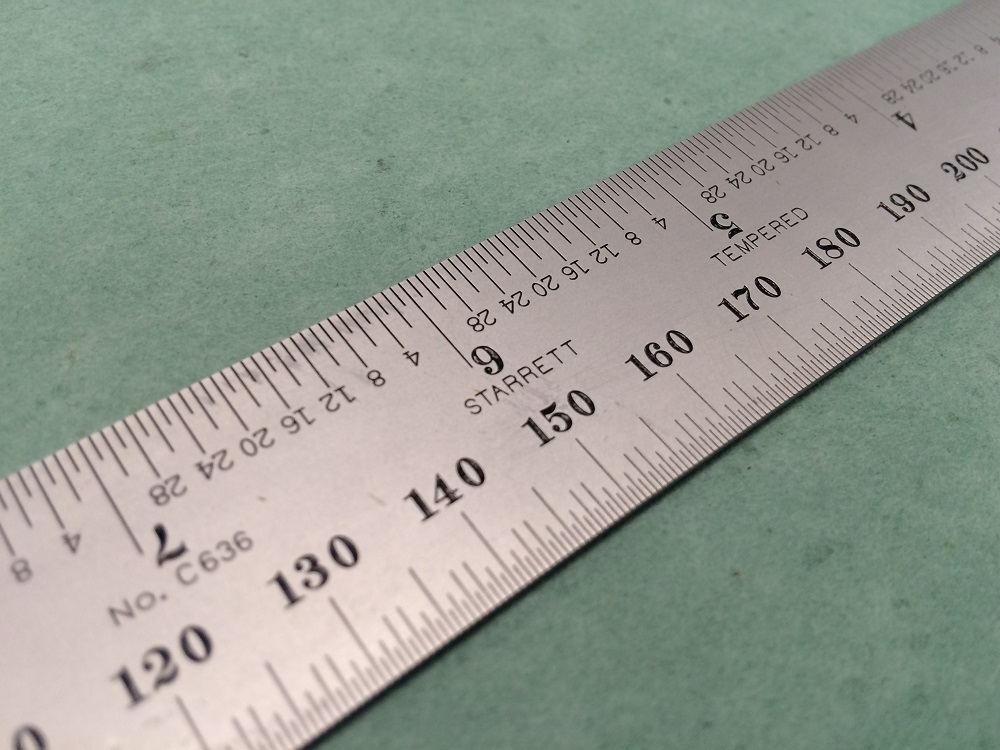
    Some tools are not only super handy, but also super beautiful (thanks, Starrett).

    IMG_8574

    Best for taking and transferring measurements…

    IMG_8581

    …and for actually measuring with numbers, obviously.

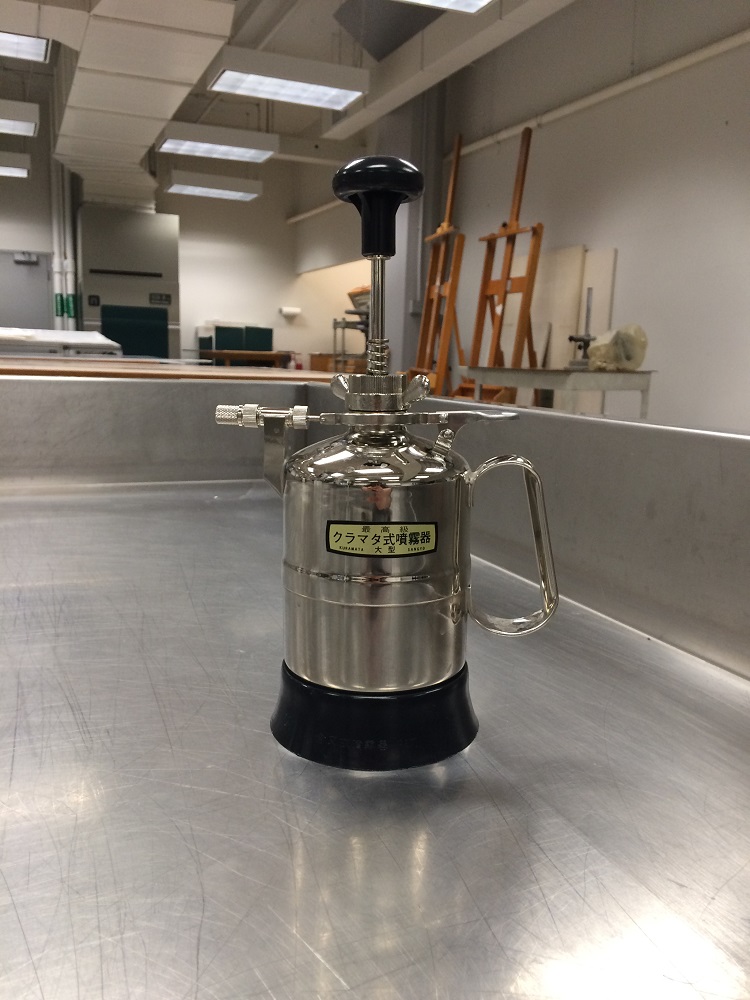
    IMG_8599

    Dahlia sprayers are the absolute best for spraying out an object for humidification!

    Some tools seem to be suited for something else entirely:

    IMG_8578

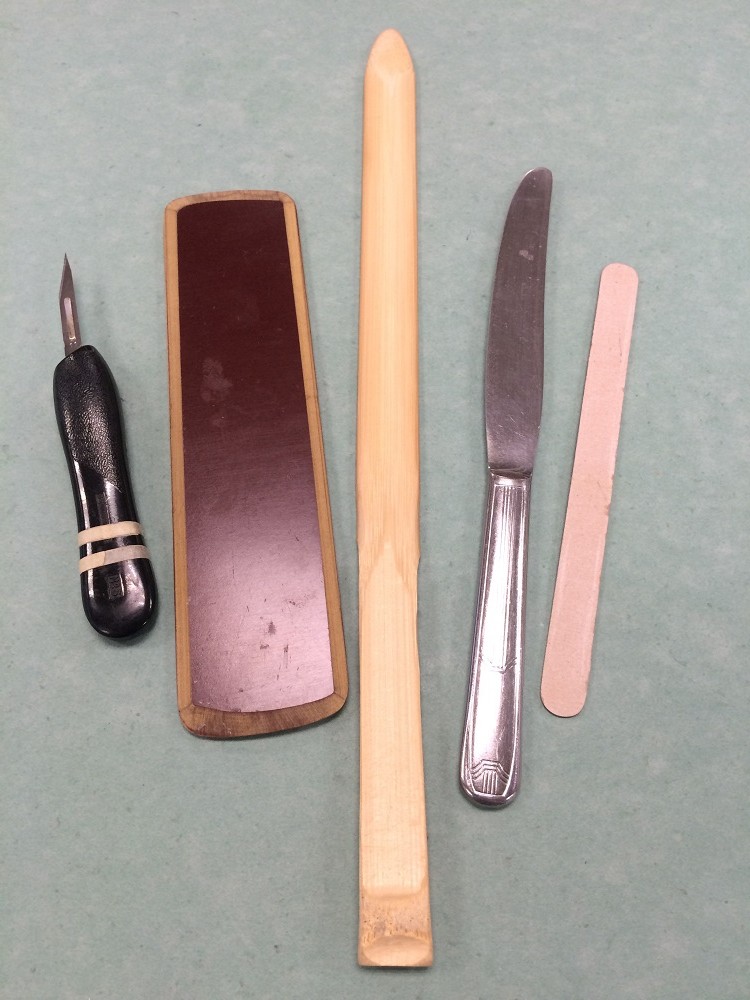
    Scalpels are great for cutting previous sewing or paring edges of leather or paper, Bakelite folders are especially good for securing cloth around board edges, the bamboo comes in handy when separating sized leaves and folios from Hollytex safely, the butter knife makes an excellent cord-frayer, and the nail file is a handy little sander.

    Some tools and equipment appear to be better suited to a kitchen…

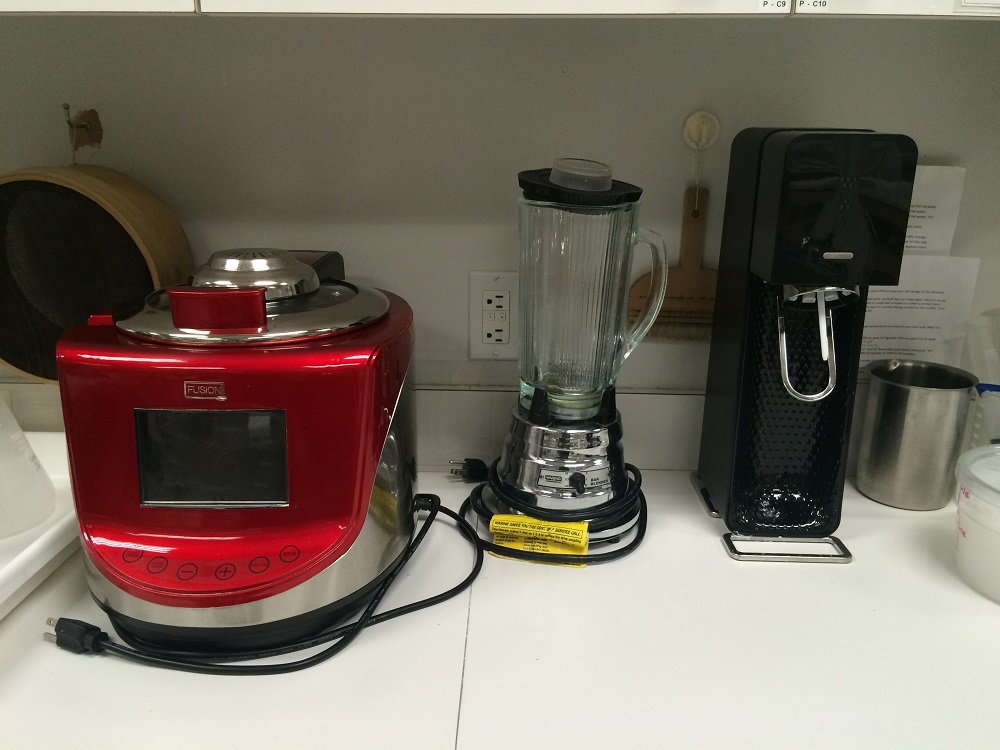
    IMG_8597

    From left to right, we have a fry stirring wok for making paste, blender for thinning paste, and SodaStream for iron gall phytate treatment.

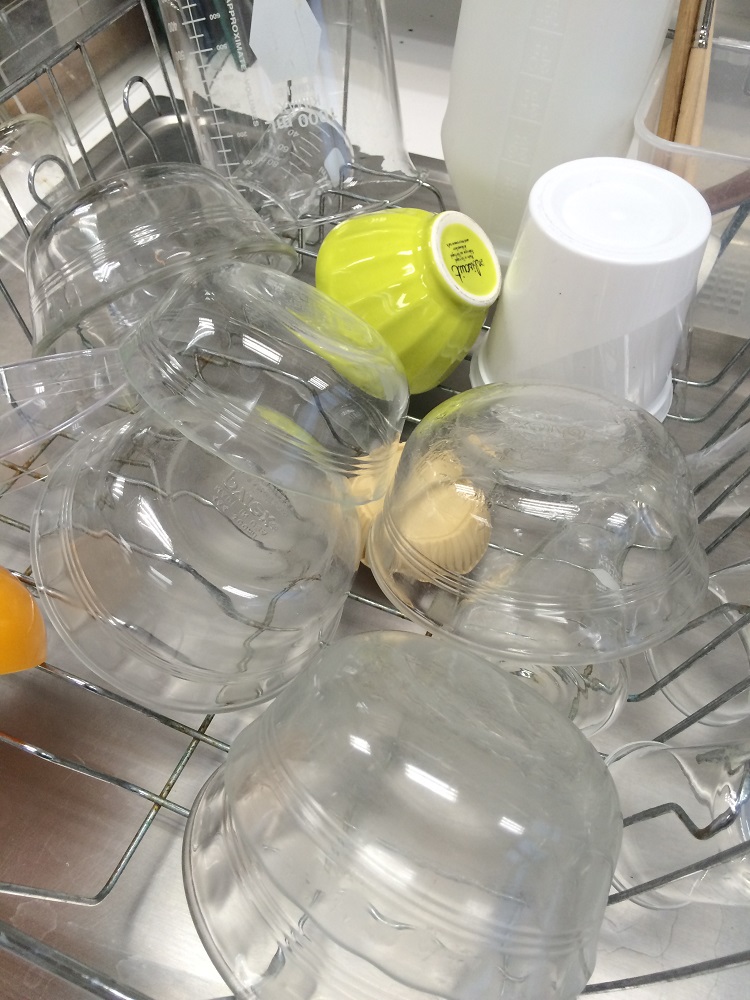
    IMG_8588

    And the ever-present Pyrex custard dish, used for basically everything – predominantly paste, in our case.

    …or a doctor’s office…

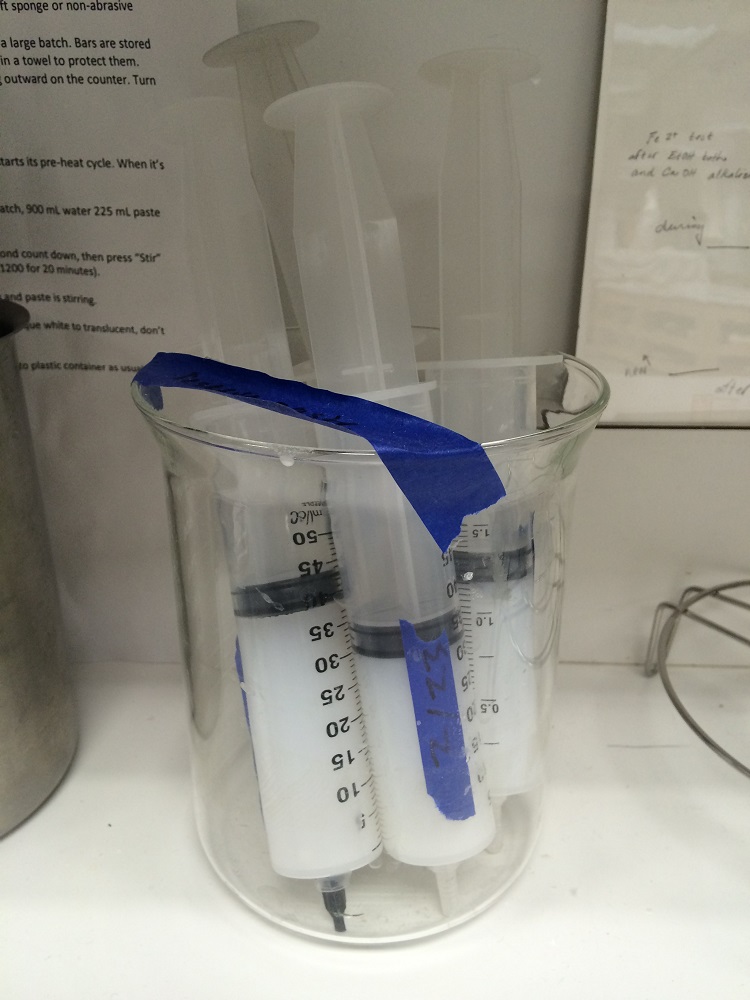
    IMG_8598

    These are syringes sans needles for holding reserve paste.

    IMG_8604

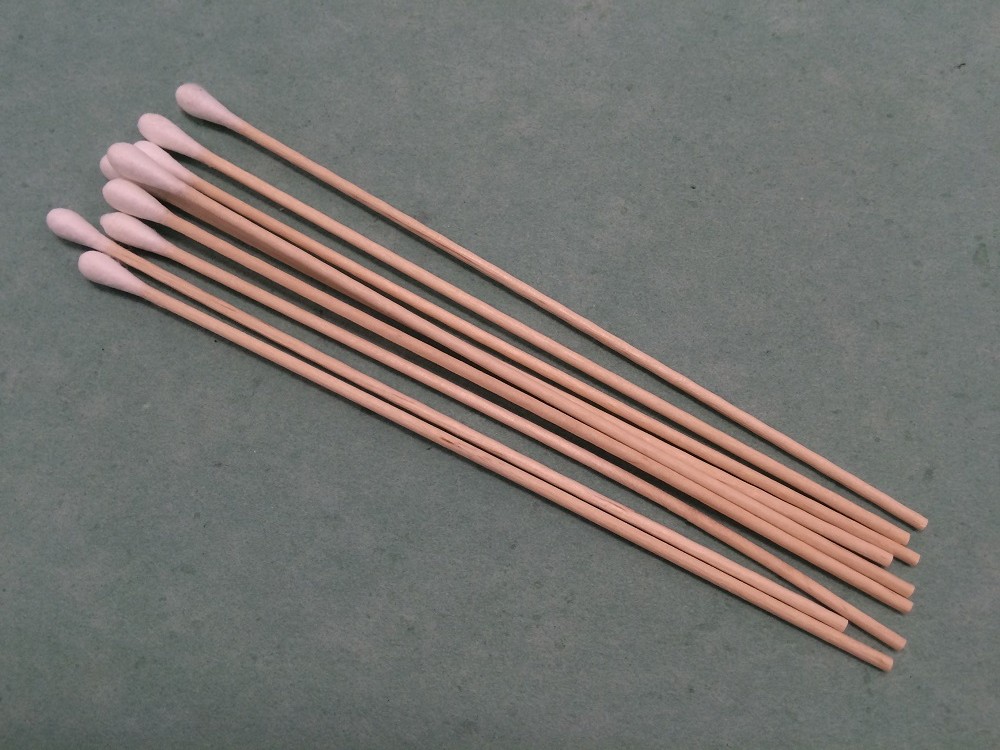
    And cotton-tipped applicators for testing ink solubility.

    IMG_8607

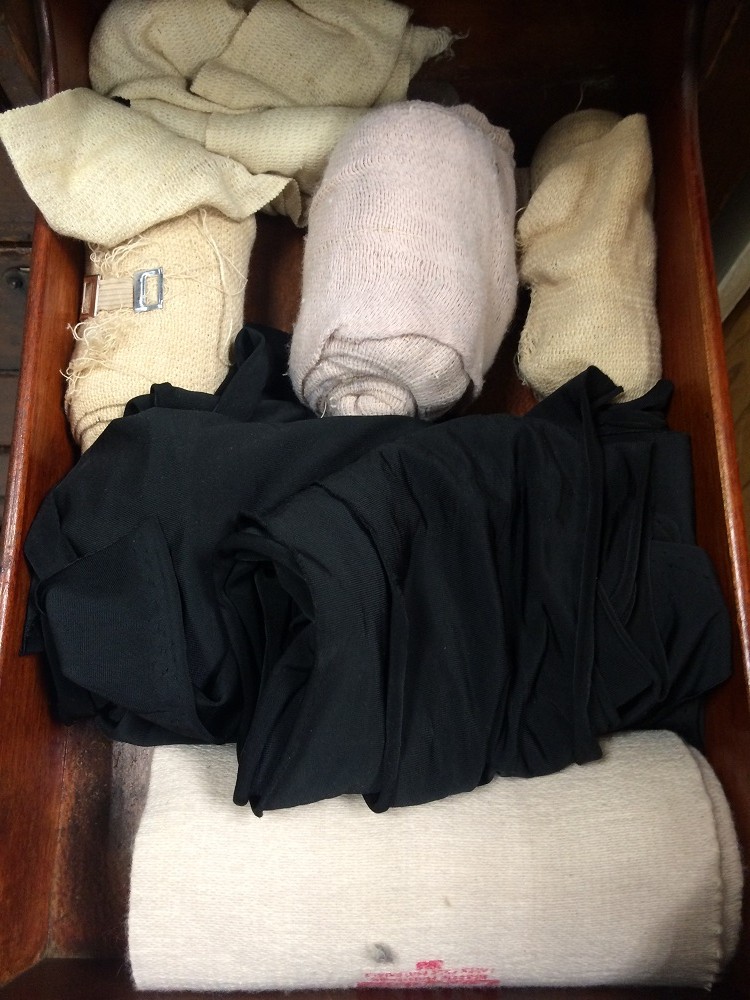
    Also an assortment of ace bandages for holding previous spines in place during re-backs.

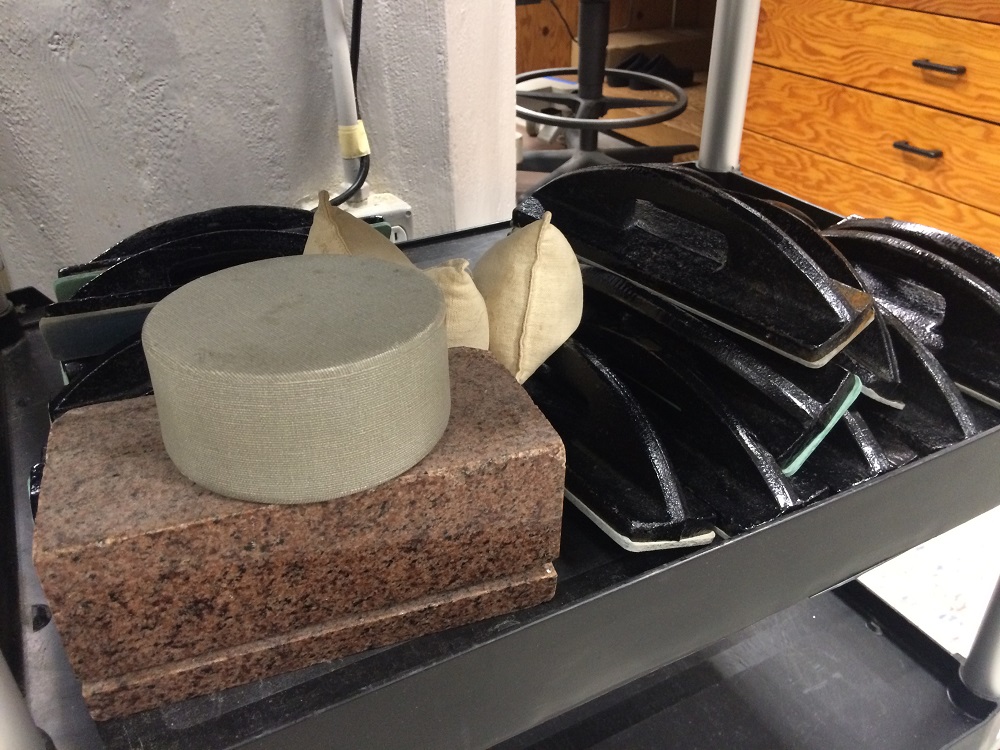
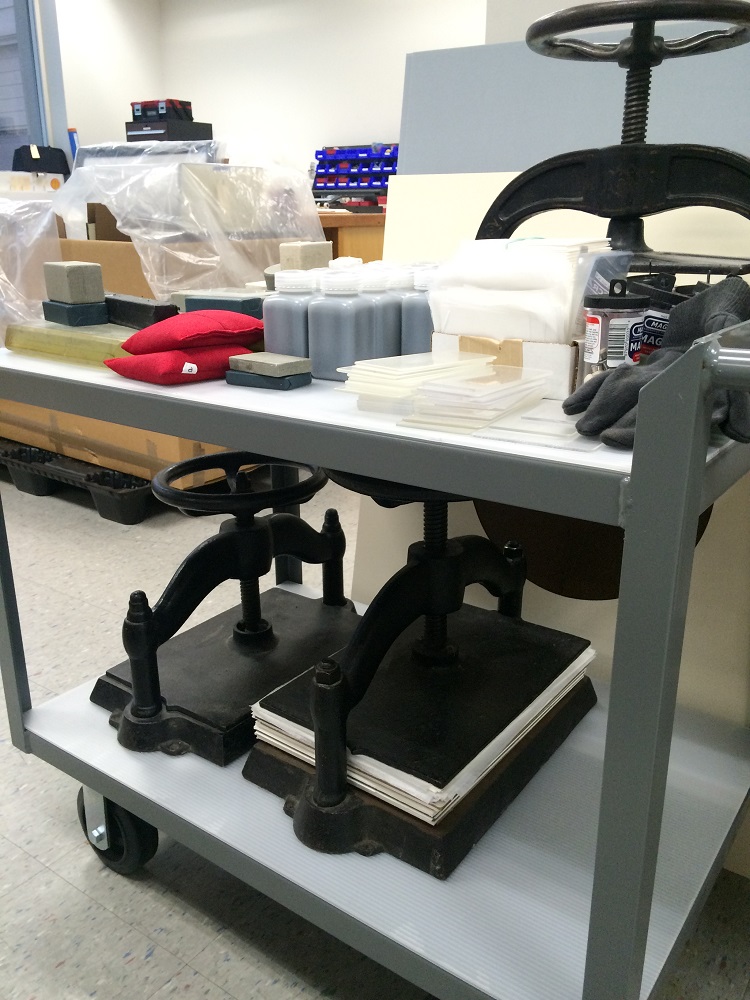
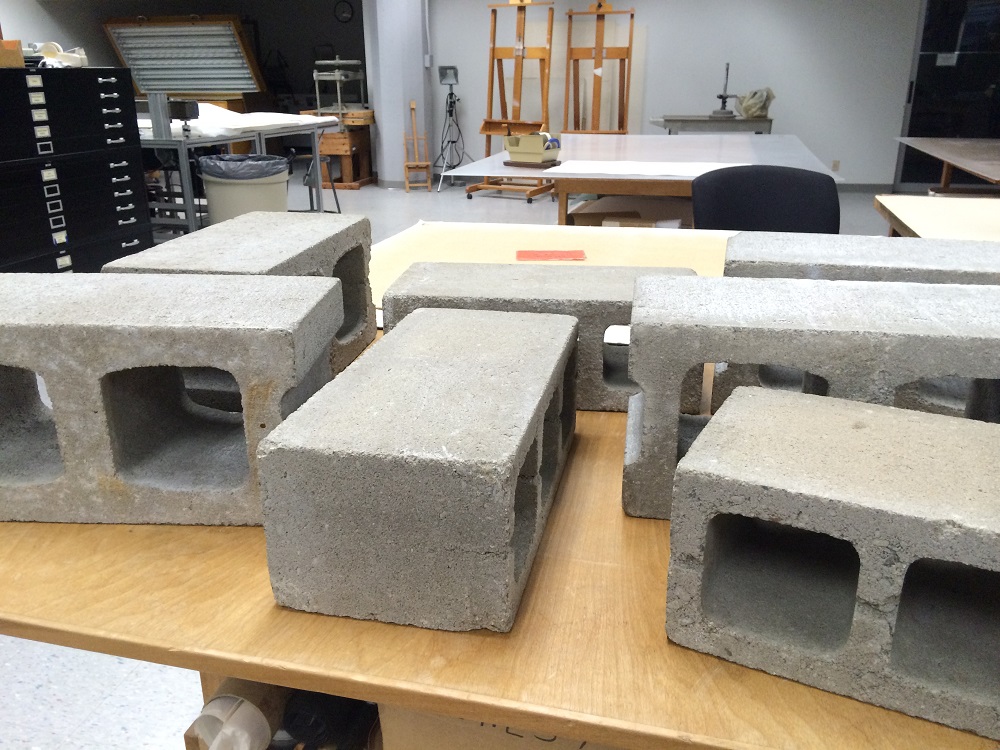
    And then there are weights:

    IMG_8600

    and more weights…

    IMG_8587

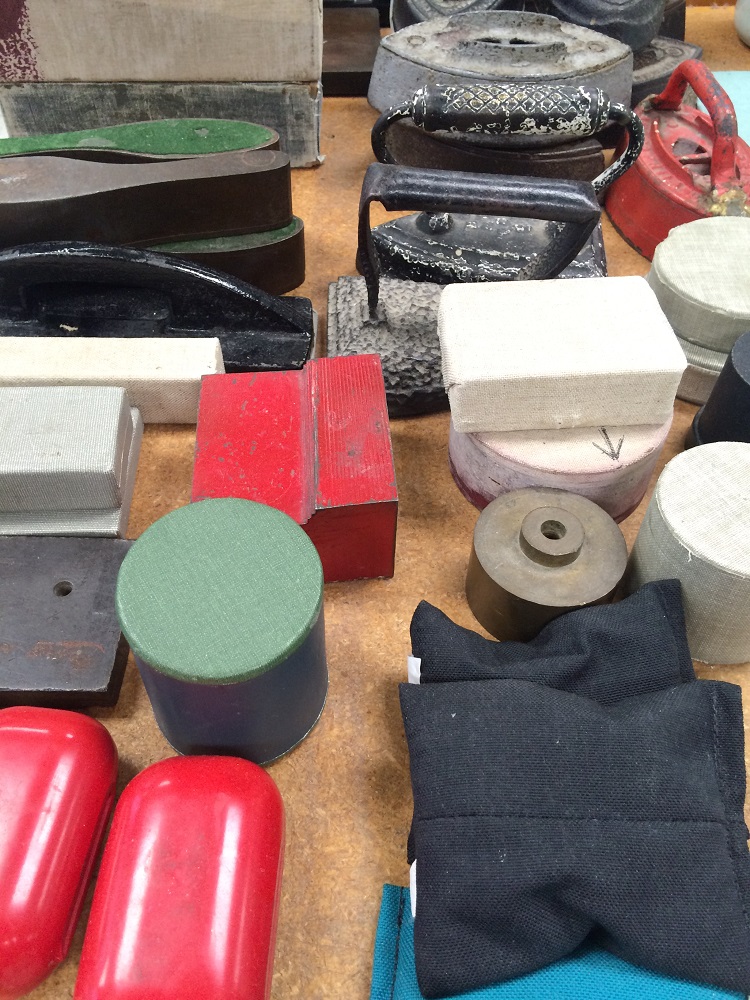
    and things that aren’t technically weights, but sure get used as such:

    IMG_8593

    IMG_8594

    We really like to hold things in place, so essentially anything heavy will do.

    Just like bookbinders, conservators have got to be resourceful. Labs tend to be equally outfitted with purpose-designed tools and cleverly re-purposed miscellaneous. It’s easy to get carried away with having just the right device for the job, but we’re faced with “make it work moments” every day. Anything you need is probably there, it just may take a bit of ingenuity to figure it out.

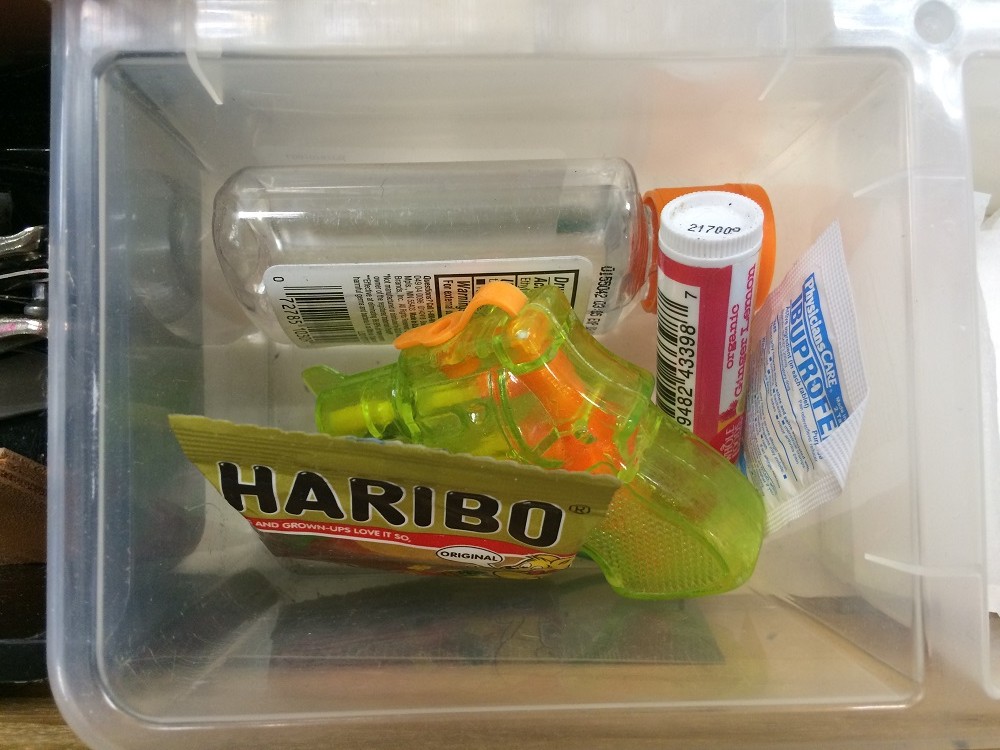
    And finally, for when just the right thing is eluding me, my emergency “tool” kit:

    IMG_8603


  4. Conservation Conversations // Book Conserva-Binder

    May 1, 2014 by Athena Moore

    I’ve been asked before whether I consider myself a book conservator or a bookbinder, or whether I consider myself to be one or the other first. While I don’t think you need to be both to be either, I find that for me the two are inextricably linked. 

    005

    When I started at North Bennet Street School in 2008, I wanted nothing more than to learn everything I possibly could about making books. I was amazed and delighted by just how much we did at the bench during those two years and how far I’d come in my skills and knowledge in that time. I was also sort of overwhelmed by just how much I had felt I had left to learn upon graduation. Every facet of book history we discussed or structure we tackled gave me a view into what a complex world books inhabit.

    5168227844_9387a3e0a5_o

    The desire to better grasp the intent and progression of bindings over time is what steered me towards conservation. During my first internship at Haverford College’s Magill Library, I started to understand how much this field can make one feel like a detective. The hand skills I had been learning at NBSS gave me the confidence to handle a range of objects – even those made with materials I might not have encountered yet. Learning to bind books from the very beginning stages had really aided in my ability to assess how a binding was constructed and, to a greater extent, why it was constructed that way.

    DSC03932

    110144B

    Athena Moore - 2.jpg

    Upon my return to school for the second year, I used the hands-on collections knowledge I gained that summer to help direct myself. I was equally interested in learning fine and design binding (leather! gold! yes!) and conservation, so I did my best to focus on both. I took on opportunities to do small repair projects that came through the school and worked part time at the Hayden Library at MIT. I was filled to the gills with information, but felt more and more like the two paths of this craft I was learning truly informed one another.

    Copy of P1060647

    120115B

    While the program at NBSS is not heavily conservation-based, the hand skills and binding history I was imbued with during my time there is invaluable to the work I do as a book conservator. After graduation, I interned at the Frances Loeb Library at the Harvard Graduate School of Design and was a fellow at the Boston Athenaeum. Through both of those experiences and in my current position at Northeast Document Conservation Center, I’ve contineed to be surprised by just how many structures I learned at NBSS that I’ve either treated or re-bound.

    5285797761_01b75bbe5d_o

    More of the hand work that I do these days is conservation focused, but I still love bookbinding and take on custom work or projects of my own with a fair amount of regularity.

    004

    c6d18df0acbb11e397651270abe28de5_8

    I find that the way my brain operates when I approach conservation really helps me in approaching my own outside work. I encounter so many seemingly similar bindings that turn out not to be exactly what they appear that it gets easier and easier over time to approach the creative challenges of new structures.

    031 (2)

    bb0956968b3e11e2a19522000a9f126b_7

    The need to be efficient and deliberate in my day to day work really feeds into my ability to effectively plan my time and, in doing so, give fair and accurate estimates to friends and clients. Finding time to work outside of a full time job isn’t the easiest thing to do, but being steeped in a form of work that uses so many of the same skills makes it all the more possible. For every part of my book work, I know I need input from binders and conservators alike and luckily, I’m more or less surrounded by both.


  5. Conservation Conversations // Not Just What, But Why

    April 10, 2014 by Athena Moore

    DSC03420

    In conservation, there are an endless number of questions to ask oneself on a daily basis. Is this binding contemporary with the text? Should I size this paper? How am I going to reback this mess? The reality is that in this field, it often has less to do with how you’re going to treat an object and more to do with why

    110151B

    As a book conservator at the Northeast Document Conservation Center, it’s difficult to predict what might come across my bench from week to week. NEDCC is not a collecting institution and as a result, the objects that come in and treatments we perform can vary pretty widely. Despite the fact that certain treatments might not come up with great frequency, it’s crucial for us to keep our broad skill set sharp. In addition to knowing how to execute these treatments, it’s of equal importance for us to know what the most appropriate approach is. 

    025

    When a client approaches us about a volume or collection of volumes, one of the first things we work to establish are the goals of that client and/or their institution. This helps to inform our recommendations and gives both us and the client a sense of what is possible. 

    110144B003DT010

    If the intent is to put a volume on exhibit, it may be decided that we should improve its appearance by surface cleaning and stabilizing the binding to make it safe for display. If the volume will be used for teaching, we have to be more thoughtful about its ability to function – this might mean reattaching loose material, reinforcing or replacing sewing, or rebacking. If the volume is considered important because of its content but the binding isn’t necessarily special to the client, we may change the binding altogether or decide just to digitize it. Particularly fragile items that will be used for research or otherwise handled will often be digitized and returned with handling instructions or if they’re in particular bad condition, may be encapsulated and post bound. Objects that are considered artifacts are generally approached in the most conservative manner and may only be boxed. We often remove damaging materials, but not always – if it is considered part of the history of the object, it might be necessary for us to leave them.

    DSC03932

    As a general rule, our intent is never to treat an object in a manner that is unnecessary. We aim only to perform treatments that are responsible and, to the extent possible, reversible. A large part of our job is to educate clients and help them to make the best decisions for their collections. We often aid in prioritizing – if an institution only has a certain budget for the year but aims to treat a set part of their collection, we’re able to guide them in those decisions.

    09381B

    At any given point, it’s not unusual for us to have two very similar volumes that receive very different treatments. This depends largely on the object’s intended use and the goals of the institution, but may also have to do with timeline and budget constraints. As challenging as it may be, it’s extremely important for us to balance working efficiently with treating each volume on its own and being thoughtful about what we hope to see as an end result. 


  6. Conservation Conversations // Leafcasting

    March 20, 2014 by Athena Moore

    DSC03802

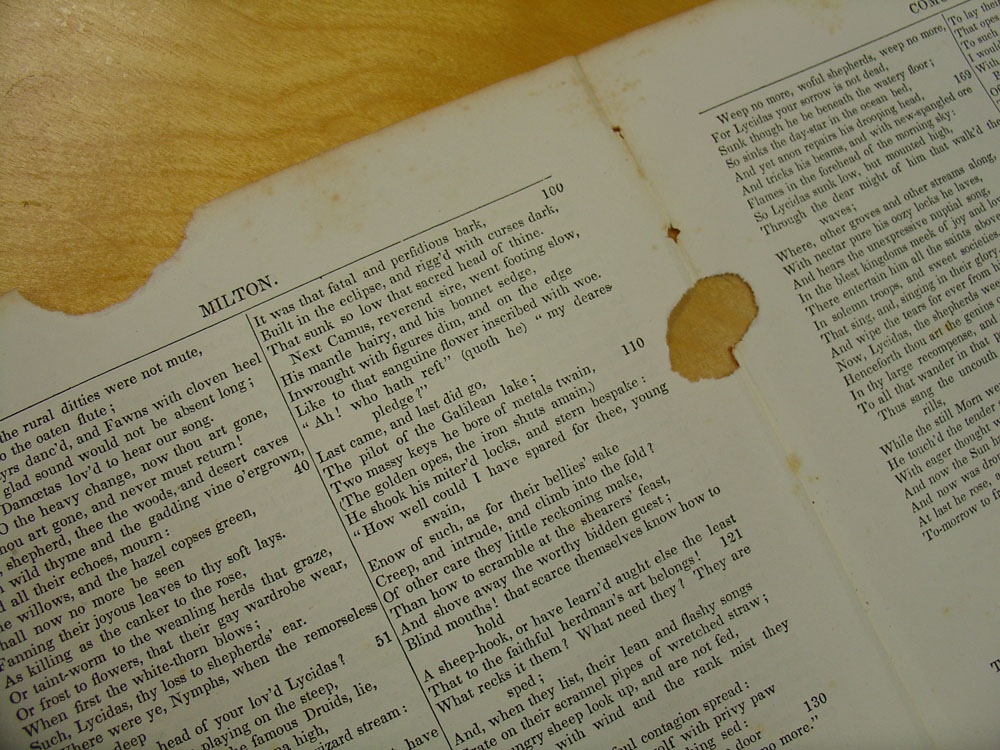
    Leafcasting is magic. Well, it at least LOOKS like magic. A not-oft-used conservation method, leafcasting helps to strengthen paper by filling areas of loss with pulp. Experimentation with this treatment began by hand in the 1950s, but was made considerably easier and more efficient with the advent of the leafcasting machine in the following decade.

    There are only a small number of institutions that have leafcasting machines and an even smaller number that use them. At the Northeast Document Conservation Center, where I work as an assistant book conservator, we’re lucky enough to have one (on semi-permanent loan from the North Bennet Street School – thanks, Jeff!). Before coming to NEDCC, I had no idea what this machine was or what it did. Kiyoshi Imai, who has been with NEDCC’s book laboratory for over 20 years, is something of an expert on this treatment. He was kind enough to teach me the process (and re-train my brain on the intricacies of arithmetic) and I’ve been somewhat obsessed ever since.

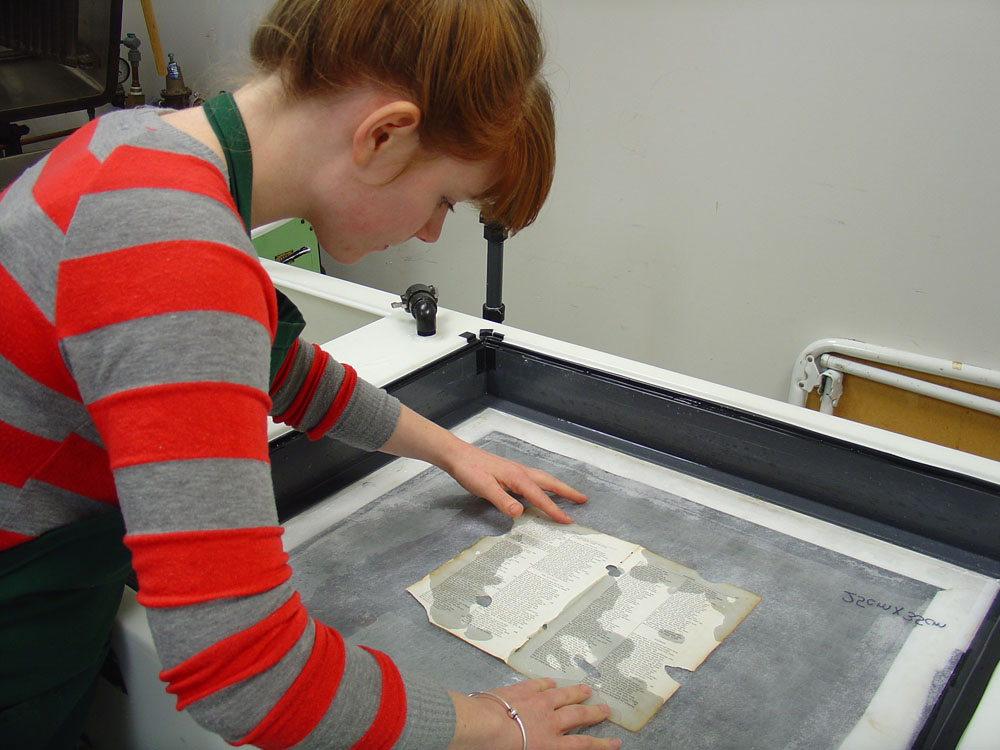
    The leafcaster is essentially a paper-making machine. A document or folio (or multiple folios, as is sometimes the case) with losses is measured to determine the weight and full size dimensions. The areas with losses are measured and subtracted from that. There are a few more math steps in there, but essentially what you come up with is one number – this is the amount of pulp needed to fill the losses in grams. Leafcasting pulp can be made out of cotton and/or hemp fiber pulp or handmade paper. It is often necessary to use a combination of both, as one of the issues a conservator is attempting to address in the process is finding a good color match for the object.

    DSC03807

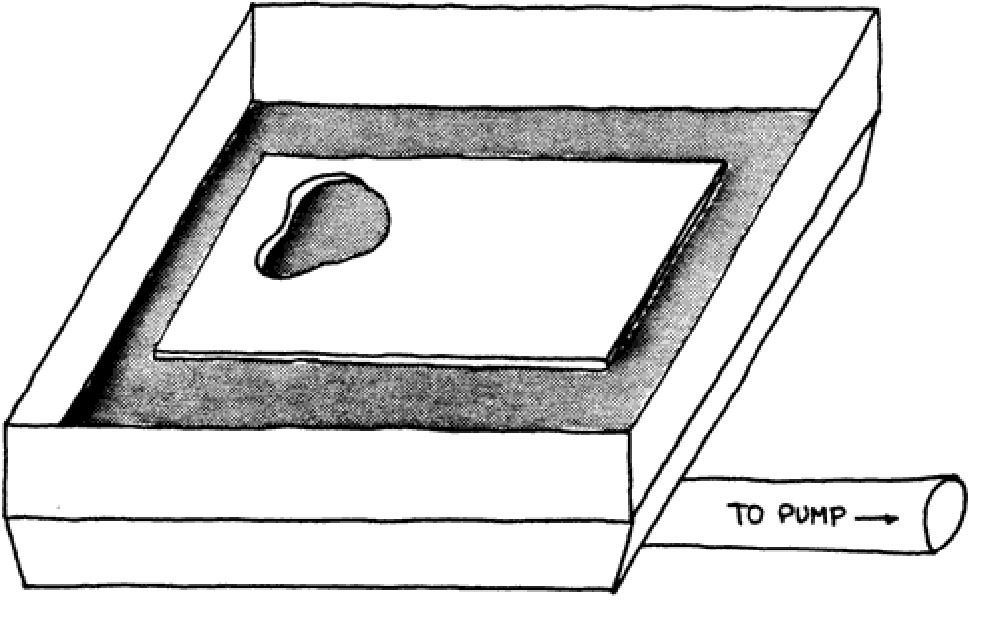
    The material that is chosen is blended with water to form a slurry. The object is placed on a sheet of spun polyester (which makes for easier handling and allows water to pass through) in the “casting area” of the machine and is held down by a screen while water is poured in. The pulp slurry is added to this water, distributed evenly and finally removed from the casting area by a pump located below. The pulp is pulled to the areas in the object with losses. If the conservator has done their job well, the new material will appear even and well matched in thickness and color.

    DSC03811

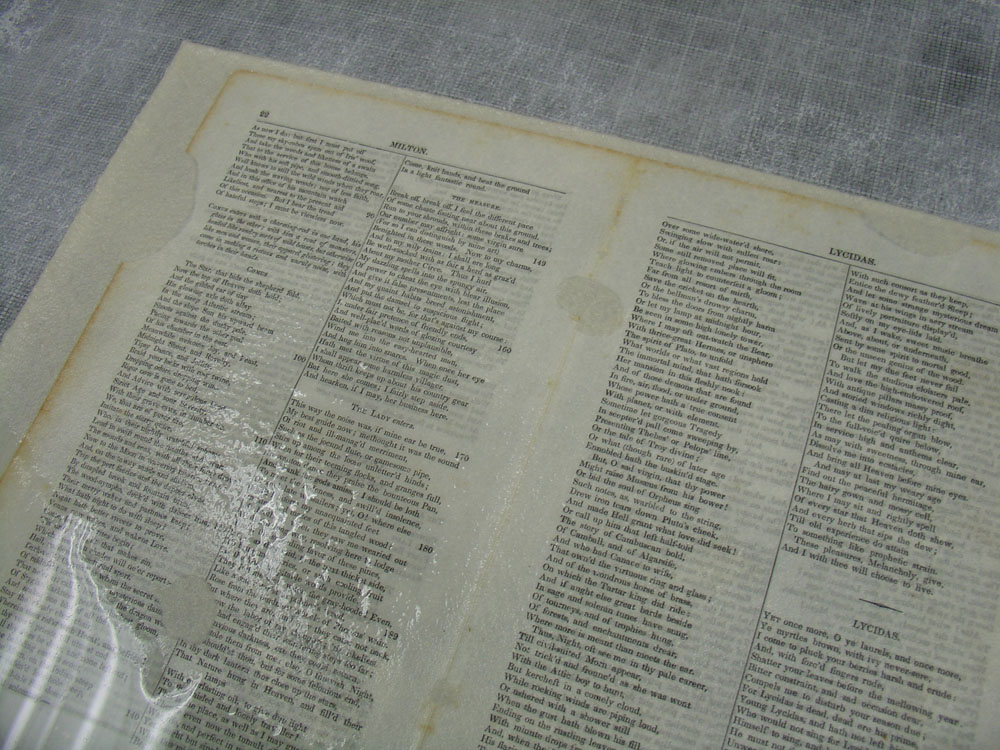
    The cast object is removed from the leafcaster with a second sheet of spun polyester and can be sized on a suction table, which helps to improve the strength of the original object and the adherence of the new cast material to the original material. The object can be dried either in a press or under blankets, depending on the intended result – drying it in a press can often augment the size, so in the case of casting just a folio or two from a bound volume, it may be best to allow for a slower, more gentle form of drying. If the object is a one-off, it can be slightly faster to dry it in the press.

    000002

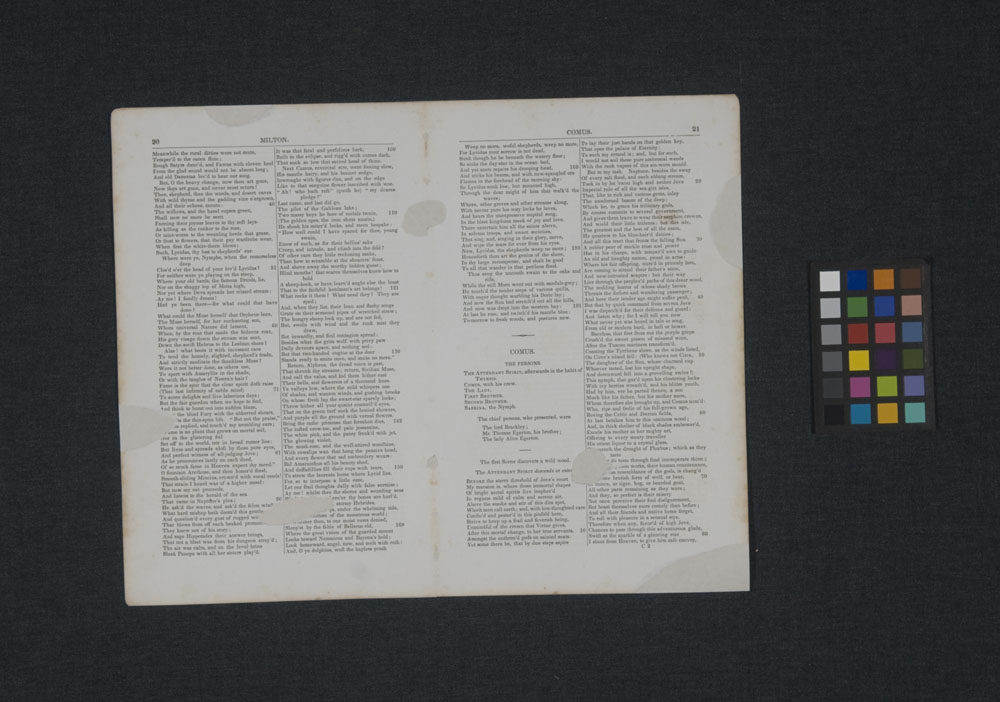
    While it isn’t the appropriate treatment for all items, leafcasting can be a great option for some. Volumes that have large amounts of insect damage, for instance, often require a huge amount of mending time. Attempting to hand fill losses at that scale is daunting. Because the damage is usually fairly consistent, it is relatively easy to use the same math on large sets of folios. It’s also very likely that the same pulp would be used, so the biggest time commitment is just the initial set up. When an object is well cast, the strength and stability of it is greatly increased. Objects that have been cast are protected against further damage in weak areas and can be handled much more safely. Because it is essentially just handmade paper pasted to the object, it is also reversible.

    It’s easy enough to create your own losses in sample materials, so if you’ve got access to a leafcaster, try it out!

    leafcasting illustration

    I am currently working with Helen Bailey, Library Fellow for Digital Curation and Preservation at MIT, to develop software that can use digital images of objects with losses to determine the amount of pulp needed and will be leading a leafcasting demonstration and lecture for SUNY Buffalo’s art conservation graduate students this spring. I have also created a user’s manual for the Model 0901 Leafcaster, so if you have any related questions, please feel free to send them my way! 


  • My name is Erin Fletcher, owner and bookbinder of Herringbone Bindery in Boston. Flash of the Hand is a space where I share my process and inspirations.
    The StudioNewsletterInstagramEmail me
  • Archives