RSS Feed

‘my hand’ Category

  1. Giveaway – Flash of the Hand Turns 2!!

    July 11, 2014 by Erin Fletcher

    foth-anniversary

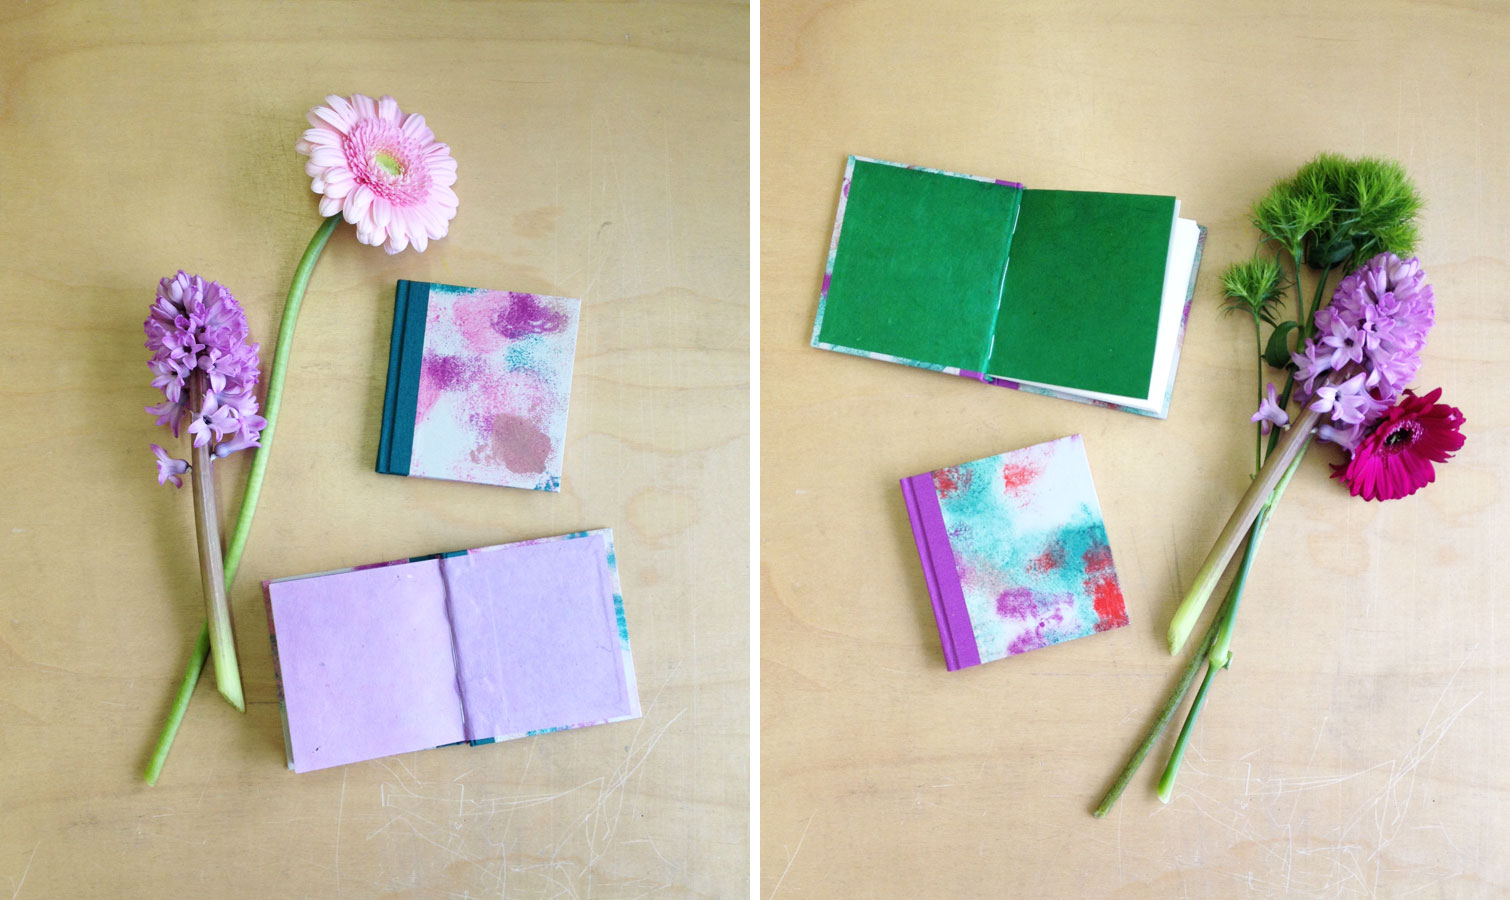
    Flash of the Hand turns 2 today! Working on this blog has brought me close to so many wonderful and talented bookbinders and artists. The comments and compliments I receive have been so thoughtful and encouraging. To show my appreciation to all of you wonderful supporters, I’m giving away 2 mini notebooks to 2 lucky winners.

    giveaway-FotH

    To be eligible to enter, all you need to do is comment on this post saying you did the following:
    – Like Herringbone Bindery on Facebook
    – Write a comment on any post in the blog (make sure to include the link to the post you commented on)
    Subscribe to the blog

    Giveaway ends on July 18th (12:00am EST). Winners will be contacted via email, so don’t forget to include your email address.

    Thanks everyone! I’m looking forward to the next year of blogging.


  2. Rare Book School – Here I Come

    July 4, 2014 by Erin Fletcher

    RBS-ErinFletcher

    After reading through 1,275 pages of content detailing the history of bookbinding, I’m ready for my week-long course at the Rare Book School. For the following week, I’ll be spending my days at the University of Virginia in Charlottesville filling my brain with even more detailed information on the history of bookbinding! RBS was founded by Terry Belanger in 1983 at Columbia University as an institute to support the study of the history of books and printing and related topics for scholars and professionals working in these fields. RBS was moved to the University of Virginia in 1992.

    I’ll be taking Introduction to the History of Bookbinding, which is a course that has been taught by Jan Storm van Leeuwen for over ten years. He is the retired Keeper of the Binding Collection at the Dutch Royal Library in The Hague. In his retired years, he continues to publish and lecture widely on the history of bookbinding. 

    While I’m in Virginia, the blog will be a bit quiet. Once I return to Boston, filled with greater bookbinding knowledge, you can look forward to a post about my experience at RBS.


  3. My Hand // Amazing Dremel Workshop

    June 24, 2014 by Erin Fletcher

    DremelWorkshopWood-ErinFletcher

    In early May, I add the opportunity to take the Amazing Dremel Workshop with Jill Timm. I had seen her workshop being offered across the nation by various Guild chapters. Due to its popularity and my position as the Program Co-chair for the New England Chapter of the Guild of Book Workers, I brought Jill to teach her workshop at the Northeast Document Conservation Center.

    My interest in the class began when I received my Dzia’s old Dremel tool along with his collection of bits. I had never used a Dremel and wanted to get acquainted with its uses. As part of our material fee, we received a collection of bits neatly packed inside a wooden box. Jill introduced each type of bit by the material it was designed to carve into. We began by carving into glass using a series of diamond bits.

    DremelWorkshop1-ErinFletcher

    After adding a flex-shaft to our Dremel, we continued working through our wooden box of new bits by carving out designs in wood, mirror, copper and steel plates. The flex-shaft screws onto the hand tool; it’s much easier to handle because the design is similar to a pencil or stylus.

    As Jill handed out the copper plates, she gave a demo on cutting the plate to create rounded corners using a cutting disc.

    DremelWorkshopCopper-ErinFletcher

    On our second day, we began to experiment with polymer clay, ceramic and plexiglass. In addition to experimenting with the various Dremel bits, we learned how to clean our tools and keep them in good shape. Jill also introduced us to the many attachments for the Dremel tool, such as a router attachment or the drill stand giving one the ability to drill through glass and other materials.

    DremelWorkshop2-ErinFletcher DremelWorkshopBench-ErinFletcher

    Overall, the workshop was fantastic. I understand my Dremel tool better and feel comfortable working with it in the future. Perhaps I’ll be making a binding with etched glass covers or carved wooden boards, only time will tell.


  4. My Hand // Leather Embroidery Samplers – Part Two

    April 30, 2014 by Erin Fletcher

    ChainStitches-ErinFletcher

    All six of my leather embroidered samplers are now complete and I’m so thrilled to share them with you. If you missed part one, you can check it out here

    The sampler above is on buffalo skin and showcases a variety of chain stitches. This sampler is by far the most successful of the bunch and is already coming in handy as I am in the early stages of designing a fine binding. Below is the couching sampler on goatskin. I wasn’t quite sure if the couching stitches would translate well through leather, but some of the variations are quite interesting and remind me a lot of classical tooling patterns.

    During the covering process I nip the sampler in a press using foam sandwiched between two press boards to make sure the leather is fully adhered to the board. This part of the process really flattened the couching stitches. 

    Couching-ErinFletcher

    The running stitch sampler is on goat and was my first and least successful attempt. (At least in my eyes, I can see a lot of errors.) Since this was my first sampler of the bunch, I began with piercing the holes with my needle as I was sewing. Working like this in the air made it really difficult to keep straight, even stitches. To resolve this issue, I began pre-piercing the holes with my pin vise with the leather flat on my work surface. 

    RunningStitches-ErinFletcher

    The scarlet goatskin sampler is adorned with a mixture of stitches, including a line of sequins at the bottom. I have mixed feelings about the stitches on this sampler because the majority of the stitches were difficult to execute through leather. Such as the coral stitch (line 3) and rope stitch (line 4).

    MixedStitches-ErinFletcher

    The following sampler is showcasing another mixture of stitches such as the herringbone stitch (with variations) and the back stitch (with variations). This sampler is also on buffalo and is probably my second favorite of the bunch with a lot of successful and useful stitches to be used on future fine bindings. 

    MixedStitches2-ErinFletcher

    Finally, I played around with woven stitches to create a larger plane of embroidery on the leather. I’m really pleased with a few of these stitches. My main hurdle is figuring out a way to hide the threads on the back, which became very visible through the blue goatskin. 

    WovenStitches-ErinFletcher


  5. My Hand // Leather Embroidery Samplers – Part One

    April 15, 2014 by Erin Fletcher

    EmbroiderySampler-ErinFletcher

    Since my last embroidered leather binding, I’ve had the urge to experiment with various traditional stitches in leather. Through my experiments I aimed to find which stitches would translate the same way on leather as they do on fabric. In addition, I wanted to know if I could easily keep a stitched line straight during the covering process.

    I began with a rough sketch of each sampler, a total of six. The stitches I chose were divided into categories (such as chain stitches, variations on the back stitch, couching, etc.) and then laid out onto each sampler sketch. I choose to experiment on both goatskin and buffalo which were pared down to the thickness I use when covering a full leather fine binding (~.5 for the buffalo and .7 for the goat). 

    EmbroiderySampler5-ErinFletcher

    Then, I cut down a piece of Japanese tissue to the size of the plaquette board and adhered it to the center of the leather. Once the pieces were dry, I proceeded to draw out a 1 x 1 mm square grid onto each sampler. This grid made it incredibly easy to lay out the stitches and to make sure I kept them even and straight. Before I began a stitch, I figured out the hole placement and spacing. Then with my pin vise I made pin-pricks through the leather. Laying out the holes beforehand made the act of stitching easier and faster. 

    EmbroiderySampler2-ErinFletcher

    After completing all of the stitches on a sampler, I prepped the leather for covering. Excess strings were trimmed and pasted down in line with stitches on the backside. This way any strays would not be visible on the front side of the leather. Once I readied my bench with the proper tools, the leather pieces were pasted up with wheat starch paste and attached to the board. After folding over the turn-ins and working down the corners, I stuck the plaquette under a press between foam and press boards. The foam pushes down the leather around the stitches much easier and quicker than I could. 

    When working with embroidered leather, I don’t wet out the piece before pasting up as I normally would. I do however add some moisture to the turn-ins to aid in the covering process. 

    EmbroiderySampler4-ErinFletcher


  6. Celebrate The One Year Anniversary of My Etsy Shop With This Offer

    March 14, 2014 by Erin Fletcher

    anniversary-march15blog

    March 15th marks the first anniversary of the Herringbone Bindery Etsy Shop. All items will be marked 15% off in celebration and just in time to make room for a whole new collection! 

    Browse through a selection of blank journals in various sizes, leather bound notebooks and bookbinding kits. 


  7. My Hand // Bullet Boxes

    December 3, 2013 by Erin Fletcher

    Earlier this year my family experienced the passing of Richard Gradowski, known by me and my cousins as Dzia which is Polish for Grandpa. My Dzia loved so many things in life and his passions created lasting relationships that touched so many lives. First was his love for Polka music both as an avid listener and talented musician on the harmonica and accordion. I remember hearing the cheerful rhythm of Polka music softly playing from the antique wooden radio in the kitchen upon each visit. 

    Secondly, my Dzia loved ducks, particularly mallards and loons. Seated at his work bench, my Dzia would carefully carve out the shape of each duck from a block of wood and hand paint each detail with superb skill and patience. These sculptures were scattered throughout the house and even gifted to my mother and aunts. 

    Lastly, my Dzia engaged in any material regarding WWII. His interest in war, no doubt came from his experience in the 1950s during the Korean War; where he was stationed at a United States Air Force base in DC as part of the motor vehicle squadron. As my family lay his body to rest, a military salute commenced. My mother was given seven casings from the volleys fired. One casing was meant for my Nana, while the remaining six would be given to her children. To honor the memory of my Dzia, I created a clamshell box to safely house each casing. 

    bulletboxes7-erinfletcher

    These are, by far, the tiniest clamshell boxes I’ve ever constructed. Using a thin binder’s board the pieces were carefully measured and cut down using the spring gauge on the board shear. 

    bulletboxes1-erinfletcher

    The boxes were constructed just like a standard sized clamshell box, except the interior tray has four walls instead of three. The trays are covered in navy Cialux bookcloth

    bulletboxes2-erinfletcherbulletboxes4-erinfletcher

    I wanted the casing to be surrounded by a soft material with plenty of padding. After laminating a few pieces of binder’s board to Volara foam, I tightly wrapped the padding with bright white Ultrasuede. The interior tray was lined with Ultrasuede as well and the pads lined both long walls. A piece of satin ribbon attached to the backside of the thicker pad allows for easy removal of the casing. 

    bulletboxes5-erinfletcher

    The case is covered in a matching navy Harmatan goatskin. The exterior tray is lined with blue Hahnemühle Ingres and stamped in gold foil with my Dzia’s name and the year of his birth and death.

    bulletboxes8-erinfletcher

    Each box was handed out during my family’s Thanksgiving celebration. Sadly, my husband and I could not attend this year for the feast and festivities, but my cousins Meg and Gina sent me some wonderful pictures of the casing sitting snugly in its clamshell box.

    bulletboxes9-erinfletcher


  8. Tutorial: Top Secret Belgian Binding

    November 19, 2013 by Erin Fletcher

    secretbelgian1-erinfletcher

    The Secret Belgian binding is just one of many structures on my long list models to make. With the aid of a tutorial posted on the BookArtsWeb tutorial and references page, I was on my way to checking this structure off my list. Unfortunately the link seems to be broken now. However, within this post you’ll find my instructions, which are very comprehensive and any skill level can complete this simple structure in a matter of hours. So let’s get started*:

    *This tutorial is for a modified version I’m calling the Top Secret Belgian. This version of the structure is sewn differently and extra steps are taken to hide the interior thread. If you are looking for more instructional content, I have a growing list of tutorials and I also teach live workshops in-person and online. Check out my list of Upcoming Workshops.

    MATERIALS: 
    – binder’s board for 2 covers and 1 spine piece
    – decorative paper
    – paper to line covers and spine piece (aka paste downs)
    – colored thread
    – text block (3-5 signatures, about 3-4 folios each)
    – PVA
    – wax

    TOOLS: 
    – needle
    – bone folder
    – glue brush
    – scalpel (preferably with curved blade)
    – x-acto
    – scissors
    – pencil
    – triangle
    – awl
    – dividers (optional)

    STEP ONE: 
    For this tutorial I bound a copy of The Yellow Wallpaper by Charlotte Perkins Gilman. My inspiration for the covers came at the moment in the story when the main character begins to tear away the maddening yellow wallpaper in a desperate attempt to relieve her agony and pain. Whatever you choose as your text block, whether it be a short story, poetry or blank pages, prepare those now and fold to their final size.

    From the text block, measure the height of the signature and add about 5-7mm. Measure the width of the folded signature and add about 3-4mm. This will determine the dimension of the covers with added squares.

    The height of the spine piece will be the same as the covers. The width is determined by the thickness of your text block. Pinch the text block about 20mm from the spine, measure the flared out signatures. Add 2mm to this measure to find the width of the spine piece.

    MY MEASUREMENTS:
    text block height: 201mm
    text block width: 121mm
    text block thickness: 10mm

    cover height: 208mm
    cover width: 125mm

    spine piece height: 208mm
    spine piece width: 12mm

    Cut down the decorative paper to include excess for turn-ins (about 20mm, less for the spine piece). Cut down the paper for the paste downs, allowing a 3mm margin on all sides. Glue up the decorative paper and cover both boards and spine piece.

    secretbelgian2-erinfletcher

    Trim out the inside of the covers, so the turn-ins are even and straight. This can be done quickly with a set of dividers. Simple measure out the desired distance, lightly score a line along all four sides. Trim off excess along scored guideline with an x-acto or scalpel. Tear away the excess by pulling toward the edge of the cover.

    secretbelgian3-erinfletcher

    Glue down the paste down onto the spine piece and set aside under weight to dry.

    STEP TWO:
    Prepare a jig for punching holes into the covers. The holes should be evenly spaced along the height of the covers allowing for a fair amount of sewing stations. Using an awl punch the holes 16mm from the spine edge. The needle on the awl should have a continuous gauge and not be graduated. This way all of the holes are the same size.

    secretbelgian4-erinfletcher read more >


  9. New Items in the Herringbone Bindery Etsy Shop

    November 6, 2013 by Erin Fletcher

    newetsyitems

    For the past few months, I’ve had a Nag Hammadi model sitting on my bench, provoking me. I finally found the time to sit down, examine and recreate the model (which belonged to my lovely friend Anna). This particular binding is based off one of the mid-fourth century bindings, which were unearthed from an urn near the town of Nag Hammadi in 1945; the structure was quite simple to construct. 

    For my Etsy shop I’ve created a simpler version by leaving out the cartonnage and papyrus, while incorporating bright buffalo and goat skin. These blank journals are filled with kraft paper and are quite suitable for the traveler and homebody alike. The image below displays all the pieces that come together to make the binding.

    nag-etsyall

    The journals are bound in soft and supple leather. In addition to the wrap-around tie, there are ties at the head and tail to keep your pages safe and secure. Journals are available in a five different color choices, from sea foam green with red accents to…

    nag-red nag-redopen

    mauve with maroon accents. See them all at the Herringbone Bindery shop!

    nag-maroon


  10. My Hand // Field Book of Western Wild Flowers: Part Three

    October 31, 2013 by Erin Fletcher

    wildflowers12-erinfletcher

    Part One can be read here
    Part Two can be read here

    I need to backtrack a bit. Part two ends with the covering of the matching leather doublures. The remainder of the design elements that are going to be explained in this post were applied before the doublures were pasted down. Part two has been revised accordingly. 

    The final steps to completing the design included the addition of a gold border and the title. In the early stages of designing the cover, I wanted to create the gold border through surfacing gilding. Which would have been done before covering because I didn’t want to risk getting gold leaf on the embroidery stitches. However, after a few tests I decided my supply of gold leaf was too yellow against the dusty pink buffalo skin. The border was therefore painted onto the leather with a fluid acrylic pigment. This is the same technique I used on the fine binding for The Songlines

    The title has been tooled with handle letters in the typeface Gill Sans. Buffalo can often feel spongy under the tool and requires slightly more pressure to achieve a crisp impression. I’ve found that buffalo will not blind in the same manner as other animal skins and can be a bit more finicky to tool. So with a bit more patience, the title was gilt in gold leaf one letter at a time. 

    wildflowers13-erinfletcher

    With the completion of the binding, I was set to make a custom clamshell box. The box reflects the binding in terms of color and design. The spine of the box is covered in matching leather that has also been embroidered. The design is derived from an illustration in the book and includes similar onlays from the book’s cover. The stem was embroidered freehand and Margaret Armstrong’s name has been hand tooled with gold leaf. 

    wildflowers14-erinfletcher

    The trays are covered and lined with the same handmade paper from Katie MacGregor that are used as the endpapers in the binding. The rest of the case and joint are covered in brown Canapetta bookcloth. A layer of Volara foam was added to the outer tray as protection for the embroidered stitches. 

    wildflowers11-erinfletcher

    I am really pleased with my first attempt at an embroidered leather binding. I plan to continue experiments with this technique, as well as incorporate other sewn elements. I recently had the opportunity to showcase this binding at the Standards of Excellence Conference in Washington, DC. Through the ‘Mix & Mingle’ event, I got the chance to speak with and meet many new bookbinders while discussing my binding on top of receiving wonderful compliments and suggestions. 

    wildflowers10-erinfletcher

    Finished binding next to clamshell box.

    wildflowers9-erinfletcher

    Side profile. Detail of edge decoration and hand-sewn headband.


  • My name is Erin Fletcher, owner and bookbinder of Herringbone Bindery in Boston. Flash of the Hand is a space where I share my process and inspirations.
    The StudioNewsletterInstagramEmail me
  • Archives