Book conservation labs are an interesting hybrid of a paper conservation lab and a bindery. Much of the equipment in a bindery you could find in a book lab, but not necessarily the other way around. Book labs can also be divided by activities, when space allows. Some processes are dirtier then others (such as sanding, red-rotted book repair, mold vacuuming) and need to be kept separate from clean spaces (washing sink, paper repair areas).
Of the many considerations when deciding which equipment should be acquired and in what order, I would say the first is to identify and prioritize the needs of the collection you are conserving. If there is a large collection of over-sized maps, the documentations washing sink should be of a size to safely accommodate slightly bigger then the average size of those maps. Some equipment, such as a leafcaster, are highly specialized and you may not acquire one until much later when the right project or the funds become available. Other considerations to muck up the works are: square footage of the space available to you, budget, floor neighbors, budget, space infrastructural needs (water source, ventilation, outlets, noise suppression), availability of equipment…..and BUDGET.
Just for fun, I am going to ignore all that annoying stuff and just give you the coveted lab equipment that made my list. This is by no means an exhaustive list and I stuck to things that you would find in a lab but not a bindery.
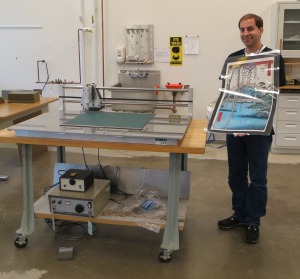
Encapsulator. Used to create custom polyester sleeves for flat paper items. Not air tight as to create a micro-climate, the sleeve protects a fragile item by giving it support from both sides by a clear polyester film and leaves all physical attributes and information completely visible. Unique to the conservation world, this machine was invented by Bill Minter, another book conservator. How it works: an ultrasonic welder attached to a brace bar with a motor that it allows it to travel back and forth along the bar as the welder welds two sheets of polyester film together around the paper object. The item/polyester sandwich is held in place on the table by a blanket of magnets which also pushes out any air and keeps the item flat.
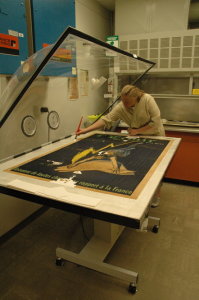
Image: Harry Ransom Center blog
Suction table. For controlled use of moisture and/or solvents to a localize area of flat paper during conservation treatment, especially useful with items that have friable or fugitive media. Invented by Marilyn Weidner in 1972, another clever and inventive conservator, this unique piece equipment will be found in most paper labs. How it works: The table work surface is a perforated aluminum top which draws air down providing a uniform suction over the entire work surface. Clean, dry blotter is placed between the item and work surface as treatments are performed.
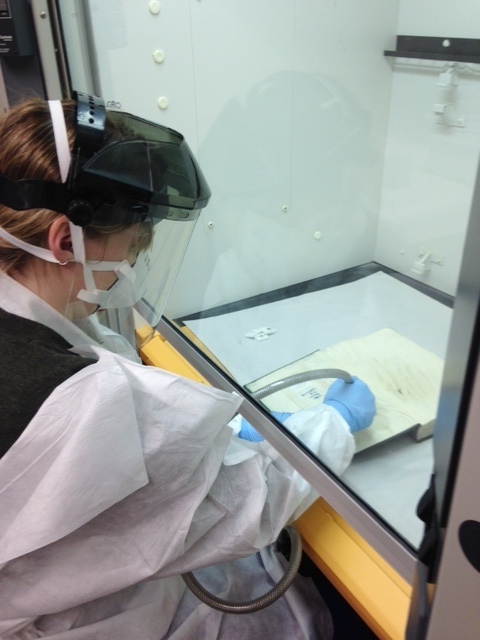
Fume hood. Used to protect workers from solvent fumes and exposure to mold spores. Conservators will place mold contaminated items inside to vacuum and for treatment. Also a place to perform small treatments with solvents if you do not have a fume trunk. Not unique to conservation, fume hoods and trunks are found in chemical and bio labs that use solvents. How they work: fume hoods (or cabinets) are typically enclosed on five sides and have a sliding glass opening at about standing work height. They can be either ducted or recirculating, but both work the same by drawing in air from the open side of the cabinet and expelling the air outside the building or made safe through a system of filtration and recirculated into the building. (wiki answer)
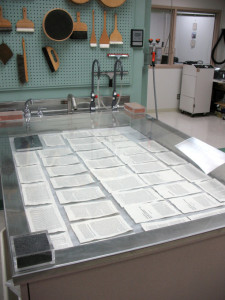
Documents Washing Sink. Just how it sounds, a giant sink for washing paper. The sink is typically custom sized to the space and standing working height with a special water filtration source. The large flat area is necessary for not only washing and humidifying large paper items, but can also be used to hold multiple trays to wash and humidify smaller items.
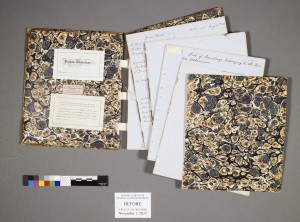
Photo documentation. The equipment used for photo documentation vary from extravagant use of space (separate room with multiple copy stands, backdrops, dedicated lights and tech) to more humble situations (plexi glass on stacked crates and roll of grey paper mounted to the wall), but all will have a dedicated camera, typically a high quality DSLR. Photos are taken before and after treatment and are included in the written treatment report that accompanies all conserved items. Documentation of items being conserved is an industry standard and a dedicated photo documentation area in the lab helps streamline the process to make it less time consuming.
